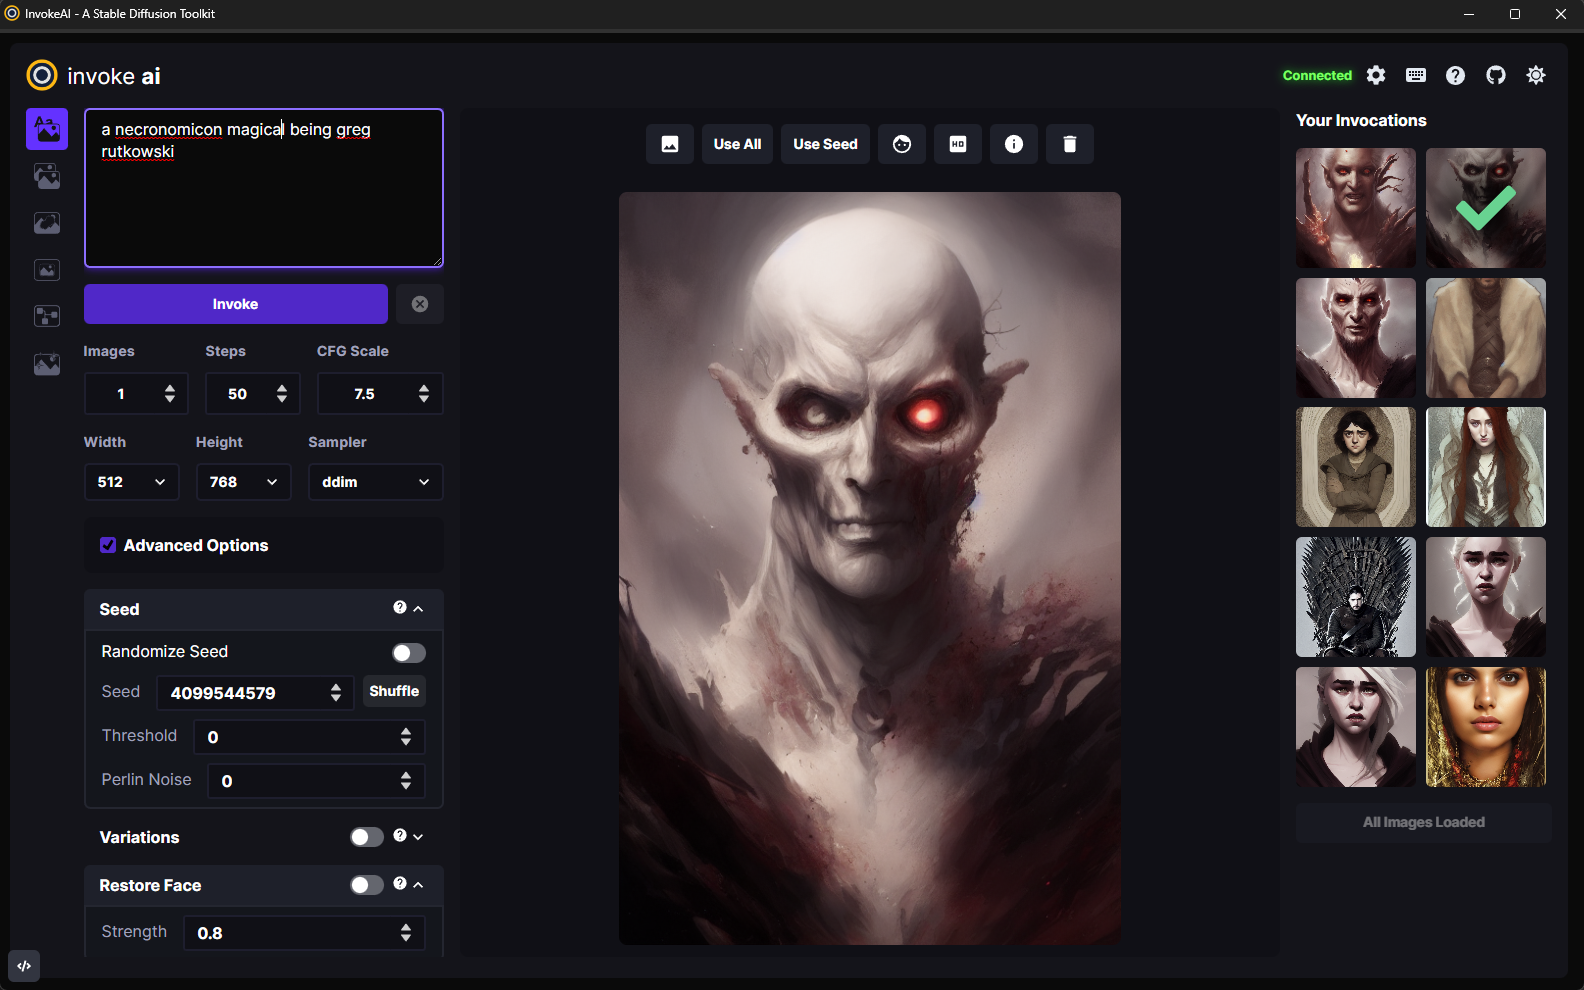
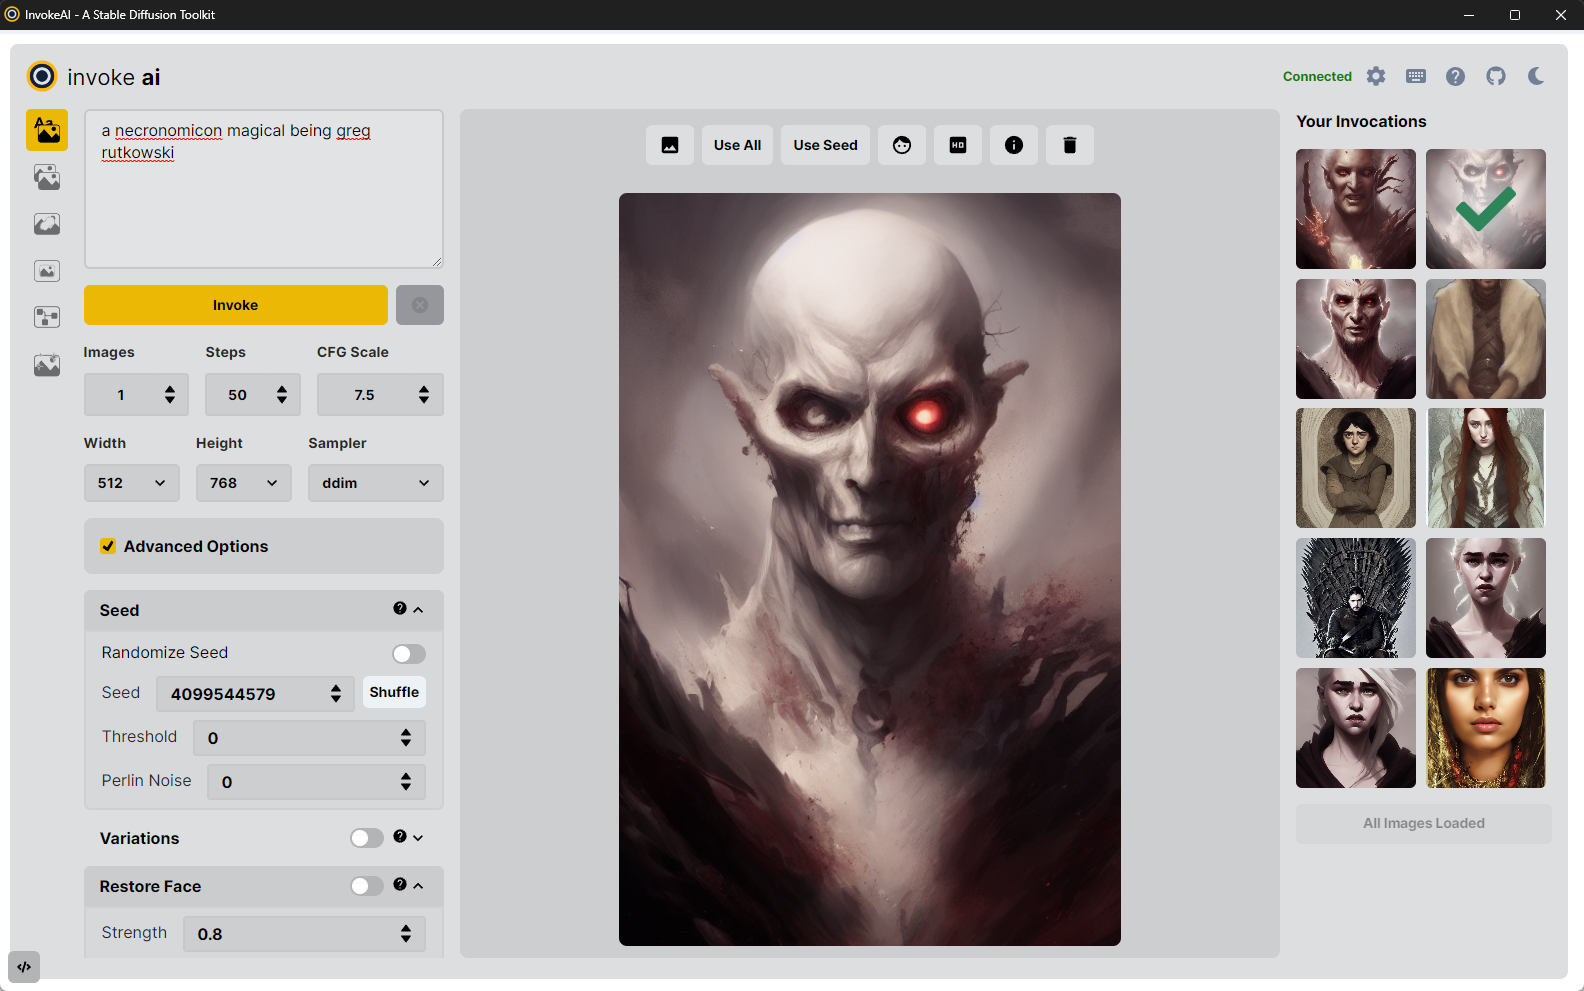
16 KiB
| title |
|---|
| InvokeAI Web Server |
As of version 2.0.0, this distribution comes with a full-featured web
server (see screenshot). To use it, run the invoke.py script by
adding the --web option:
(ldm) ~/InvokeAI$ python3 scripts/invoke.py --web
You can then connect to the server by pointing your web browser at
http://localhost:9090. To reach the server from a different machine on
your LAN, you may launch the web server with the --host argument and
either the IP address of the host you are running it on, or the
wildcard 0.0.0.0. For example:
(ldm) ~/InvokeAI$ python3 scripts/invoke.py --web --host 0.0.0.0
Quick guided walkthrough of the WebGUI's features
While most of the WebGUI's features are intuitive, here is a guided walkthrough through its various components.
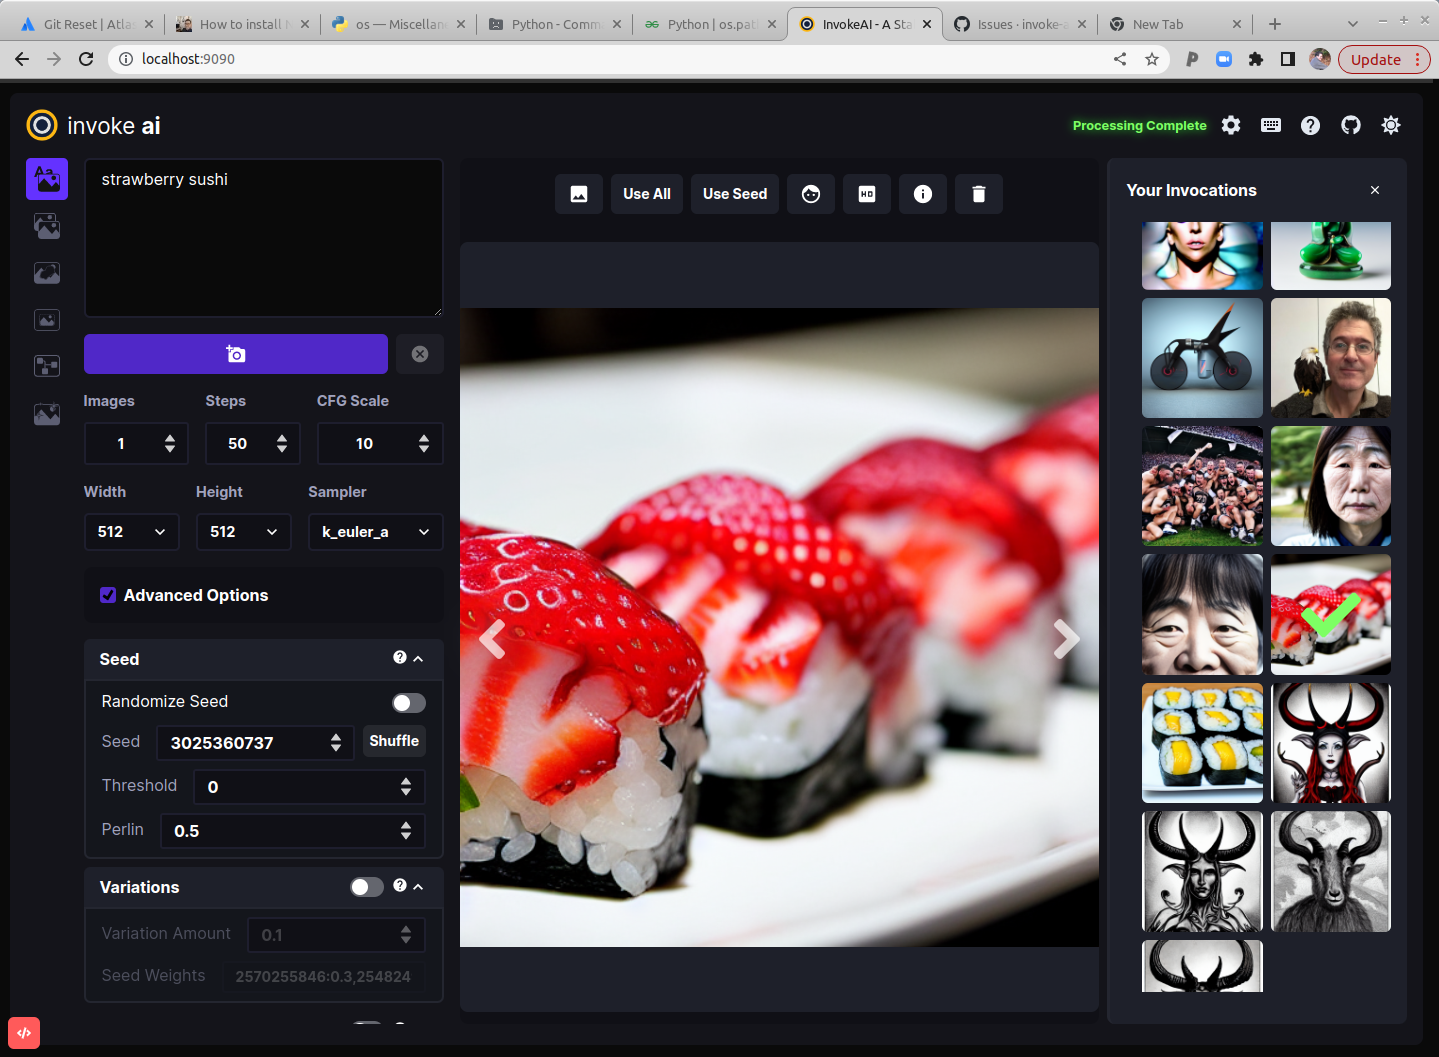
The screenshot above shows the Text to Image tab of the WebGUI. There are three main sections:
-
A control panel on the left, which contains various settings for text to image generation. The most important part is the text field (currently showing
strawberry sushi) for entering the text prompt, and the camera icon directly underneath that will render the image. We'll call this the Invoke button from now on. -
The current image section in the middle, which shows a large format version of the image you are currently working on. A series of buttons at the top ("image to image", "Use All", "Use Seed", etc) lets you modify the image in various ways.
-
A *gallery section on the left that contains a history of the images you have generated. These images are read and written to the directory specified at launch time in
--outdir.
In addition to these three elements, there are a series of icons for changing global settings, reporting bugs, and changing the theme on the upper right.
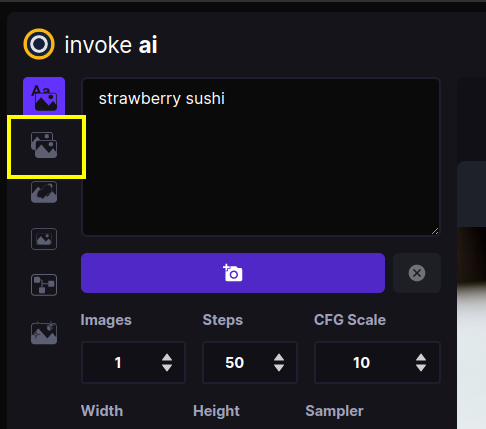
There are also a series of icons to the left of the control panel (see highlighted area in the screenshot below) which select among a series of tabs for performing different types of operations.
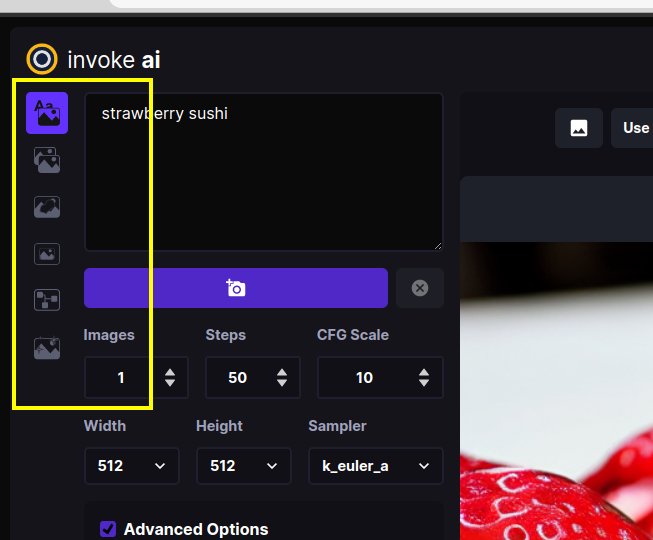
From top to bottom, these are:
- Text to Image - generate images from text
- Image to Image - from an uploaded starting image (drawing or photograph) generate a new one, modified by the text prompt
- Inpainting (pending) - Interactively erase portions of a starting image and have the AI fill in the erased region from a text prompt.
- Outpainting (pending) - Interactively add blank space to the borders of a starting image and fill in the background from a text prompt.
- Postprocessing (pending) - Interactively postprocess generated images using a variety of filters.
The inpainting, outpainting and postprocessing tabs are currently in development. However, limited versions of their features can already be accessed through the Text to Image and Image to Image tabs.
Walkthrough
The following walkthrough will exercise most (but not all) of the WebGUI's feature set.
Text to Image
-
Launch the WebGUI using
python scripts/invoke.py --weband connect to it with your browser by accessinghttp://localhost:9090. If the browser and server are running on different machines on your LAN, add the option--host 0.0.0.0to the launch command line and connect to the machine hosting the web server using its IP address or domain name. -
If all goes well, the WebGUI should come up and you'll see a green
connectedmessage on the upper right.
Basics
- Generate an image by typing strawberry sushi into the large prompt field on the upper left and then clicking on the Invoke button (the one with the Camera icon). After a short wait, you'll see a large image of sushi in the image panel, and a new thumbnail in the gallery on the right.
If you need more room on the screen, you can turn the gallery off by clicking on the x to the right of "Your Invocations". You can turn it back on later by clicking the image icon that appears in the gallery's place.
The images are written into the directory indicated by the --outdir
option provided at script launch time. By default, this is
outputs/img-samples under the InvokeAI directory.
-
Generate a bunch of strawberry sushi images by increasing the number of requested images by adjusting the Images counter just below the Camera button. As each is generated, it will be added to the gallery. You can switch the active image by clicking on the gallery thumbnails.
-
Try playing with different settings, including image width and height, the Sampler, the Steps and the CFG scale.
Image Width and Height do what you'd expect. However, be aware that larger images consume more VRAM memory and take longer to generate.
The Sampler controls how the AI selects the image to display. Some samplers are more "creative" than others and will produce a wider range of variations (see next section). Some samplers run faster than others.
Steps controls how many noising/denoising/sampling steps the AI will take. The higher this value, the more refined the image will be, but the longer the image will take to generate. A typical strategy is to generate images with a low number of steps in order to select one to work on further, and then regenerate it using a higher number of steps.
The CFG Scale controls how hard the AI tries to match the generated image to the input prompt. You can go as high or low as you like, but generally values greater than 20 won't improve things much, and values lower than 5 will produce unexpected images. There are complex interactions between Steps, CFG Scale and the Sampler, so experiment to find out what works for you.
- To regenerate a previously-generated image, select the image you want and click Use All. This loads the text prompt and other original settings into the control panel. If you then press Invoke it will regenerate the image exactly. You can also selectively modify the prompt or other settings to tweak the image.
Alternatively, you may click on Use Seed to load just the image's seed, and leave other settings unchanged.
- To regenerate a Stable Diffusion image that was generated by another SD package, you need to know its text prompt and its Seed. Copy-paste the prompt into the prompt box, unset the Randomize Seed control in the control panel, and copy-paste the desired Seed into its text field. When you Invoke, you will get something similar to the original image. It will not be exact unless you also set the correct values for the original sampler, CFG, steps and dimensions, but it will (usually) be close.
Variations on a theme
- Let's try generating some variations. Select your favorite sushi image from the gallery to load it. Then select "Use All" from the list of buttons above. This will load up all the settings used to generate this image, including its unique seed.
Go down to the Variations section of the Control Panel and set the
button to On. Set Variation Amount to 0.2 to generate a modest
number of variations on the image, and also set the Image counter to
4. Press the invoke button. This will generate a series of related
images. To obtain smaller variations, just lower the Variation
Amount. You may also experiment with changing the Sampler. Some
samplers generate more variability than others. k_euler_a is
particularly creative, while ddim is pretty conservative.
- For even more variations, experiment with increasing the setting for Perlin. This adds a bit of noise to the image generation process. Note that values of Perlin noise greater than 0.15 produce poor images for several of the samplers.
Facial reconstruction and upscaling
Stable Diffusion frequently produces mangled faces, particularly when there are multiple figures in the same scene. Stable Diffusion has particular issues with generating reallistic eyes. InvokeAI provides the ability to reconstruct faces using either the GFPGAN or CodeFormer libraries. For more information see POSTPROCESS.
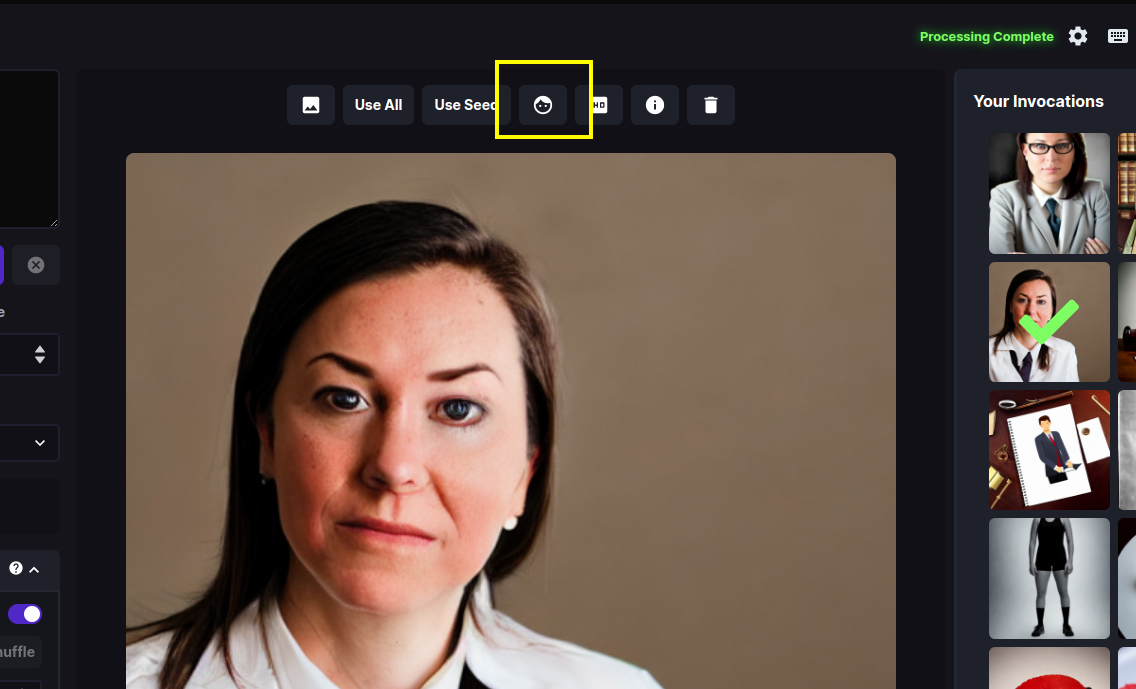
- Invoke a prompt that generates a mangled face. A prompt that often gives this is "portrait of a lawyer, 3/4 shot" (this is not intended as a slur against lawyers!) Once you have an image that needs some touching up, load it into the Image panel, and press the button with the face icon (highlighted in the first screenshot below). A dialog box will appear. Leave Strength at 0.8 and press *Restore Faces". If all goes well, the eyes and other aspects of the face will be improved (see the second screenshot)
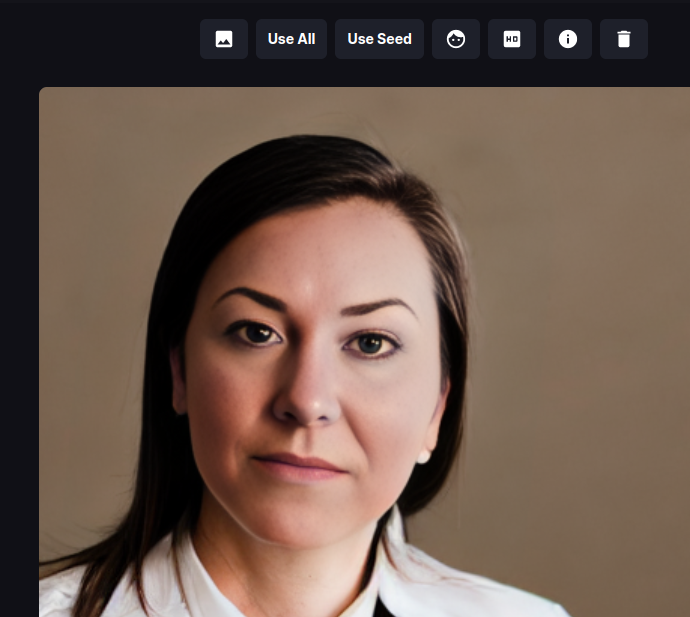
The facial reconstruction Strength field adjusts how aggressively the face library will try to alter the face. It can be as high as 1.0, but be aware that this often softens the face airbrush style, losing some details. The default 0.8 is usually sufficient.
-
"Upscaling" is the process of increasing the size of an image while retaining the sharpness. InvokeAI uses an external library called "ESRGAN" to do this. To invoke upscaling, simply select an image and press the HD button above it. You can select between 2X and 4X upscaling, and adjust the upscaling strength, which has much the same meaning as in facial reconstruction. Try running this on one of your previously-generated images.
-
Finally, you can run facial reconstruction and/or upscaling automatically after each Invocation. Go to the Advanced Options section of the Control Panel and turn on Restore Face and/or Upscale.
Image to Image
InvokeAI lets you take an existing image and use it as the basis for a new creation. You can use any sort of image, including a photograph, a scanned sketch, or a digital drawing, as long as it is in PNG or JPEG format.
For this tutorial, we'll use files named Lincoln-and-Parrot-512.png, and Lincoln-and-Parrot-512-transparent.png. Download these images to your local machine now to continue with the walkthrough.
- Click on the Image to Image tab icon, which is the second icon from the top on the left-hand side of the screen:
This will bring you to a screen similar to the one shown here:
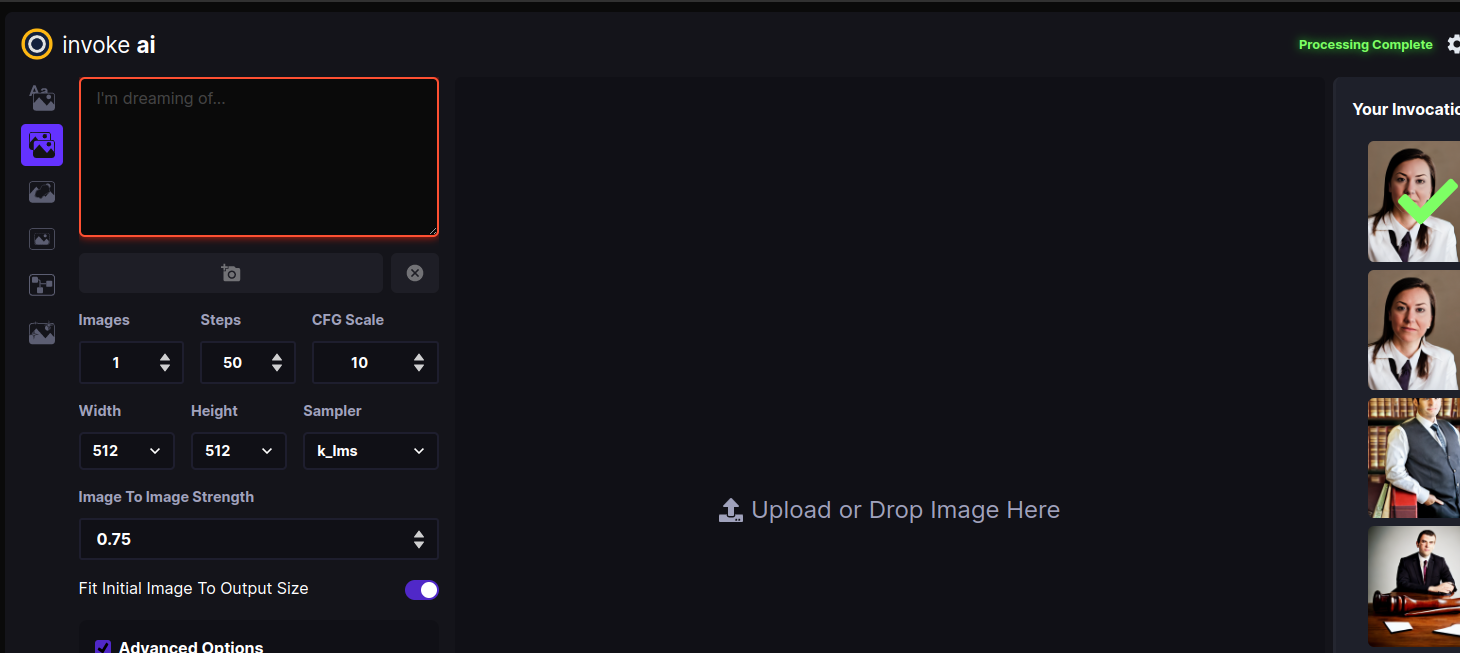
Drag-and-drop the Lincoln-and-Parrot image into the Image panel, or click the blank area to get an upload dialog. The image will load into an area marked Initial Image. (The WebGUI will also load the most recently-generated image from the gallery into a section on the left, but this image will be replaced in the next step.)
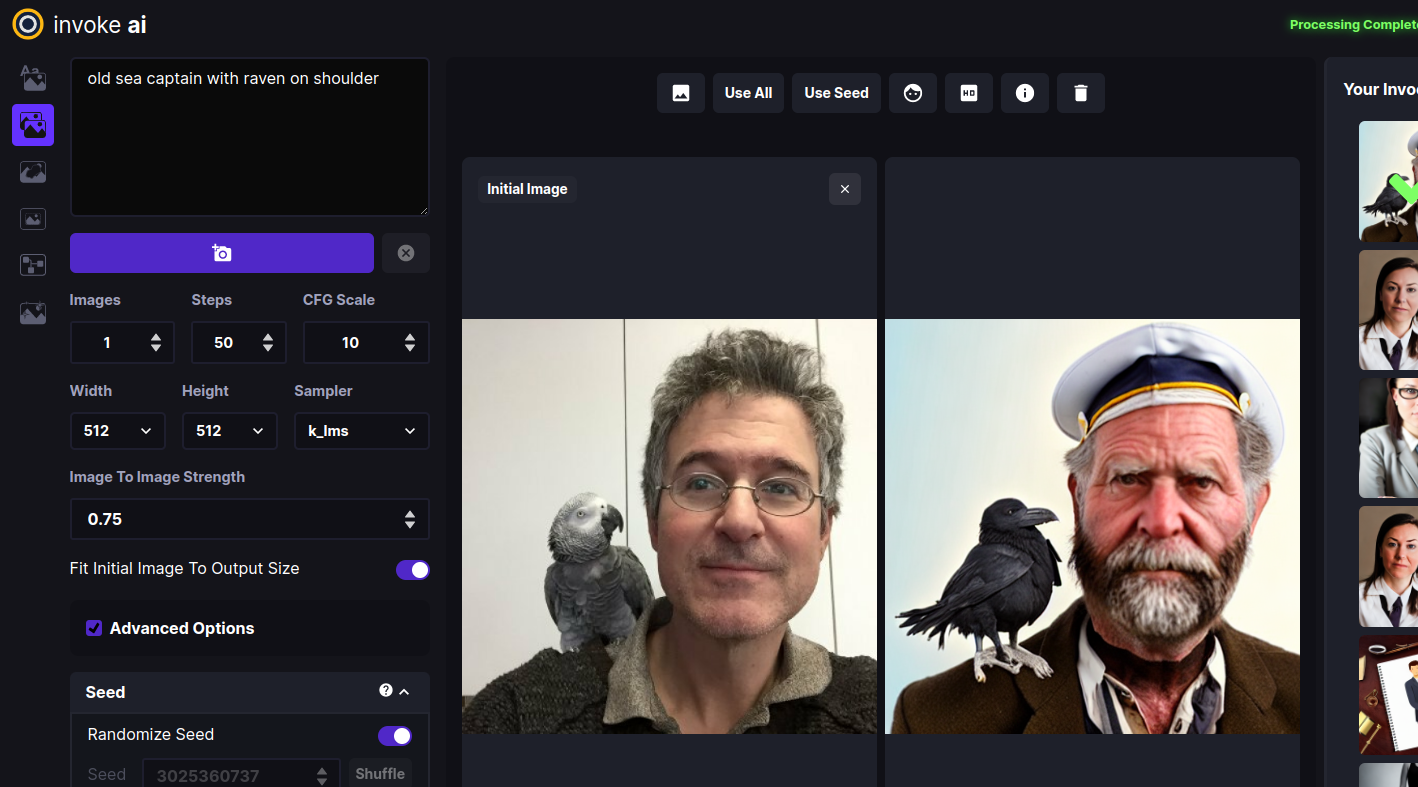
- Go to the prompt box and type old sea captain with raven on shoulder and press Invoke. A derived image will appear to the right of the original one:
-
Experiment with the different settings. The most influential one in Image to Image is Image to Image Strength located about midway down the control panel. By default it is set to 0.75, but can range from 0.0 to 0.99. The higher the value, the more of the original image the AI will replace. A value of 0 will leave the initial image completely unchanged, while 0.99 will replace it completely. However, the Sampler and CFG Scale also influence the final result. You can also generate variations in the same way as described in Text to Image.
-
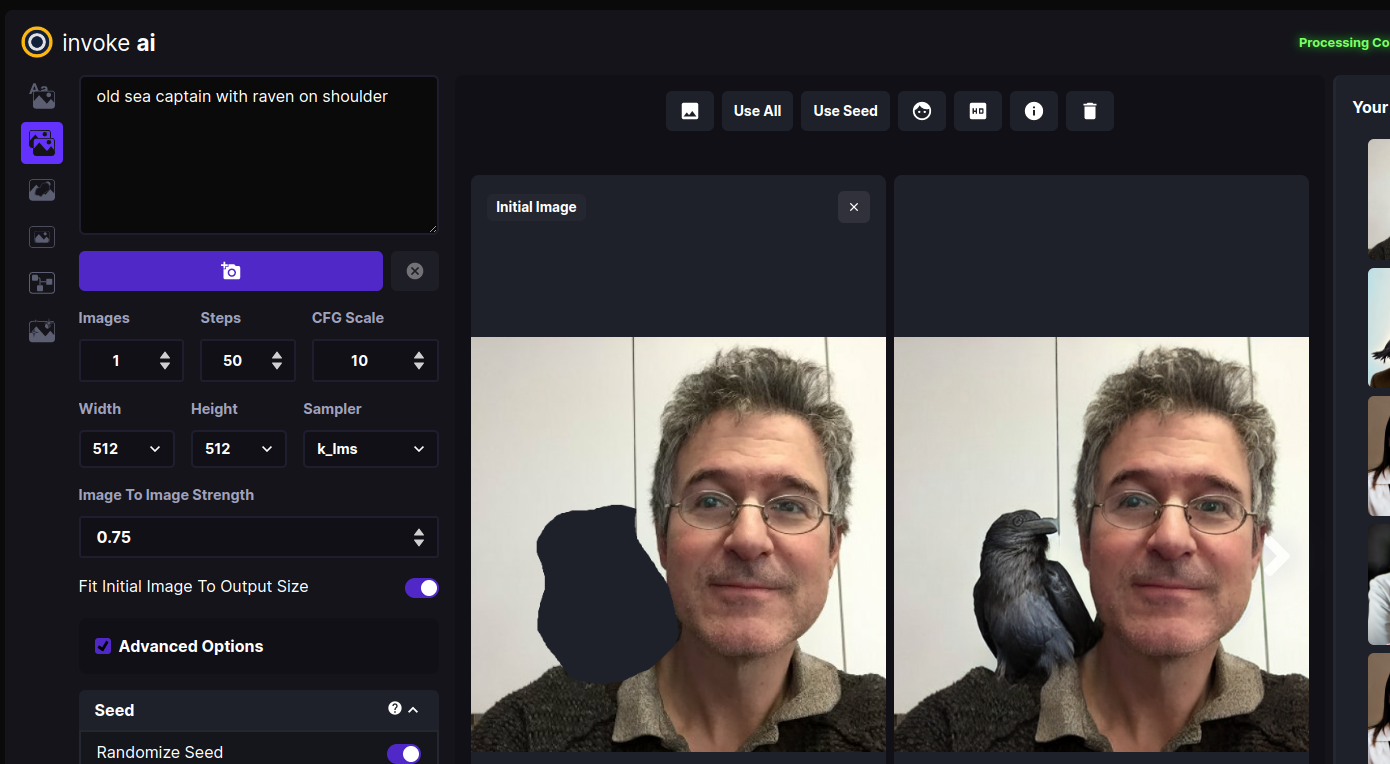
What if we only want to change certain part(s) of the image and leave the rest intact? This is called Inpainting, and a future version of the InvokeAI web server will provide an interactive painting canvas on which you can directly draw the areas you wish to Inpaint into. For now, you can achieve this effect by using an external photoeditor tool to make one or more regions of the image transparent as described in [INPAINTING.md] and uploading that.
The file Lincoln-and-Parrot-512-transparent.png is a version of the earlier image in which the area around the parrot has been replaced with transparency. Click on the "x" in the upper right of the Initial Image and upload the transparent version. Using the same prompt "old sea captain with raven on shoulder" try Invoking an image. This time, only the parrot will be replaced, leaving the rest of the original image intact:
Parting remarks
This concludes the walkthrough, but there are several more features that you can explore. Please check out the Command Line Interface documentation for further explanation of the advanced features that were not covered here.
The WebGUI is only rapid development. Check back regularly for updates!
Reference
Additional Options
--web_develop - Starts the web server in development mode.
--web_verbose - Enables verbose logging
--cors [CORS ...] - Additional allowed origins, comma-separated
--host HOST - Web server: Host or IP to listen on. Set to 0.0.0.0 to
accept traffic from other devices on your network.
--port PORT - Web server: Port to listen on
--gui - Start InvokeAI GUI - This is the "desktop mode" version of the web app. It uses Flask
to create a desktop app experience of the webserver.
Web Specific Features
The web experience offers an incredibly easy-to-use experience for interacting with the InvokeAI toolkit. For detailed guidance on individual features, see the Feature-specific help documents available in this directory. Note that the latest functionality available in the CLI may not always be available in the Web interface.
Dark Mode & Light Mode
The InvokeAI interface is available in a nano-carbon black & purple Dark Mode, and a "burn your eyes out Nosferatu" Light Mode. These can be toggled by clicking the Sun/Moon icons at the top right of the interface.
Invocation Toolbar
The left side of the InvokeAI interface is available for customizing the prompt and the settings used for invoking your new image. Typing your prompt into the open text field and clicking the Invoke button will produce the image based on the settings configured in the toolbar.
See below for additional documentation related to each feature:
Invocation Gallery
The currently selected --outdir (or the default outputs folder) will display all previously generated files on load. As new invocations are generated, these will be dynamically added to the gallery, and can be previewed by selecting them. Each image also has a simple set of actions (e.g., Delete, Use Seed, Use All Parameters, etc.) that can be accessed by hovering over the image.
Image Workspace
When an image from the Invocation Gallery is selected, or is generated, the image will be displayed within the center of the interface. A quickbar of common image interactions are displayed along the top of the image, including:
- Use image in the
Image to Imageworkflow - Initialize Face Restoration on the selected file
- Initialize Upscaling on the selected file
- View File metadata and details
- Delete the file
Acknowledgements
A huge shout-out to the core team working to make this vision a reality, including psychedelicious, Kyle0654 and blessedcoolant. hipsterusername was the team's unofficial cheerleader and added tooltips/docs.
