The timeouts are at least 3x the expected time to complete the jobs.
This is particularly relevant for the `pytest` job. Occasionally, it hangs while running tests that do network things, and the job only times out after 6 hours.
- Restructure & update code check workflows
- Add release workflow to handle checks/tests, build and publish to PyPI
- Add docs/RELEASE.md explaining the workflow & process
- `create_installer.sh`: Update to work with the release workflow
- `create_installer.sh` & `tag_release.sh`: Fix the ANSI escape codes for macOS
- `tag_release.sh`: Add check for python binary name
- `tag_release.sh`: Print `git remote -v` output
- `tag_release.sh`: Fix error when deleting nonexistant tags
This ensures it matches the github workflow.
Also there's an update that stabilizes a number of formatting rules, so there will be a format commit after this.
Model metadata includes the main model, VAE and refiner model.
These used full model configs, as returned by the server, as their metadata type.
LoRA and control adapter metadata only use the metadata identifier.
This created a difference in handling. After parsing a model/vae/refiner, we have its name and can display it. But for LoRAs and control adapters, we only have the model key and must query for the full model config to get the name.
This change makes main model/vae/refiner metadata only have the model key, like LoRAs and control adapters.
The render function is now async so fetching can occur within it. All metadata fields with models now only contain the identifier, and fetch the model name to render their values.
When we retrieve a list of models, upsert that data into the `getModelConfig` and `getModelConfigByAttrs` query caches.
With this change, calls to those two queries are almost always going to be free, because their caches will already have all models in them. The exception is queries for models that no longer exist.
Add concepts for metadata handlers. Handlers include parsers, recallers and validators for different metadata types:
- Parsers parse a raw metadata object of any shape to a structured object.
- Recallers load the parsed metadata into state. Recallers are optional, as some metadata types don't need to be loaded into state.
- Validators provide an additional layer of validation before recalling the metadata. This is needed because a metadata object may be valid, but not able to be recalled due to some other requirement, like base model compatibility. Validators are optional.
Sometimes metadata is not a single object but a list of items - like LoRAs. Metadata handlers may implement an optional set of "item" handlers which operate on individual items in the list.
Parsers and validators are async to allow fetching additional data, like a model config. Recallers are synchronous.
The these handlers are composed into a public API, exported as a `handlers` object. Besides the handlers functions, a metadata handler set includes:
- A function to get the label of the metadata type.
- An optional function to render the value of the metadata type.
- An optional function to render the _item_ value of the metadata type.
Gets the first model that matches the given name, base and type. Raises 404 if there isn't one.
This will be used for backwards compatibility with old metadata.
This was done in the frontend before but it's something the backend should handle.
The logic compares the found model paths to the path and source of all installed models. It excludes core models.
Refactor of metadata recall handling. This is in preparation for a backwards compatibility layer for models.
- Create helpers to fetch a model outside react (e.g. not in a hook)
- Created helpers to parse model metadata
- Renamed a lot of types that were confusing and/or had naming collisions
The setup of `ModelConfigBase` means autogenerated types have critical fields flagged as nullable (like `key` and `base`). Need to manually flag them as required.
- Support extended HF repoid syntax in TUI. This allows
installation of subfolders and safetensors files, as in
`XpucT/Deliberate::Deliberate_v5.safetensors`
- Add `error` and `error_traceback` properties to the install
job objects.
- Rename the `heuristic_import` route to `heuristic_install`.
- Fix the example `config` input in the `heuristic_install` route.
Notable updates:
- Minor version of RTK includes customizable selectors for RTK Query, so we can remove the patch that was added to ensure only the LRU memoize function was used for perf reasons. Updated to use the LRU memoize function.
- Major version of react-resizable-panels. No breaking changes, works great, and you can now resize all panels when dragging at the intersection point of panels. Cool!
- Minor (?) version of nanostores. `action` API is removed, we were using it in one spot. Fixed.
- @invoke-ai/eslint-config-react has all deps bumped and now has its dependent plugins/configs listed as normal dependencies (as opposed to peer deps). This means we can remove those packages from explicit dev deps.
- Use a single listener for all of the to keep them in one spot
- Use the bulk download item name as a toast id so we can update the existing toasts
- Update handling to work with other environments
- Move all bulk download handling from components to listener
- Deduplicate the mock invocation services. This is possible now that the import order issue is resolved.
- Merge `DummyEventService` into `TestEventService` and update all tests to use `TestEventService`.
Double underscores are used in the app but it doesn't actually do or convey anything that single underscores don't already do. Considered unpythonic except for actual dunder/magic methods.
Consolidate graph processing logic into session processor.
With graphs as the unit of work, and the session queue distributing graphs, we no longer need the invocation queue or processor.
Instead, the session processor dequeues the next session and processes it in a simple loop, greatly simplifying the app.
- Remove `graph_execution_manager` service.
- Remove `queue` (invocation queue) service.
- Remove `processor` (invocation processor) service.
- Remove queue-related logic from `Invoker`. It now only starts and stops the services, providing them with access to other services.
- Remove unused `invocation_retrieval_error` and `session_retrieval_error` events, these are no longer needed.
- Clean up stats service now that it is less coupled to the rest of the app.
- Refactor cancellation logic - cancellations now originate from session queue (i.e. HTTP cancel endpoint) and are emitted as events. Processor gets the events and sets the canceled event. Access to this event is provided to the invocation context for e.g. the step callback.
- Remove `sessions` router; it provided access to `graph_executions` but that no longer exists.
`GraphInvocation` is a node that can contain a whole graph. It is removed for a number of reasons:
1. This feature was unused (the UI doesn't support it) and there is no plan for it to be used.
The use-case it served is known in other node execution engines as "node groups" or "blocks" - a self-contained group of nodes, which has group inputs and outputs. This is a planned feature that will be handled client-side.
2. It adds substantial complexity to the graph processing logic. It's probably not enough to have a measurable performance impact but it does make it harder to work in the graph logic.
3. It allows for graphs to be recursive, and the improved invocations union handling does not play well with it. Actually, it works fine within `graph.py` but not in the tests for some reason. I do not understand why. There's probably a workaround, but I took this as encouragement to remove `GraphInvocation` from the app since we don't use it.
The change to `Graph.nodes` and `GraphExecutionState.results` validation requires some fanagling to get the OpenAPI schema generation to work. See new comments for a details.
We use pydantic to validate a union of valid invocations when instantiating a graph.
Previously, we constructed the union while creating the `Graph` class. This introduces a dependency on the order of imports.
For example, consider a setup where we have 3 invocations in the app:
- Python executes the module where `FirstInvocation` is defined, registering `FirstInvocation`.
- Python executes the module where `SecondInvocation` is defined, registering `SecondInvocation`.
- Python executes the module where `Graph` is defined. A union of invocations is created and used to define the `Graph.nodes` field. The union contains `FirstInvocation` and `SecondInvocation`.
- Python executes the module where `ThirdInvocation` is defined, registering `ThirdInvocation`.
- A graph is created that includes `ThirdInvocation`. Pydantic validates the graph using the union, which does not know about `ThirdInvocation`, raising a `ValidationError` about an unknown invocation type.
This scenario has been particularly problematic in tests, where we may create invocations dynamically. The test files have to be structured in such a way that the imports happen in the right order. It's a major pain.
This PR refactors the validation of graph nodes to resolve this issue:
- `BaseInvocation` gets a new method `get_typeadapter`. This builds a pydantic `TypeAdapter` for the union of all registered invocations, caching it after the first call.
- `Graph.nodes`'s type is widened to `dict[str, BaseInvocation]`. This actually is a nice bonus, because we get better type hints whenever we reference `some_graph.nodes`.
- A "plain" field validator takes over the validation logic for `Graph.nodes`. "Plain" validators totally override pydantic's own validation logic. The validator grabs the `TypeAdapter` from `BaseInvocation`, then validates each node with it. The validation is identical to the previous implementation - we get the same errors.
`BaseInvocationOutput` gets the same treatment.
- Replace AnyModelLoader with ModelLoaderRegistry
- Fix type check errors in multiple files
- Remove apparently unneeded `get_model_config_enum()` method from model manager
- Remove last vestiges of old model manager
- Updated tests and documentation
resolve conflict with seamless.py
- Rename old "model_management" directory to "model_management_OLD" in order to catch
dangling references to original model manager.
- Caught and fixed most dangling references (still checking)
- Rename lora, textual_inversion and model_patcher modules
- Introduce a RawModel base class to simplfy the Union returned by the
model loaders.
- Tidy up the model manager 2-related tests. Add useful fixtures, and
a finalizer to the queue and installer fixtures that will stop the
services and release threads.
- ModelMetadataStoreService is now injected into ModelRecordStoreService
(these two services are really joined at the hip, and should someday be merged)
- ModelRecordStoreService is now injected into ModelManagerService
- Reduced timeout value for the various installer and download wait*() methods
- Introduced a Mock modelmanager for testing
- Removed bare print() statement with _logger in the install helper backend.
- Removed unused code from model loader init file
- Made `locker` a private variable in the `LoadedModel` object.
- Fixed up model merge frontend (will be deprecated anyway!)
- Update most model identifiers to be `{key: string}` instead of name/base/type. Doesn't change the model select components yet.
- Update model _parameters_, stored in redux, to be `{key: string, base: BaseModel}` - we need to store the base model to be able to check model compatibility. May want to store the whole config? Not sure...
- Replace legacy model manager service with the v2 manager.
- Update invocations to use new load interface.
- Fixed many but not all type checking errors in the invocations. Most
were unrelated to model manager
- Updated routes. All the new routes live under the route tag
`model_manager_v2`. To avoid confusion with the old routes,
they have the URL prefix `/api/v2/models`. The old routes
have been de-registered.
- Added a pytest for the loader.
- Updated documentation in contributing/MODEL_MANAGER.md
- Implement new model loader and modify invocations and embeddings
- Finish implementation loaders for all models currently supported by
InvokeAI.
- Move lora, textual_inversion, and model patching support into
backend/embeddings.
- Restore support for model cache statistics collection (a little ugly,
needs work).
- Fixed up invocations that load and patch models.
- Move seamless and silencewarnings utils into better location
- Cache stat collection enabled.
- Implemented ONNX loading.
- Add ability to specify the repo version variant in installer CLI.
- If caller asks for a repo version that doesn't exist, will fall back
to empty version rather than raising an error.
Unfortunately you cannot test for both a specific type of error and match its message. Splitting the error classes makes it easier to test expected error conditions.
The changes aim to deduplicate data between workflows and node templates, decoupling workflows from internal implementation details. A good amount of data that was needlessly duplicated from the node template to the workflow is removed.
These changes substantially reduce the file size of workflows (and therefore the images with embedded workflows):
- Default T2I SD1.5 workflow JSON is reduced from 23.7kb (798 lines) to 10.9kb (407 lines).
- Default tiled upscale workflow JSON is reduced from 102.7kb (3341 lines) to 51.9kb (1774 lines).
The trade-off is that we need to reference node templates to get things like the field type and other things. In practice, this is a non-issue, because we need a node template to do anything with a node anyways.
- Field types are not included in the workflow. They are always pulled from the node templates.
The field type is now properly an internal implementation detail and we can change it as needed. Previously this would require a migration for the workflow itself. With the v3 schema, the structure of a field type is an internal implementation detail that we are free to change as we see fit.
- Workflow nodes no long have an `outputs` property and there is no longer such a thing as a `FieldOutputInstance`. These are only on the templates.
These were never referenced at a time when we didn't also have the templates available, and there'd be no reason to do so.
- Node width and height are no longer stored in the node.
These weren't used. Also, per https://reactflow.dev/api-reference/types/node, we shouldn't be programmatically changing these properties. A future enhancement can properly add node resizing.
- `nodeTemplates` slice is merged back into `nodesSlice` as `nodes.templates`. Turns out it's just a hassle having these separate in separate slices.
- Workflow migration logic updated to support the new schema. V1 workflows migrate all the way to v3 now.
- Changes throughout the nodes code to accommodate the above changes.
We have two different classes named `ModelInfo` which might need to be used by API consumers. We need to export both but have to deal with this naming collision.
The `ModelInfo` I've renamed here is the one that is returned when a model is loaded. It's the object least likely to be used by API consumers.
Replace `delete_on_startup: bool` & associated logic with `ephemeral: bool` and `TemporaryDirectory`.
The temp dir is created inside of `output_dir`. For example, if `output_dir` is `invokeai/outputs/tensors/`, then the temp dir might be `invokeai/outputs/tensors/tmpvj35ht7b/`.
The temp dir is cleaned up when the service is stopped, or when it is GC'd if not properly stopped.
In the event of a catastrophic crash where the temp files are not cleaned up, the user can delete the tempdir themselves.
This situation may not occur in normal use, but if you kill the process, python cannot clean up the temp dir itself. This includes running the app in a debugger and killing the debugger process - something I do relatively often.
Tests updated.
- The default is to not delete on startup - feels safer.
- The two services using this class _do_ delete on startup.
- The class has "ephemeral" removed from its name.
- Tests & app updated for this change.
`_delete_all` logged how many items it deleted, and had to be called _after_ service start bc it needed access to logger.
Move the logger call to the startup method and return the the deleted stats from `_delete_all`. This lets `_delete_all` be called at any time.
Turns out they are just different enough in purpose that the implementations would be rather unintuitive. I've made a separate ObjectSerializer service to handle tensors and conditioning.
Refined the class a bit too.
Turns out `ItemStorageABC` was almost identical to `PickleStorageBase`. Instead of maintaining separate classes, we can use `ItemStorageABC` for both.
There's only one change needed - the `ItemStorageABC.set` method must return the newly stored item's ID. This allows us to let the service handle the responsibility of naming the item, but still create the requisite output objects during node execution.
The naming implementation is improved here. It extracts the name of the generic and appends a UUID to that string when saving items.
- New generic class `PickleStorageBase`, implements the same API as `LatentsStorageBase`, use for storing non-serializable data via pickling
- Implementation `PickleStorageTorch` uses `torch.save` and `torch.load`, same as `LatentsStorageDisk`
- Add `tensors: PickleStorageBase[torch.Tensor]` to `InvocationServices`
- Add `conditioning: PickleStorageBase[ConditioningFieldData]` to `InvocationServices`
- Remove `latents` service and all `LatentsStorage` classes
- Update `InvocationContext` and all usage of old `latents` service to use the new services/context wrapper methods
This class works the same way as `WithMetadata` - it simply adds a `board` field to the node. The context wrapper function is able to pull the board id from this. This allows image-outputting nodes to get a board field "for free", and have their outputs automatically saved to it.
This is a breaking change for node authors who may have a field called `board`, because it makes `board` a reserved field name. I'll look into how to avoid this - maybe by naming this invoke-managed field `_board` to avoid collisions?
Supporting changes:
- `WithBoard` is added to all image-outputting nodes, giving them the ability to save to board.
- Unused, duplicate `WithMetadata` and `WithWorkflow` classes are deleted from `baseinvocation.py`. The "real" versions are in `fields.py`.
- Remove `LinearUIOutputInvocation`. Now that all nodes that output images also have a `board` field by default, this node is no longer necessary. See comment here for context: https://github.com/invoke-ai/InvokeAI/pull/5491#discussion_r1480760629
- Without `LinearUIOutputInvocation`, the `ImagesInferface.update` method is no longer needed, and removed.
Note: This commit does not bump all node versions. I will ensure that is done correctly before merging the PR of which this commit is a part.
Note: A followup commit will implement the frontend changes to support this change.
- The config is already cached by the config class's `get_config()` method.
- The config mutates itself in its `root_path` property getter. Freezing the class makes any attempt to grab a path from the config error. Unfortunately this means we cannot easily freeze the class without fiddling with the inner workings of `InvokeAIAppConfig`, which is outside the scope here.
Update all invocations to use the new context. The changes are all fairly simple, but there are a lot of them.
Supporting minor changes:
- Patch bump for all nodes that use the context
- Update invocation processor to provide new context
- Minor change to `EventServiceBase` to accept a node's ID instead of the dict version of a node
- Minor change to `ModelManagerService` to support the new wrapped context
- Fanagling of imports to avoid circular dependencies
## What type of PR is this? (check all applicable)
- [ ] Refactor
- [ ] Feature
- [ ] Bug Fix
- [X] Optimization
- [ ] Documentation Update
- [ ] Community Node Submission
## Have you discussed this change with the InvokeAI team?
- [X] Yes
- [ ] No, because:
## Have you updated all relevant documentation?
- [ ] Yes
- [ ] No
## Description
Added new tooltip popovers and updated copy of existing ones
## Related Tickets & Documents
<!--
For pull requests that relate or close an issue, please include them
below.
For example having the text: "closes #1234" would connect the current
pull
request to issue 1234. And when we merge the pull request, Github will
automatically close the issue.
-->
- Related Issue #
- Closes #
## QA Instructions, Screenshots, Recordings
<!--
Please provide steps on how to test changes, any hardware or
software specifications as well as any other pertinent information.
-->
## Merge Plan
<!--
A merge plan describes how this PR should be handled after it is
approved.
Example merge plans:
- "This PR can be merged when approved"
- "This must be squash-merged when approved"
- "DO NOT MERGE - I will rebase and tidy commits before merging"
- "#dev-chat on discord needs to be advised of this change when it is
merged"
A merge plan is particularly important for large PRs or PRs that touch
the
database in any way.
-->
## Added/updated tests?
- [ ] Yes
- [ ] No : _please replace this line with details on why tests
have not been included_
## [optional] Are there any post deployment tasks we need to perform?
## What type of PR is this? (check all applicable)
Release - Invoke 3.7.0
## Have you discussed this change with the InvokeAI team?
- [X] Yes
- [ ] No, because:
## Have you updated all relevant documentation?
- [X] Yes
- [ ] No
## Description
Invoke 3.7.0 Release
## QA Instructions, Screenshots, Recordings
Test Installer:
[InvokeAI-installer-v3.7.0.zip](https://github.com/invoke-ai/InvokeAI/files/14298200/InvokeAI-installer-v3.7.0.zip)
<!--
Please provide steps on how to test changes, any hardware or
software specifications as well as any other pertinent information.
-->
## Merge Plan
Merge once approved
<!--
A merge plan describes how this PR should be handled after it is
approved.
Example merge plans:
- "This PR can be merged when approved"
- "This must be squash-merged when approved"
- "DO NOT MERGE - I will rebase and tidy commits before merging"
- "#dev-chat on discord needs to be advised of this change when it is
merged"
A merge plan is particularly important for large PRs or PRs that touch
the
database in any way.
-->
## Added/updated tests?
- [ ] Yes
- [X] No : _please replace this line with details on why tests
have not been included_
## [optional] Are there any post deployment tasks we need to perform?
1. Release on PyPi
2. Release on GitHub
3. Announce on Discord
With these changes, the Docker image can be built and executed
successfully on hosts with AMD devices with ROCm acceleration.
Previously, a ROCm-enabled version of torch would be installed, but
later removed during installation of InvokeAI itself. This was caused by
InvokeAI needing a newer torch version than was previously installed.
The fix consists of multiple components:
* Update the hardcoded versions of torch and torchvision to the versions
currently used in pyproject.toml, so that a new version need not be
installed during installation of InvokeAI.
* Specify --extra-index-url on installation of InvokeAI so that even if
a verison mismatch occurs, the correct torch version should still be
installed. This also necessitates changing --index-url to
--extra-index-url for the Torch repo. Otherwise non-torch dependencies
would not be found.
* In run.sh, build the image for the selected service.
## What type of PR is this? (check all applicable)
- [ ] Refactor
- [x] Feature
- [ ] Bug Fix
- [ ] Optimization
- [ ] Documentation Update
- [ ] Community Node Submission
## Have you discussed this change with the InvokeAI team?
- [x] Yes
- [ ] No, because:
## Have you updated all relevant documentation?
- [ ] Yes
- [ ] No
## Description
## Related Tickets & Documents
<!--
For pull requests that relate or close an issue, please include them
below.
For example having the text: "closes #1234" would connect the current
pull
request to issue 1234. And when we merge the pull request, Github will
automatically close the issue.
-->
- Related Issue #
- Closes #
## QA Instructions, Screenshots, Recordings
<!--
Please provide steps on how to test changes, any hardware or
software specifications as well as any other pertinent information.
-->
## Merge Plan
<!--
A merge plan describes how this PR should be handled after it is
approved.
Example merge plans:
- "This PR can be merged when approved"
- "This must be squash-merged when approved"
- "DO NOT MERGE - I will rebase and tidy commits before merging"
- "#dev-chat on discord needs to be advised of this change when it is
merged"
A merge plan is particularly important for large PRs or PRs that touch
the
database in any way.
-->
## Added/updated tests?
- [ ] Yes
- [ ] No : _please replace this line with details on why tests
have not been included_
## [optional] Are there any post deployment tasks we need to perform?
* new workflow tab UI - still using shared state with workflow editor tab
* polish workflow details
* remove workflow tab, add edit/view mode to workflow slice and get that working to switch between within editor tab
* UI updates for view/edit mode
* cleanup
* add warning to view mode
* lint
* start with isTouched false
* working on styling mode toggle
* more UX iteration
* lint
* cleanup
* save original field values to state, add indicator if they have been changed and give user choice to reset
* lint
* fix import and commit translation
* dont switch to view mode when loading a workflow
* warns before clearing editor
* use folder icon
* fix(ui): track do not erase value when resetting field value
- When adding an exposed field, we need to add it to originalExposedFieldValues
- When removing an exposed field, we need to remove it from originalExposedFieldValues
- add `useFieldValue` and `useOriginalFieldValue` hooks to encapsulate related logic
* feat(ui): use IconButton for workflow view/edit button
* feat(ui): change icon for new workflow
It was the same as the workflow tab icon, confusing bc you think it's going to somehow take you to the tab.
* feat(ui): use render props for NewWorkflowConfirmationAlertDialog
There was a lot of potentially sensitive logic shared between the new workflow button and menu items. Also, two instances of ConfirmationAlertDialog.
Using a render prop deduplicates the logic & components
* fix(ui): do not mark workflow touched when loading workflow
This was occurring because the `nodesChanged` action is called by reactflow when loading a workflow. Specifically, it calculates and sets the node dimensions as it loads.
The existing logic set `isTouched` whenever this action was called.
The changes reactflow emits have types, and we can use the change types and data to determine if a change should result in the workflow being marked as touched.
* chore(ui): lint
* chore(ui): lint
* delete empty file
---------
Co-authored-by: Mary Hipp <maryhipp@Marys-MacBook-Air.local>
Co-authored-by: psychedelicious <4822129+psychedelicious@users.noreply.github.com>
Methods `get_node` and `complete` were typed as returning a dynamically created unions `InvocationsUnion` and `InvocationOutputsUnion`, respectively.
Static type analysers cannot work with dynamic objects, so these methods end up as effectively un-annotated, returning `Unknown`.
They now return `BaseInvocation` and `BaseInvocationOutput`, respectively, which are the superclasses of all members of each union. This gives us the best type annotation that is possible.
Note: the return types of these methods are never introspected, so it doesn't really matter what they are at runtime.
## What type of PR is this? (check all applicable)
- [ ] Refactor
- [ ] Feature
- [ X ] Bug Fix
- [ ] Optimization
- [ ] Documentation Update
- [ ] Community Node Submission
## Have you discussed this change with the InvokeAI team?
- [ ] Yes
- [ X ] No, because: It's small
## Have you updated all relevant documentation?
- [ ] Yes
- [ X ] No
## Description
This pulls out some of the updates from the WIP Seamless branch that has
yet to be completed, and hardcodes values that are exposed in that
branch. Given that seamless currently does not generate seamless
textures, and this fix results in seamless outputs, it's an improvement
even if it doesn't resolve this in a "perfect" way that exposes all
variables to the end user.
better over perfect.

* remove thunk for receivedOpenApiSchema and use RTK query instead. add loading state for exposed fields
* clean up
* ignore any
* fix(ui): do not log on canceled openapi.json queries
- Rely on RTK Query for the `loadSchema` query by providing a custom `jsonReplacer` in our `dynamicBaseQuery`, so we don't need to manage error state.
- Detect when the query was canceled and do not log the error message in those situations.
* feat(ui): `utilitiesApi.endpoints.loadSchema` -> `appInfoApi.endpoints.getOpenAPISchema`
- Utilities is for server actions, move this to `appInfo` bc it fits better there.
- Rename to match convention for HTTP GET queries.
- Fix inverted logic in the `matchRejected` listener (typo'd this)
---------
Co-authored-by: Mary Hipp <maryhipp@Marys-MacBook-Air.local>
Co-authored-by: psychedelicious <4822129+psychedelicious@users.noreply.github.com>
## What type of PR is this? (check all applicable)
Release Invoke 3.6.3
## Have you discussed this change with the InvokeAI team?
- [X] Yes
- [ ] No, because:
## Have you updated all relevant documentation?
- [X] Yes
- [ ] No
## Description
Invoke 3.6.3 Release
## QA Instructions, Screenshots, Recordings
Test the installer:
[InvokeAI-installer-v3.6.3.zip](https://github.com/invoke-ai/InvokeAI/files/14233359/InvokeAI-installer-v3.6.3.zip)
<!--
Please provide steps on how to test changes, any hardware or
software specifications as well as any other pertinent information.
-->
## Merge Plan
Merge once approved
<!--
A merge plan describes how this PR should be handled after it is
approved.
Example merge plans:
- "This PR can be merged when approved"
- "This must be squash-merged when approved"
- "DO NOT MERGE - I will rebase and tidy commits before merging"
- "#dev-chat on discord needs to be advised of this change when it is
merged"
A merge plan is particularly important for large PRs or PRs that touch
the
database in any way.
-->
## [optional] Are there any post deployment tasks we need to perform?
1. Release on PyPi & GitHub
2. Announce on Discord
## What type of PR is this? (check all applicable)
- [ ] Refactor
- [ ] Feature
- [ ] Bug Fix
- [ ] Optimization
- [x] Documentation Update
- [ ] Community Node Submission
## Have you discussed this change with the InvokeAI team?
- [ ] Yes
- [x] No, because: it is text only, simple, and (hopefully) self-evident
## Have you updated all relevant documentation?
- [x] Yes - as far as I can grep.
- [ ] No
## Description
`.env.sample` was misspelled as `env.sample` in a few places.
This changes documentation only. You may need to re-build/deploy docs,
I'm not sure.
## What type of PR is this? (check all applicable)
- [ ] Refactor
- [ ] Feature
- [x] Bug Fix
- [ ] Optimization
- [ ] Documentation Update
- [ ] Community Node Submission
## Description
The change to memory session storage brings a subtle behaviour change.
Previously, we serialized and deserialized everything (e.g. field state,
invocation outputs, etc) constantly. The meant we were effectively
working with deep-copied objects at all time. We could mutate objects
freely without worrying about other references to the object.
With memory storage, objects are now passed around by reference, and we
cannot handle them in the same way.
This is problematic for nodes that mutate their own inputs. There are
two ways this causes a problem:
- An output is used as input for multiple nodes. If the first node
mutates the output object while `invoke`ing, the next node will get the
mutated object.
- The invocation cache stores live python objects. When a node mutates
an output pulled from the cache, the next node that uses the cached
object will get the mutated object.
The solution is to deep-copy a node's inputs as they are set,
effectively reproducing the same behaviour as we had with the SQLite
session storage. Nodes can safely mutate their inputs and those changes
never leave the node's scope.
## Related Tickets & Documents
<!--
For pull requests that relate or close an issue, please include them
below.
For example having the text: "closes #1234" would connect the current
pull
request to issue 1234. And when we merge the pull request, Github will
automatically close the issue.
-->
- Closes #5665
The root issue affects CLIP Skip because that node mutates its input
`ClipField`. Specifically, it increments `self.clip.skipped_layers` and
passes `self.clip` as its output. I don't know if there are any other
nodes that do this.
## QA Instructions, Screenshots, Recordings
Two issues to reproduce.
First is the caching issue:

Note the cache is enabled. Run this simple graph a couple times, and
check the outputs of the CLIP Skip node. You'll see the `skipped_layers`
value increasing each time.
Second is the nodes-sharing-inputs issue:

Note the cache is _disabled_. Run the graph a couple times and check the
outputs of the two CLIP Skip nodes. You'll see that one has the expected
value for `skipped_layers` and the other has double that.
Now update to the PR and try again. You should see `skipped_layers` is
the right value in all cases.
<!--
Please provide steps on how to test changes, any hardware or
software specifications as well as any other pertinent information.
-->
## Merge Plan
This PR can be merged when approved. It needs a real review with
braintime.
<!--
A merge plan describes how this PR should be handled after it is
approved.
Example merge plans:
- "This PR can be merged when approved"
- "This must be squash-merged when approved"
- "DO NOT MERGE - I will rebase and tidy commits before merging"
- "#dev-chat on discord needs to be advised of this change when it is
merged"
A merge plan is particularly important for large PRs or PRs that touch
the
database in any way.
-->
The change to memory session storage brings a subtle behaviour change.
Previously, we serialized and deserialized everything (e.g. field state, invocation outputs, etc) constantly. The meant we were effectively working with deep-copied objects at all time. We could mutate objects freely without worrying about other references to the object.
With memory storage, objects are now passed around by reference, and we cannot handle them in the same way.
This is problematic for nodes that mutate their own inputs. There are two ways this causes a problem:
- An output is used as input for multiple nodes. If the first node mutates the output object while `invoke`ing, the next node will get the mutated object.
- The invocation cache stores live python objects. When a node mutates an output pulled from the cache, the next node that uses the cached object will get the mutated object.
The solution is to deep-copy a node's inputs as they are set, effectively reproducing the same behaviour as we had with the SQLite session storage. Nodes can safely mutate their inputs and those changes never leave the node's scope.
Closes #5665
Currently translated at 74.4% (1054 of 1416 strings)
translationBot(ui): update translation (German)
Currently translated at 69.6% (986 of 1416 strings)
translationBot(ui): update translation (German)
Currently translated at 68.6% (972 of 1416 strings)
Co-authored-by: B N <berndnieschalk@gmail.com>
Translate-URL: https://hosted.weblate.org/projects/invokeai/web-ui/de/
Translation: InvokeAI/Web UI
…elected
## What type of PR is this? (check all applicable)
- [ ] Refactor
- [ ] Feature
- [x] Bug Fix
- [ ] Optimization
- [ ] Documentation Update
- [ ] Community Node Submission
## Have you discussed this change with the InvokeAI team?
- [x] Yes
- [ ] No, because:
## Have you updated all relevant documentation?
- [ ] Yes
- [ ] No
## Description
Small bugfix: the installer would always print the latest stable version
as the one to be installed, even if a different one was selected. The
selected version would still be installed correctly. This PR fixes the
message.
## QA Instructions, Screenshots, Recordings
Select a pre-release version on install and observe the correct version
being printed. Compare to current behaviour to ascertain the fix.
## Merge Plan
- "This PR can be merged when approved"
## Added/updated tests?
- [ ] Yes
- [x] No
This has repeatedly shown itself useful in fixing install issues,
especially regarding pytorch CPU/GPU version, so there is little
downside to making this the default.
Performance impact of this should be negligible. Packages will
be reinstalled from pip cache if possible, and downloaded only if
necessary. Impact may be felt on slower disks.
## What type of PR is this? (check all applicable)
- [ ] Refactor
- [ ] Feature
- [ ] Bug Fix
- [X] Optimization
- [ ] Documentation Update
- [ ] Community Node Submission
## Have you discussed this change with the InvokeAI team?
- [ ] Yes
- [X] No, because probably not needed
## Have you updated all relevant documentation?
- [ ] Yes
- [ ] No
## Description
These are another minor dep updates that I was able to test without any
regressions. This will ensure we are up-to-date again.
The fixes are very minor, probably not noticeable in InvokeAI (at least
for diffusers) but it's still good to have them.
This is also to make sure that the RC is releasing with the latest
packages to ensure extended testing.
Greetings
## Related Tickets & Documents
<!--
For pull requests that relate or close an issue, please include them
below.
For example having the text: "closes #1234" would connect the current
pull
request to issue 1234. And when we merge the pull request, Github will
automatically close the issue.
-->
- Related Issue #
- Closes #
## QA Instructions, Screenshots, Recordings
<!--
Please provide steps on how to test changes, any hardware or
software specifications as well as any other pertinent information.
-->
## Merge Plan
<!--
A merge plan describes how this PR should be handled after it is
approved.
Example merge plans:
- "This PR can be merged when approved"
- "This must be squash-merged when approved"
- "DO NOT MERGE - I will rebase and tidy commits before merging"
- "#dev-chat on discord needs to be advised of this change when it is
merged"
A merge plan is particularly important for large PRs or PRs that touch
the
database in any way.
-->
## Added/updated tests?
- [ ] Yes
- [ ] No : _please replace this line with details on why tests
have not been included_
## [optional] Are there any post deployment tasks we need to perform?
## What type of PR is this? (check all applicable)
- [x] Community Node Submission
## Description
- Adds BriaAI's new 1.4 model for background removal. Far superior
results from what I've tested compared to any other BG removal so far:
https://github.com/blessedcoolant/invoke_bria_rmbg
The stats service was logging error messages when attempting to retrieve stats for a graph that it wasn't tracking. This was rather noisy.
Instead of logging these errors within the service, we now will just raise the error and let the consumer of the service decide whether or not to log. Our usage of the service at this time is to suppress errors - we don't want to log anything to the console.
Note: With the improvements in the previous two commits, we shouldn't get these errors moving forward, but I still think this change is correct.
When an invocation is canceled, we consider the graph canceled. Log its graph's stats before resetting its graph's stats. No reason to not log these stats.
We also should stop the profiler at this point, because this graph is finished. If we don't stop it manually, it will stop itself and write the profile to disk when it is next started, but the resultant profile will include more than just its target graph.
Now we get both stats and profiles for canceled graphs.
When an invocation errored, we clear the stats for the whole graph. Later on, we check the graph for errors and see the failed invocation, and we consider the graph failed. We then attempts to log the stats for the failed graph.
Except now the failed graph has no stats, and the stats raises an error.
The user sees, in the terminal:
- An invocation error
- A stats error (scary!)
- No stats for the failed graph (uninformative!)
What the user should see:
- An invocation error
- Graph stats
The fix is simple - don't reset the graph stats when an invocation has an error.
Hardcode the options in the dropdown, don't rely on translators to fill this in.
Also, add a number of missing languages (Azerbaijani, Finnish, Hungarian, Swedish, Turkish).
Closes#5647
The alpha values in the UI are `0-1` but the backend wants `0-255`.
Previously, this was handled in `parseFIeldValue` when building the graph. In a recent release, field types were refactored and broke the alpha handling.
The logic for handling alpha values is moved into `ColorFieldInputComponent`, and `parseFieldValue` now just does no value transformations.
Though it would be a minor change, I'm leaving this function in because I don't want to change the rest of the logic except when necessary.
Closes#5616
Turns out the OpenAPI schema definition for a pydantic field with a `Literal` type annotation is different depending on the number of options.
When there is a single value (e.g. `Literal["foo"]`, this results in a `const` schema object. The schema parser didn't know how to handle this, and displayed a warning in the JS console.
This situation is now handled. When a `const` schema object is encountered, we interpret that as an `EnumField` with a single option.
I think this makes sense - if you had a truly constant value, you wouldn't make it a field, so a `const` must mean a dynamically generated enum that ended up with only a single option.
Currently translated at 40.6% (582 of 1433 strings)
translationBot(ui): update translation (Turkish)
Currently translated at 38.8% (557 of 1433 strings)
Co-authored-by: Ufuk Sarp Selçok <ilkel@live.com>
Translate-URL: https://hosted.weblate.org/projects/invokeai/web-ui/tr/
Translation: InvokeAI/Web UI
- `ItemStorageMemory.get` now throws an `ItemNotFoundError` when the requested `item_id` is not found.
- Update docstrings in ABC and tests.
The new memory item storage implementation implemented the `get` method incorrectly, by returning `None` if the item didn't exist.
The ABC typed `get` as returning `T`, while the SQLite implementation typed `get` as returning `Optional[T]`. The SQLite implementation was referenced when writing the memory implementation.
This mismatched typing is a violation of the Liskov substitution principle, because the signature of the implementation of `get` in the implementation is wider than the abstract class's definition. Using `pyright` in strict mode catches this.
In `invocation_stats_default`, this introduced an error. The `_prune_stats` method calls `get`, expecting the method to throw if the item is not found. If the graph is no longer stored in the bounded item storage, we will call `is_complete()` on `None`, causing the error.
Note: This error condition never arose the SQLite implementation because it parsed the item with pydantic before returning it, which would throw if the item was not found. It implicitly threw, while the memory implementation did not.
The `getIntermediatesCount` query is set to `refetchOnMountOrArgsChange`. The intention was for when the settings modal opens (i.e. mounts), the `getIntermediatesCount` query is refetched. But it doesn't work - modals only mount once, there is no lazy rendering for them.
So we have to imperatively refetch, by refetching as we open the modal.
Closes#5639
* Port the command-line tools to use model_manager2
1.Reimplement the following:
- invokeai-model-install
- invokeai-merge
- invokeai-ti
To avoid breaking the original modeal manager, the udpated tools
have been renamed invokeai-model-install2 and invokeai-merge2. The
textual inversion training script should continue to work with
existing installations. The "starter" models now live in
`invokeai/configs/INITIAL_MODELS2.yaml`.
When the full model manager 2 is in place and working, I'll rename
these files and commands.
2. Add the `merge` route to the web API. This will merge two or three models,
resulting a new one.
- Note that because the model installer selectively installs the `fp16` variant
of models (rather than both 16- and 32-bit versions as previous),
the diffusers merge script will choke on any huggingface diffuserse models
that were downloaded with the new installer. Previously-downloaded models
should continue to merge correctly. I have a PR
upstream https://github.com/huggingface/diffusers/pull/6670 to fix
this.
3. (more important!)
During implementation of the CLI tools, found and fixed a number of small
runtime bugs in the model_manager2 implementation:
- During model database migration, if a registered models file was
not found on disk, the migration would be aborted. Now the
offending model is skipped with a log warning.
- Caught and fixed a condition in which the installer would download the
entire diffusers repo when the user provided a single `.safetensors`
file URL.
- Caught and fixed a condition in which the installer would raise an
exception and stop the app when a request for an unknown model's metadata
was passed to Civitai. Now an error is logged and the installer continues.
- Replaced the LoWRA starter LoRA with FlatColor. The former has been removed
from Civitai.
* fix ruff issue
---------
Co-authored-by: Lincoln Stein <lstein@gmail.com>
## What type of PR is this? (check all applicable)
- [ ] Refactor
- [ ] Feature
- [x] Bug Fix
- [ ] Optimization
- [ ] Documentation Update
- [ ] Community Node Submission
## Have you discussed this change with the InvokeAI team?
- [x] Yes
- [ ] No, because:
## Have you updated all relevant documentation?
- [ ] Yes
- [ ] No
## Description
Seems we elected to convert checkpoints into .bin files when we set it
up. This doesn't seem to corrupt them anymore.
## Related Tickets & Documents
<!--
For pull requests that relate or close an issue, please include them
below.
For example having the text: "closes #1234" would connect the current
pull
request to issue 1234. And when we merge the pull request, Github will
automatically close the issue.
-->
- Related Issue #
- Closes #
## QA Instructions, Screenshots, Recordings
<!--
Please provide steps on how to test changes, any hardware or
software specifications as well as any other pertinent information.
-->
## Merge Plan
<!--
A merge plan describes how this PR should be handled after it is
approved.
Example merge plans:
- "This PR can be merged when approved"
- "This must be squash-merged when approved"
- "DO NOT MERGE - I will rebase and tidy commits before merging"
- "#dev-chat on discord needs to be advised of this change when it is
merged"
A merge plan is particularly important for large PRs or PRs that touch
the
database in any way.
-->
## Added/updated tests?
- [ ] Yes
- [ ] No : _please replace this line with details on why tests
have not been included_
## [optional] Are there any post deployment tasks we need to perform?
Initially I wanted to show how many sessions were being deleted. In hindsight, this is not great:
- It requires extra logic in the migrator, which should be as simple as possible.
- It may be alarming to see "Clearing 224591 old sessions".
The app still reports on freed space during the DB startup logic.
* fix(ui): download image opens in new tab
In some environments, a simple `a` element cannot trigger a download of an image. Fetching the image directly can get around this and provide more reliable download functionality.
* use hook for imageUrlToBlob so token gets sent if needed
---------
Co-authored-by: Mary Hipp <maryhipp@Marys-MacBook-Air.local>
This substantially reduces the time spent encoding PNGs. In workflows with many image outputs, this is a drastic improvement.
For a tiled upscaling workflow going from 512x512 to a scale factor of 4, this can provide over 15% speed increase.
This allows the stats to be written to disk as JSON and analyzed.
- Add dataclasses to hold stats.
- Move stats pretty-print logic to `__str__` of the new `InvocationStatsSummary` class.
- Add `get_stats` and `dump_stats` methods to `InvocationStatsServiceBase`.
- `InvocationStatsService` now throws if stats are requested for a session it doesn't know about. This avoids needing to do a lot of messy null checks.
- Update `DefaultInvocationProcessor` to use the new stats methods and suppresses the new errors.
## What type of PR is this? (check all applicable)
- [ ] Refactor
- [ ] Feature
- [x] Bug Fix
- [ ] Optimization
- [ ] Documentation Update
- [ ] Community Node Submission
## Have you discussed this change with the InvokeAI team?
- [x] Yes
- [ ] No, because:
## Have you updated all relevant documentation?
- [ ] Yes
- [ ] No
## Description
Small PR to allow users to pass in a civit api key via config options
## Related Tickets & Documents
<!--
For pull requests that relate or close an issue, please include them
below.
For example having the text: "closes #1234" would connect the current
pull
request to issue 1234. And when we merge the pull request, Github will
automatically close the issue.
-->
- Related Issue #
- Closes #
## QA Instructions, Screenshots, Recordings
<!--
Please provide steps on how to test changes, any hardware or
software specifications as well as any other pertinent information.
-->
## Merge Plan
<!--
A merge plan describes how this PR should be handled after it is
approved.
Example merge plans:
- "This PR can be merged when approved"
- "This must be squash-merged when approved"
- "DO NOT MERGE - I will rebase and tidy commits before merging"
- "#dev-chat on discord needs to be advised of this change when it is
merged"
A merge plan is particularly important for large PRs or PRs that touch
the
database in any way.
-->
## Added/updated tests?
- [ ] Yes
- [ ] No : _please replace this line with details on why tests
have not been included_
## [optional] Are there any post deployment tasks we need to perform?
* redo top panel of workflow editor
* add checkbox option to save to project, integrate save-as flow into first time saving workflow
* remove log
* remove workflowLibrary as a feature that can be disabled
* lint
* feat(ui): make SaveWorkflowAsDialog a singleton
Fixes an issue where the workflow name would erroneously be an empty string (which it should show the current workflow name).
Also makes it easier to interact with this component.
- Extract the dialog state to a hook
- Render the dialog once in `<NodeEditor />`
- Use the hook in the various buttons that should open the dialog
- Fix a few wonkily named components (pre-existing issue)
* fix(ui): when saving a never-before-saved workflow, do not append " (copy)" to the name
* fix(ui): do not obscure workflow library button with add node popover
This component is kinda janky :/ the popover content somehow renders invisibly over the button. I think it's related to the `<PopoverAnchor />.
Need to redo this in the future, but for now, making the popover render lazily fixes this.
---------
Co-authored-by: Mary Hipp <maryhipp@Marys-MacBook-Air.local>
Co-authored-by: psychedelicious <4822129+psychedelicious@users.noreply.github.com>
Adds adds ctrl/meta + scroll to change brush size on canvas.
* changed hotkeys
* new hotkey as an additional
* lint fixed"
* added ctrl scroll and removed hotkey
* using
* added fix
* feedbck_changes
* brush size change logic
* feat(ui): also check for meta key when modifying brush size
* feat(ui): add comment linking to where brush size algo was determined
---------
Co-authored-by: psychedelicious <4822129+psychedelicious@users.noreply.github.com>
## What type of PR is this? (check all applicable)
- [ ] Refactor
- [ ] Feature
- [ ] Bug Fix
- [ ] Optimization
- [X] Documentation Update
- [ ] Community Node Submission
## Have you discussed this change with the InvokeAI team?
- [X] Yes
- [ ] No, because:
## Have you updated all relevant documentation?
- [X] Yes
- [ ] No
## Description
This brings `docs/other/CONTRIBUTORS.md` into sync with collaborator
roles in Discord as of January 27, 2024.
## Related Tickets & Documents
<!--
For pull requests that relate or close an issue, please include them
below.
For example having the text: "closes #1234" would connect the current
pull
request to issue 1234. And when we merge the pull request, Github will
automatically close the issue.
-->
## QA Instructions, Screenshots, Recordings
N/A
<!--
Please provide steps on how to test changes, any hardware or
software specifications as well as any other pertinent information.
-->
## Merge Plan
Merge when approved.
<!--
A merge plan describes how this PR should be handled after it is
approved.
Example merge plans:
- "This PR can be merged when approved"
- "This must be squash-merged when approved"
- "DO NOT MERGE - I will rebase and tidy commits before merging"
- "#dev-chat on discord needs to be advised of this change when it is
merged"
A merge plan is particularly important for large PRs or PRs that touch
the
database in any way.
-->
## Added/updated tests?
- [ ] Yes
- [ ] No : _please replace this line with details on why tests
have not been included_
## [optional] Are there any post deployment tasks we need to perform?
Currently translated at 10.5% (151 of 1426 strings)
translationBot(ui): update translation (Turkish)
Currently translated at 8.1% (116 of 1426 strings)
translationBot(ui): update translation (Turkish)
Currently translated at 6.6% (95 of 1426 strings)
Co-authored-by: Ufuk Sarp Selçok <ilkel@live.com>
Translate-URL: https://hosted.weblate.org/projects/invokeai/web-ui/tr/
Translation: InvokeAI/Web UI
It doesn't work now that the theme is external. I'm not sure how to fix it and not sure if it really did much (I don't think I ever got autocomplete...). Maybe it can be implemented in `@invoke-ai/ui-library`.
## What type of PR is this? (check all applicable)
- [ ] Refactor
- [ ] Feature
- [ ] Bug Fix
- [ ] Optimization
- [X] Documentation Update
- [ ] Community Node Submission
## Have you discussed this change with the InvokeAI team?
- [X] Yes
- [ ] No, because:
## Have you updated all relevant documentation?
- [X] Yes
- [ ] No
## Description
- Update docs to make link to automated installer easier to find
- Fixed issue in SDXL + refiner example workflow
## Related Tickets & Documents
<!--
For pull requests that relate or close an issue, please include them
below.
For example having the text: "closes #1234" would connect the current
pull
request to issue 1234. And when we merge the pull request, Github will
automatically close the issue.
-->
- Related Issue #
- Closes #
## QA Instructions, Screenshots, Recordings
Read over docs changes
<!--
Please provide steps on how to test changes, any hardware or
software specifications as well as any other pertinent information.
-->
## Merge Plan
Merge when approved
<!--
A merge plan describes how this PR should be handled after it is
approved.
Example merge plans:
- "This PR can be merged when approved"
- "This must be squash-merged when approved"
- "DO NOT MERGE - I will rebase and tidy commits before merging"
- "#dev-chat on discord needs to be advised of this change when it is
merged"
A merge plan is particularly important for large PRs or PRs that touch
the
database in any way.
-->
## [optional] Are there any post deployment tasks we need to perform?
Deploy new docs
…y to distinguish what's being changed
## What type of PR is this? (check all applicable)
- [ ] Refactor
- [ ] Feature
- [ ] Bug Fix
- [x] Optimization
- [ ] Documentation Update
- [ ] Community Node Submission
## Have you discussed this change with the InvokeAI team?
- [x] Yes
- [ ] No, because:
## Have you updated all relevant documentation?
- [x] Yes
- [ ] No
## Description
## Related Tickets & Documents
<!--
For pull requests that relate or close an issue, please include them
below.
For example having the text: "closes #1234" would connect the current
pull
request to issue 1234. And when we merge the pull request, Github will
automatically close the issue.
-->
- Related Issue #
- Closes #
## QA Instructions, Screenshots, Recordings
<!--
Please provide steps on how to test changes, any hardware or
software specifications as well as any other pertinent information.
-->
## Merge Plan
<!--
A merge plan describes how this PR should be handled after it is
approved.
Example merge plans:
- "This PR can be merged when approved"
- "This must be squash-merged when approved"
- "DO NOT MERGE - I will rebase and tidy commits before merging"
- "#dev-chat on discord needs to be advised of this change when it is
merged"
A merge plan is particularly important for large PRs or PRs that touch
the
database in any way.
-->
## Added/updated tests?
- [ ] Yes
- [x] No : _please replace this line with details on why tests
have not been included_
## [optional] Are there any post deployment tasks we need to perform?
* dont show duplicate toasts if workflow actions fail due to auth
* dynamic order by options based on projectId
* add endpointName to authtoast to makeit unique per endpoint
* lint
* update toast logic to check based on endpoint name w type safety
* fix save as endpoit name
* lint
* fix type
---------
Co-authored-by: Mary Hipp <maryhipp@Marys-MacBook-Air.local>
## What type of PR is this? (check all applicable)
Invoke v3.6.2 release
## Have you discussed this change with the InvokeAI team?
- [X] Yes
- [ ] No, because:
## Have you updated all relevant documentation?
- [X] Yes
- [ ] No
## Description
Invoke v3.6.2
## Related Tickets & Documents
<!--
For pull requests that relate or close an issue, please include them
below.
For example having the text: "closes #1234" would connect the current
pull
request to issue 1234. And when we merge the pull request, Github will
automatically close the issue.
-->
- Related Issue #
- Closes #
## QA Instructions, Screenshots, Recordings
[InvokeAI-installer-v3.6.2.zip](https://github.com/invoke-ai/InvokeAI/files/14046191/InvokeAI-installer-v3.6.2.zip)
* retain id through workflow state so that we correctly update or save new
* lint
---------
Co-authored-by: Mary Hipp <maryhipp@Marys-MacBook-Air.local>
## What type of PR is this? (check all applicable)
Invoke 3.6.1 release
## QA Instructions, Screenshots, Recordings
[InvokeAI-installer-v3.6.1.zip](https://github.com/invoke-ai/InvokeAI/files/14041411/InvokeAI-installer-v3.6.1.zip)
<!--
Please provide steps on how to test changes, any hardware or
software specifications as well as any other pertinent information.
-->
## Merge Plan
This PR can be merged when approved
## [optional] Are there any post deployment tasks we need to perform?
PyPI Release & GitHub Release
## What type of PR is this? (check all applicable)
- [x] Feature
## Have you discussed this change with the InvokeAI team?
- [x] Yes
## Have you updated all relevant documentation?
- [x] No
## Description
- This adds the newly released Depth Anything to InvokeAI. A new node
`Depth Anything Processor` has been added to generate depth maps using
this new technique. https://depth-anything.github.io
- All related checkpoints will be downloaded automatically on first
boot. The `DinoV2` models will be loaded to your torch cache dir and the
checkpoints pertaining to Depth Anything will be downloaded to
`any/annotators/depth_anything`.
- Alternatively you can find the checkpoints here and download them to
that folder:
https://huggingface.co/spaces/LiheYoung/Depth-Anything/tree/main/checkpoints
- This depth map can be used with any depth ControlNet model out there
but the folks at DepthAnything have also released a custom fine tuned
ControlNet model. From my limited testing, I still prefer the original
depth model because this one seems to be producing weird artifacts. Not
sure if that is a specific problem to Invoke or just the model itself.
I'll test more later. Place these in your controlnet folder like your
other ControlNets. You can get that here:
https://huggingface.co/spaces/LiheYoung/Depth-Anything/tree/main/checkpoints_controlnet
- Also available in the LinearUI
- DepthAnything has three models `large`, `base` and `small` -- I've
defaulted the processor to small but a user can change to the large
model if they wish to do so. Small is way faster but obviously somewhat
of a lesser quality.
- DepthAnything is now the default processor for depth controlnet
models.
## Screenshots

## Merge Plan
DO NOT MERGE YET. Test it first and I'm sure the model caching can be
done better. Coz I don't think I've done that at all. I would appreciate
if @brandonrising or @lstein or anyone can take a look at that part of
it.
* feat: ✨ "Remix Image" option on images
Adds a new "remix image" option where applicable, recalls all metadata except the seed
* refactor: 🚨 lint code
* feat: ✨ "Remix Image" option on images
Adds a new "remix image" option where applicable, recalls all metadata except the seed
* refactor: 🚨 lint code
* feat: ✨ add new remix hotkey to hotkeys modal
---------
Co-authored-by: psychedelicious <4822129+psychedelicious@users.noreply.github.com>
Remove `trim()` from model identifier schema, which prevented parsed model identifiers from matching.
The root issue here is that model names are identifiers. This will be resolved in the model manager refactor.
Closes#5556
- Bump `@invoke-ai/ui` for updated styles
- Update regex to parse prompts with newlines
- Update styling of overlay button when prompt has an error
- Fix bug where loading and error state sometimes weren't cleared
We had a one-behind issue with recalling metadata items that had a model.
For example, when recalling LoRAs, we check against the current main model to decide whether or not the requested LoRA is compatible and may be recalled.
When recalling all params, we are often also recalling the main model, but the compat logic didn't compare against this new main model.
The logic is updated to check against the new main model, if one is being set.
Closes#5512
## What type of PR is this? (check all applicable)
- [ ] Refactor
- [ ] Feature
- [ ] Bug Fix
- [ ] Optimization
- [x] Documentation Update
- [ ] Community Node Submission
## Description
Update UI README
## Merge Plan
This PR can be merged when approved
<!--
A merge plan describes how this PR should be handled after it is
approved.
Example merge plans:
- "This PR can be merged when approved"
- "This must be squash-merged when approved"
- "DO NOT MERGE - I will rebase and tidy commits before merging"
- "#dev-chat on discord needs to be advised of this change when it is
merged"
A merge plan is particularly important for large PRs or PRs that touch
the
database in any way.
-->
The frontend docs should just be in the frontend. This is a standard practice for monorepos with developer information for specific packages within the monorepo.
The Ideal Size node is useful for High-Res Optimization as it gives the optimum size for creating an initial generation with minimal artifacts (duplication and other strangeness) from today's models.
After inclusion, front end graph generation can be simplified by offloading calculations for HRO initial generation to this node.
The previous method wasn't totally foolproof, and locales/assets were cached.
To solve this once and for all (famous last words, I know), we can subclass `StaticFiles` and use maximally strict no-caching headers to disable caching on all static files.
Currently translated at 97.3% (1365 of 1402 strings)
translationBot(ui): update translation (Italian)
Currently translated at 97.3% (1365 of 1402 strings)
translationBot(ui): update translation (Italian)
Currently translated at 97.3% (1365 of 1402 strings)
translationBot(ui): update translation (Italian)
Currently translated at 97.3% (1365 of 1402 strings)
Co-authored-by: Riccardo Giovanetti <riccardo.giovanetti@gmail.com>
Translate-URL: https://hosted.weblate.org/projects/invokeai/web-ui/it/
Translation: InvokeAI/Web UI
* resolved conflicts
* changed logo and some design changes
* feedback changes
* resolved conflicts
* changed logo and some design changes
* feedback changes
* lint fixed
* added translations
* some requested changes done
* all feedback changes done and replace links in settingsmenu comp
* fixed the gap between deps verisons & chnaged heights
* feat(ui): minor about modal styling
* feat(ui): tag app endpoints with FetchOnReconnect
* fix(ui): remove unused translation string
---------
Co-authored-by: psychedelicious <4822129+psychedelicious@users.noreply.github.com>
Co-authored-by: Kent Keirsey <31807370+hipsterusername@users.noreply.github.com>
Use each language's own language for their option in the language select. This falls back to the english translation if the language name isn't translated.
* add basic functionality for model metadata fetching from hf and civitai
* add storage
* start unit tests
* add unit tests and documentation
* add missing dependency for pytests
* remove redundant fetch; add modified/published dates; updated docs
* add code to select diffusers files based on the variant type
* implement Civitai installs
* make huggingface parallel downloading work
* add unit tests for model installation manager
- Fixed race condition on selection of download destination path
- Add fixtures common to several model_manager_2 unit tests
- Added dummy model files for testing diffusers and safetensors downloading/probing
- Refactored code for selecting proper variant from list of huggingface repo files
- Regrouped ordering of methods in model_install_default.py
* improve Civitai model downloading
- Provide a better error message when Civitai requires an access token (doesn't give a 403 forbidden, but redirects
to the HTML of an authorization page -- arrgh)
- Handle case of Civitai providing a primary download link plus additional links for VAEs, config files, etc
* add routes for retrieving metadata and tags
* code tidying and documentation
* fix ruff errors
* add file needed to maintain test root diretory in repo for unit tests
* fix self->cls in classmethod
* add pydantic plugin for mypy
* use TestSession instead of requests.Session to prevent any internet activity
improve logging
fix error message formatting
fix logging again
fix forward vs reverse slash issue in Windows install tests
* Several fixes of problems detected during PR review:
- Implement cancel_model_install_job and get_model_install_job routes
to allow for better control of model download and install.
- Fix thread deadlock that occurred after cancelling an install.
- Remove unneeded pytest_plugins section from tests/conftest.py
- Remove unused _in_terminal_state() from model_install_default.
- Remove outdated documentation from several spots.
- Add workaround for Civitai API results which don't return correct
URL for the default model.
* fix docs and tests to match get_job_by_source() rather than get_job()
* Update invokeai/backend/model_manager/metadata/fetch/huggingface.py
Co-authored-by: Ryan Dick <ryanjdick3@gmail.com>
* Call CivitaiMetadata.model_validate_json() directly
Co-authored-by: Ryan Dick <ryanjdick3@gmail.com>
* Second round of revisions suggested by @ryanjdick:
- Fix type mismatch in `list_all_metadata()` route.
- Do not have a default value for the model install job id
- Remove static class variable declarations from non Pydantic classes
- Change `id` field to `model_id` for the sqlite3 `model_tags` table.
- Changed AFTER DELETE triggers to ON DELETE CASCADE for the metadata and tags tables.
- Made the `id` field of the `model_metadata` table into a primary key to achieve uniqueness.
* Code cleanup suggested in PR review:
- Narrowed the declaration of the `parts` attribute of the download progress event
- Removed auto-conversion of str to Url in Url-containing sources
- Fixed handling of `InvalidModelConfigException`
- Made unknown sources raise `NotImplementedError` rather than `Exception`
- Improved status reporting on cached HuggingFace access tokens
* Multiple fixes:
- `job.total_size` returns a valid size for locally installed models
- new route `list_models` returns a paged summary of model, name,
description, tags and other essential info
- fix a few type errors
* consolidated all invokeai root pytest fixtures into a single location
* Update invokeai/backend/model_manager/metadata/metadata_store.py
Co-authored-by: psychedelicious <4822129+psychedelicious@users.noreply.github.com>
* Small tweaks in response to review comments:
- Remove flake8 configuration from pyproject.toml
- Use `id` rather than `modelId` for huggingface `ModelInfo` object
- Use `last_modified` rather than `LastModified` for huggingface `ModelInfo` object
- Add `sha256` field to file metadata downloaded from huggingface
- Add `Invoker` argument to the model installer `start()` and `stop()` routines
(but made it optional in order to facilitate use of the service outside the API)
- Removed redundant `PRAGMA foreign_keys` from metadata store initialization code.
* Additional tweaks and minor bug fixes
- Fix calculation of aggregate diffusers model size to only count the
size of files, not files + directories (which gives different unit test
results on different filesystems).
- Refactor _get_metadata() and _get_download_urls() to have distinct code paths
for Civitai, HuggingFace and URL sources.
- Forward the `inplace` flag from the source to the job and added unit test for this.
- Attach cached model metadata to the job rather than to the model install service.
* fix unit test that was breaking on windows due to CR/LF changing size of test json files
* fix ruff formatting
* a few last minor fixes before merging:
- Turn job `error` and `error_type` into properties derived from the exception.
- Add TODO comment about the reason for handling temporary directory destruction
manually rather than using tempfile.tmpdir().
* add unit tests for reporting HTTP download errors
---------
Co-authored-by: Lincoln Stein <lstein@gmail.com>
Co-authored-by: Ryan Dick <ryanjdick3@gmail.com>
Co-authored-by: psychedelicious <4822129+psychedelicious@users.noreply.github.com>
Per user feedback, this is preferrable to letting them expand when the window grows.
Also bumps `react-resizable-panels` now that one of my PRs is merged to fix an issue.
## What type of PR is this? (check all applicable)
Release v3.6.0
## Have you discussed this change with the InvokeAI team?
- [X] Yes
- [ ] No, because:
## Have you updated all relevant documentation?
- [X] Yes
- [ ] No
## Description
Invoke v3.6.0
## QA Instructions, Screenshots, Recordings
[InvokeAI-installer-v3.6.0.zip](https://github.com/invoke-ai/InvokeAI/files/13923761/InvokeAI-installer-v3.6.0.zip)
## [optional] Are there any post deployment tasks we need to perform?
1. Release on PyPi
2. Release on GitHub
3. Announce in #releases
* feat: allow bfloat16 to be configurable in invoke.yaml
* fix: `torch_dtype()` util
- Use `choose_precision` to get the precision string
- Do not reference deprecated `config.full_precision` flat (why does this still exist?), if a user had this enabled it would override their actual precision setting and potentially cause a lot of confusion.
---------
Co-authored-by: psychedelicious <4822129+psychedelicious@users.noreply.github.com>
- Add various brand images, organise images
- Create favicon for docs pages (light blue version of key logo)
- Rename app title to `Invoke - Community Edition`
Add `FetchOnReconnect` tag, tagging relevant queries with it. This tag is invalidated in the socketConnected listener, when it is determined that the queue changed.
- Add checks to the "recovery" logic for socket connect events to reduce the number of network requests.
- Remove the `isInitialized` state from `systemSlice` and make it a nanostore local to the socketConnected listener. It didn't need to be global state. It's also now more clearly named `isFirstConnection`.
- Export the queue status selector (minor improvement, memoizes it correctly).
## What type of PR is this? (check all applicable)
Release v3.6.0rc6
## Have you discussed this change with the InvokeAI team?
- [X] Yes
- [ ] No, because:
## Have you updated all relevant documentation?
- [X] Yes
- [ ] No
## Description
Release candidate $6
## QA Instructions, Screenshots, Recordings
[InvokeAI-installer-v3.6.0rc6.zip](https://github.com/invoke-ai/InvokeAI/files/13890206/InvokeAI-installer-v3.6.0rc6.zip)
## Merge Plan
Merge when approved
## [optional] Are there any post deployment tasks we need to perform?
Release on PyPi & Github
- Fixed a bug where after you load more, changing boards doesn't work. The offset and limit for the list image query had some wonky logic, now resolved.
- Addressed major lag in gallery when selecting an image.
Both issues were related to the useMultiselect and useGalleryImages hooks, which caused every image in the gallery to re-render on whenever the selection changed. There's no way to memoize away this - we need to know when the selection changes. This is a longstanding issue.
The selection is only used in a callback, though - the onClick handler for an image to select it (or add it to the existing selection). We don't really need the reactivity for a callback, so we don't need to listen for changes to the selection.
The logic to handle multiple selection is moved to a new `galleryImageClicked` listener, which does all the selection right when it is needed.
The result is that gallery images no long need to do heavy re-renders on any selection change.
Besides the multiselect click handler, there was also inefficient use of DND payloads. Previously, the `IMAGE_DTOS` type had a payload of image DTO objects. This was only used to drag gallery selection into a board. There is no need to hold onto image DTOs when we have the selection state already in redux. We were recalculating this payload for every image, on every tick.
This payload is now just the board id (the only piece of information we need for this particular DND event).
- I also removed some unused DND types while making this change.
There was a lot of convoluted, janky logic related to trying to not mount the context menu's portal until its needed. This was in the library where the component was originally copied from.
I've removed that and resolved the jank, at the cost of there being an extra portal for each instance of the context menu. Don't think this is going to be an issue. If it is, the whole context menu could be refactored to be a singleton.
* ci: add docker build timout; log free space on runner before and after build
* docker: bump frontend builder to node=20.x; skip linting on build
* chore: gitignore .pnpm-store
* update code owners for docker and CI
---------
Co-authored-by: Millun Atluri <Millu@users.noreply.github.com>
I was troubleshooting a hotkeys issue on canvas and thought I had broken the tool logic in a past change so I redid it moving it to nanostores. In the end, the issue was an upstream but with the hotkeys library, but I like having tool in nanostores so I'm leaving it.
It's ephemeral interaction state anyways, doesn't need to be in redux.
There's a challenge to accomplish this due to our slice structure - the model is stored in `generationSlice`, but `canvasSlice` also needs to have awareness of it. For example, when the model changes, the canvas slice doesn't know what the previous model was, so it doesn't know whether or not to optimize the size.
This means we need to lift the "should we optimize size" information up. To do this, the `modelChanged` action creator accepts the previous model as an optional second arg.
Now the canvas has access to both the previous model and new model selection, and can decide whether or not it should optimize its size setting in the same way that the generation slice does.
Closes #5452
For some reason `ReturnType<typeof useListImagesQuery>` isn't working correctly, and destructuring `queryResult` it results in `any`, when the hook is used.
I've removed the explicit return typing so that consumers of the hook get correct types.
Organise deps into ~3 categories:
- Core generation dependencies, pinned for reproducible builds.
- Core application dependencies, pinned for reproducible builds.
- Auxiliary dependencies, pinned only if necessary.
I pinned / bumped these to latest:
- `controlnet_aux`
- `fastapi`
- `fastapi-events`
- `huggingface-hub`
- `numpy`
- `python-socketio`
- `torchmetrics`
- `transformers`
- `uvicorn`
I checked the release notes for these and didn't see any breaking changes that would affect us. There is a `fastapi` breaking change in v108 related to background tasks but it doesn't affect us.
I tested on a fresh venv. The app still works and I can generate on macOS.
Hopefully, enforcing explicit pinned versions will reduce the issues where people get CPU torch.
It also means we should periodically bump versions up to ensure we don't get too far behind on our dependencies and have to do painful upgrades.
Workflow building would fail when a current image node was in the workflow due to the strict validation.
So we need to use the other workflow builder util first, which strips out extraneous data.
This bug was introduced during an attempt to optimize the workflow building logic, which was causing slowdowns on the workflow editor.
* do not show toast if 403 is triggered by lack of image access
* remove log
* lint
---------
Co-authored-by: Mary Hipp <maryhipp@Marys-MacBook-Air.local>
## What type of PR is this? (check all applicable)
Release - InvokeAI v3.5.0rc5
## Have you discussed this change with the InvokeAI team?
- [X] Yes
- [ ] No, because:
## Have you updated all relevant documentation?
- [X] Yes
- [ ] No
## Description
Release - InvokeAI v3.5.0rc5
## QA Instructions, Screenshots, Recordings
[InvokeAI-installer-v3.6.0rc5.zip](https://github.com/invoke-ai/InvokeAI/files/13863661/InvokeAI-installer-v3.6.0rc5.zip)
## [optional] Are there any post deployment tasks we need to perform?
Releasee on PyPi & GitHub
* feat(ui): get rid of convoluted socket vs appSocket redux actions
There's no need to have `socket...` and `appSocket...` actions.
I did this initially due to a misunderstanding about the sequence of handling from middleware to reducers.
* feat(ui): bump deps
Mainly bumping to get latest `redux-remember`.
A change to socket.io required a change to the types in `useSocketIO`.
* chore(ui): format
* feat(ui): add error handling to redux persistence layer
- Add an error handler to `redux-remember` config using our logger
- Add custom errors representing storage set and get failures
- Update storage driver to raise these accordingly
- wrap method to clear idbkeyval storage and tidy its logic up
* feat(ui): add debuggingLoggerMiddleware
This simply logs every action and a diff of the state change.
Due to the noise this creates, it's not added by default at all. Add it to the middlewares if you want to use it.
* feat(ui): add $socket to window if in dev mode
* fix(ui): do not enable cancel hotkeys on inputs
* fix(ui): use JSON.stringify for ROARR logger serializer
A recent change to ROARR introduced limits to the size of data that will logged. This ends up making our logs far less useful. Change the serializer back to what it was previously.
* feat(ui): change diff util, update debuggerLoggerMiddleware
The previous diff library would present deleted things as `undefined`. Unfortunately, a JSON.stringify cycle will strip those values out. The ROARR logger does this and so the diffs end up being a lot less useful, not showing removed keys.
The new diff library uses a different format for the delta that serializes nicely.
* feat(ui): add migrations to redux persistence layer
- All persisted slices must now have a slice config, consisting of their initial state and a migrate callback. The migrate callback is very simple for now, with no type safety. It adds missing properties to the state. A future enhancement might be to model the each slice's state with e.g. zod and have proper validation and types.
- Persisted slices now have a `_version` property
- The migrate callback is called inside `redux-remember`'s `unserialize` handler. I couldn't figure out a good way to put this into the reducer and do logging (reducers should have no side effects). Also I ran into a weird race condition that I couldn't figure out. And finally, the typings are tricky. This works for now.
- `generationSlice` and `canvasSlice` both need migrations for the new aspect ratio setup, this has been added
- Stuff related to persistence has been moved in to `store.ts` for simplicity
* feat(ui): clean up StorageError class
* fix(ui): scale method default is now 'auto'
* feat(ui): when changing controlnet model, enable autoconfig
* fix(ui): make embedding popover immediately accessible
Prevents hotkeys from being captured when embeddings are still loading.
## What type of PR is this? (check all applicable)
- [ ] Refactor
- [ ] Feature
- [x] Bug Fix
- [ ] Optimization
- [ ] Documentation Update
- [ ] Community Node Submission
## Description
The new select component appears to close itself before calling the
onchange handler. This short-circuits the autoconnect logic. Tweaked so
the ordering is correct.
## Related Tickets & Documents
<!--
For pull requests that relate or close an issue, please include them
below.
For example having the text: "closes #1234" would connect the current
pull
request to issue 1234. And when we merge the pull request, Github will
automatically close the issue.
-->
- Closes#5425
## QA Instructions, Screenshots, Recordings
bug should be fixed
<!--
Please provide steps on how to test changes, any hardware or
software specifications as well as any other pertinent information.
-->
## Merge Plan
This PR can be merged when approved
<!--
A merge plan describes how this PR should be handled after it is
approved.
Example merge plans:
- "This PR can be merged when approved"
- "This must be squash-merged when approved"
- "DO NOT MERGE - I will rebase and tidy commits before merging"
- "#dev-chat on discord needs to be advised of this change when it is
merged"
A merge plan is particularly important for large PRs or PRs that touch
the
database in any way.
-->
The new select component appears to close itself before calling the onchange handler. This short-circuits the autoconnect logic. Tweaked so the ordering is correct.
Centralize the initial/min/max/etc values for all numerical params. We used this for some but at some point stopped updating it.
All numerical params now use their respective configs. Far fewer hardcoded values throughout the app now.
Also updated the config types a bit to better accommodate slider vs number input constraints.
- Use the virtuoso grid item container and list containers to calculate imagesPerRow, skipping manual compensation for padding of images
- Round the imagesPerRow instead of flooring - we often will end up with values like 4.99999 due to floating point precision
- Update `getDownImage` comments & logic to be clearer
- Use variables for the ids in query selectors, preventing future typos
- Only scroll if the new selected image is different from the prev one
- Fix preexisting bug where gallery network requests were duplicated when triggering infinite scroll
- Refactor `useNextPrevImage` to not use `state => state` as an input selector - logic split up into different hooks
- Remove use instant scroll for arrow key navigation - smooth scroll is janky when you hold the arrow down and it fires rapidly
- Move gallery nav hotkeys to GalleryImageGrid component, so they work whenever the gallery is open (previously didn't work on canvas or workflow editor tabs)
- Use nanostores for gallery grid refs instead of passing context with virtuoso's context feature, making it much simpler to do the imperative gallery nav
- General gallery hook/component cleanup
## What type of PR is this? (check all applicable)
Release v3.6.0rc4
## Have you discussed this change with the InvokeAI team?
- [X] Yes
- [ ] No, because:
## Have you updated all relevant documentation?
- [X] Yes
- [ ] No
## Description
Release for v3.6.0rc4
## Related Tickets & Documents
<!--
For pull requests that relate or close an issue, please include them
below.
For example having the text: "closes #1234" would connect the current
pull
request to issue 1234. And when we merge the pull request, Github will
automatically close the issue.
-->
- Related Issue #
- Closes #
## QA Instructions, Screenshots, Recordings
[Uploading InvokeAI-installer-v3.6.0rc4.zip…](Installer Zip)
<!--
Please provide steps on how to test changes, any hardware or
software specifications as well as any other pertinent information.
-->
## Merge Plan
- This PR can be merged when approved
<!--
A merge plan describes how this PR should be handled after it is
approved.
Example merge plans:
- "This PR can be merged when approved"
- "This must be squash-merged when approved"
- "DO NOT MERGE - I will rebase and tidy commits before merging"
- "#dev-chat on discord needs to be advised of this change when it is
merged"
A merge plan is particularly important for large PRs or PRs that touch
the
database in any way.
-->
## Added/updated tests?
- [ ] Yes
- [ ] No : _please replace this line with details on why tests
have not been included_
## [optional] Are there any post deployment tasks we need to perform?
Release on PyPi & GitHub
Pending resolution of https://github.com/reduxjs/reselect/issues/635, we can patch `reselect` to use `lruMemoize` exclusively.
Pin RTK and react-redux versions too just to be safe.
This reduces the major GC events that were causing lag/stutters in the app, particularly in canvas and workflow editor.
## What type of PR is this? (check all applicable)
Release v3.6.0rc3
## Have you discussed this change with the InvokeAI team?
- [X] Yes
- [ ] No, because:
## Have you updated all relevant documentation?
- [] Yes
- [X] No
## Description
Next release candidate
## Related Tickets & Documents
N/A
<!--
For pull requests that relate or close an issue, please include them
below.
For example having the text: "closes #1234" would connect the current
pull
request to issue 1234. And when we merge the pull request, Github will
automatically close the issue.
-->
- Related Issue #
- Closes #
## QA Instructions, Screenshots, Recordings
[Uploading InvokeAI-installer-v3.6.0rc3.zip…](Installer zip)
<!--
Please provide steps on how to test changes, any hardware or
software specifications as well as any other pertinent information.
-->
## Merge Plan
This PR can be merged when approved
<!--
A merge plan describes how this PR should be handled after it is
approved.
Example merge plans:
- "This PR can be merged when approved"
- "This must be squash-merged when approved"
- "DO NOT MERGE - I will rebase and tidy commits before merging"
- "#dev-chat on discord needs to be advised of this change when it is
merged"
A merge plan is particularly important for large PRs or PRs that touch
the
database in any way.
-->
## Added/updated tests?
- [ ] Yes
- [ ] No : _please replace this line with details on why tests
have not been included_
## [optional] Are there any post deployment tasks we need to perform?
Release on PyPI & Github
A bug that caused panels to be collapsed on a fresh indexedDb in was fixed in dd32c632cd, but this re-introduced a different bug that caused the panels to expand on window resize, if they were already collapsed.
Revert the previous change and instead add one imperative resize outside the observer, so that on startup, we set both panels to their minimum sizes.
* replace custom header with custom nav component to go below settings
* add option for custom gallery header
* add option for custom app info text on logo hover
* add data-testid for tabs
* remove descriptions
* lint
* lint
---------
Co-authored-by: Mary Hipp <maryhipp@Marys-MacBook-Air.local>
We are now using the lefthand vertical strip for the settings menu button. This is a good place for the status indicator.
Really, we only need to display something *if there is a problem*. If the app is processing, the progress bar indicates that.
For the case where the panels are collapsed, I'll add the floating buttons back in some form, and we'll indicate via those if the app is processing something.
just make it like a normal button - normal and hover state, no difference when its expanded. the icon clearly indicates this, and you see the extra components
On one hand I like the color but on the other it makes this divider a focus point, which doesn't really makes sense to me. I tried several shades but think it adds a bit too much distraction for your eyes.
There was an extra div, needed for the fullscreen file upload dropzone, that made styling the main app containers a bit awkward.
Refactor the uploader a bit to simplify this - no longer need so many app-level wrappers. Much cleaner.
Removed logic related to aspect ratio from the components.
When the main bbox changes, if the scale method is auto, the reducers will handle the scaled bbox size appropriately.
Somehow linking up the manual mode to the aspect ratio is tricky, and instead of adding complexity for a rarely-used mode, I'm leaving manual mode as fully manual.
Cannot figure out how to allow the bbox to be transformed when aspect ratio is locked from all handles. Only the bottom right handle works as expected.
As a workaround, when the aspect ratio is locked, you can only resize the bbox from the bottom right handle.
## What type of PR is this? (check all applicable)
Release
## Have you discussed this change with the InvokeAI team?
- [X] Yes
- [ ] No, because:
## Have you updated all relevant documentation?
- [X] Yes
- [ ] No
## Description
v3.6.0rc2 release
## Related Tickets & Documents
<!--
For pull requests that relate or close an issue, please include them
below.
For example having the text: "closes #1234" would connect the current
pull
request to issue 1234. And when we merge the pull request, Github will
automatically close the issue.
-->
- Related Issue #
- Closes #
## QA Instructions, Screenshots, Recordings
Test latest main & [Uploading
InvokeAI-installer-v3.6.0rc2.zip…](Installer zip)
## Merge Plan
PR can be merged immediately
<!--
A merge plan describes how this PR should be handled after it is
approved.
Example merge plans:
- "This PR can be merged when approved"
- "This must be squash-merged when approved"
- "DO NOT MERGE - I will rebase and tidy commits before merging"
- "#dev-chat on discord needs to be advised of this change when it is
merged"
A merge plan is particularly important for large PRs or PRs that touch
the
database in any way.
-->
## Added/updated tests?
- [ ] Yes
- [X] No : _please replace this line with details on why tests
have not been included_
## [optional] Are there any post deployment tasks we need to perform?
Publish release on PyPI and GitHub
- Do not _merge_ prompt and style prompt when concat is enabled - either use the prompt as style, or use the style directly.
- Set style prompt metadata correctly.
- Add metadata recall for style prompt.
`react-select` has some weird behaviour where if the value is `undefined`, it shows the last-selected value instead of nothing. Must fall back to `null`
Ensure workflow editor model selector component gets a value
This introduced some funky type issues related to ONNX models. ONNX doesn't work anyways (unmaintained). Instead of fixing the types to work with a non-working feature, ONNX is now removed entirely from the UI.
- Remove all refs to ONNX (and Olives)
- Fix some type issues
- Add ONNX nodes to the nodes denylist (so they are not visible in UI)
- Update VAE graph helper, which still had some ONNX logic. It's a very simple change and doesn't change any logic. Just removes some conditions that were for ONNX. I tested it and nothing broke.
- Regenerate types
- Fix prettier and eslint ignores for generated types
- Lint
* Udpater suggest db backup when installing RC
* Update invokeai_update.py to be more specific
* Update invokeai_update.py
* Update invokeai_update.py
* Update invokeai_update.py
* Update invokeai_update.py
* Update docker-compose.yml to bind local data path
* Update LOCAL_DATA_PATH in .env.sample
* Add fallback to INVOKEAI_ROOT envar if LOCAL_DATA_PATH not present.
* rename LOCAL_DATA_PATH to INVOKAI_LOCAL_ROOT
* Whoops, didnt mean to include this
* Update docker/docker-compose.yml
Co-authored-by: Eugene Brodsky <ebr@users.noreply.github.com>
* [chore] rename envar
* Apply suggestions from code review
---------
Co-authored-by: Eugene Brodsky <ebr@users.noreply.github.com>
- Prompt must have an open curly brace followed by a close curly brace to enable dynamic prompts processing
- If a the given prompt already had a dynamic prompt cached, do not re-process
- If processing is not needed, user may invoke immediately
- Invoke button shows loading state when dynamic prompts are processing, tooltip says generating
- Dynamic prompts preview icon in prompt box shows loading state when processing, tooltip says generating
- Support grid size of 8 on canvas
- Internal canvas math works on 8
- Update gridlines rendering to show 64 spaced lines and 32/16/8 when zoomed in
- Bbox manipulation defaults to grid of 64 - hold shift to get grid of 8
Besides being something we support internally, supporting 8 on canvas avoids a lot of hacky logic needed to work well with aspect ratios.
Canvas and non-canvas have separate width and height and need their own separate aspect ratios. In order to not duplicate a lot of aspect ratio logic, the components relating to image size have been modularized.
- Fix `weight` and `begin_step_percent`, the constraints were mixed up
- Add model validatort to ensure `begin_step_percent < end_step_percent`
- Bump version
## What type of PR is this? (check all applicable)
InvokeAI 3.6.0rc1 Release
## Have you discussed this change with the InvokeAI team?
- [X] Yes
- [ ] No, because:
## Have you updated all relevant documentation?
- [X] Yes
- [ ] No
## Description
Update version & frontend build for Invoke v3.6.0rc1
## Related Tickets & Documents
<!--
For pull requests that relate or close an issue, please include them
below.
For example having the text: "closes #1234" would connect the current
pull
request to issue 1234. And when we merge the pull request, Github will
automatically close the issue.
-->
- Related Issue #
- Closes #
## QA Instructions, Screenshots, Recordings
<!--
Please provide steps on how to test changes, any hardware or
software specifications as well as any other pertinent information.
-->
## Merge Plan
<!--
A merge plan describes how this PR should be handled after it is
approved.
Example merge plans:
- "This PR can be merged when approved"
- "This must be squash-merged when approved"
- "DO NOT MERGE - I will rebase and tidy commits before merging"
- "#dev-chat on discord needs to be advised of this change when it is
merged"
A merge plan is particularly important for large PRs or PRs that touch
the
database in any way.
-->
## Added/updated tests?
- [ ] Yes
- [ ] No : _please replace this line with details on why tests
have not been included_
## [optional] Are there any post deployment tasks we need to perform?
Upload release to PyPI & create release on GitHub
- Store workflow in nanostore as singleton instead of building for each consumer
- Debounce the build (already was indirectly debounced)
- When the workflow is needed, imperatively grab it from the nanostores, instead of letting react handle it via reactivity
This drastically reduces the computation needed when moving the cursor. It also correctly separates ephemeral interaction state from redux, where it is not needed.
Also removed some unused canvas state.
This uses the previous implementation of the memoization function in reselect. It's possible for the new weakmap-based memoization to cause memory leaks in certain scenarios, so we will avoid it for now.
## What type of PR is this? (check all applicable)
Release v3.5.1
## Have you discussed this change with the InvokeAI team?
- [X] Yes
- [ ] No, because:
## Have you updated all relevant documentation?
- [X] Yes
- [ ] No
## Description
InvokeAI v3.5.1 release
## [optional] Are there any post deployment tasks we need to perform?
1. Release on PyPi
2. Create GH release
3. Annonce on Discord
## What type of PR is this? (check all applicable)
- [ ] Refactor
- [X] Feature
- [ ] Bug Fix
- [ ] Optimization
- [ ] Documentation Update
- [ ] Community Node Submission
## Have you discussed this change with the InvokeAI team?
- [X] Yes
- [ ] No, because:
## Have you updated all relevant documentation?
- [ ] Yes
- [X] No
## Description
Add Tiled Upscaling to default workflows
## Related Tickets & Documents
<!--
For pull requests that relate or close an issue, please include them
below.
For example having the text: "closes #1234" would connect the current
pull
request to issue 1234. And when we merge the pull request, Github will
automatically close the issue.
-->
- Related Issue #
- Closes #
## QA Instructions, Screenshots, Recordings
<!--
Please provide steps on how to test changes, any hardware or
software specifications as well as any other pertinent information.
-->
## Merge Plan
<!--
A merge plan describes how this PR should be handled after it is
approved.
Example merge plans:
- "This PR can be merged when approved"
- "This must be squash-merged when approved"
- "DO NOT MERGE - I will rebase and tidy commits before merging"
- "#dev-chat on discord needs to be advised of this change when it is
merged"
A merge plan is particularly important for large PRs or PRs that touch
the
database in any way.
-->
## Added/updated tests?
- [ ] Yes
- [ ] No : _please replace this line with details on why tests
have not been included_
## [optional] Are there any post deployment tasks we need to perform?
If the user specifies `torch-sdp` as the attention type in `config.yaml`, we can go ahead and use it (if available) rather than always throwing an exception.
## What type of PR is this? (check all applicable)
- [X] Refactor
- [ ] Feature
- [ ] Bug Fix
- [ ] Optimization
- [ ] Documentation Update
- [ ] Community Node Submission
## Have you discussed this change with the InvokeAI team?
- [x] Yes
- [ ] No, because:
## Have you updated all relevant documentation?
- [X] Yes
- [ ] No
## Description
To release 3.5.0 successfully, a front end build needed to be in the
repo so that it would be included in the invokeai package distributed on
PyPi.
This PR remove the frontend build and updates the frontend gitignore to
not include the build.
## QA Instructions, Screenshots, Recordings
<!--
Please provide steps on how to test changes, any hardware or
software specifications as well as any other pertinent information.
-->
## Added/updated tests?
- [ ] Yes
- [X] No : _please replace this line with details on why tests
have not been included_
## [optional] Are there any post deployment tasks we need to perform?
N/A
## What type of PR is this? (check all applicable)
- [ ] Refactor
- [ ] Feature
- [X] Bug Fix
- [ ] Optimization
- [ ] Documentation Update
- [ ] Community Node Submission
## Have you discussed this change with the InvokeAI team?
- [ ] Yes
- [X] No, because: it's a simple fix
## Have you updated all relevant documentation?
- [X] Yes
- [ ] No
## Description
if there are two multi vector TI in a prompt eg `<ti-1> <ti-2>` with
ti-1 has vector size 16 and ti-2 has vector size 8 then the second one
uses the first ti_embedding.shape[0] and you get errors like eg
"<ti-2-!pad-8> is not found" because ti-2 only has vector size 8 but the
code is taking the wrong ti_embedding.shape[0]
## Related Tickets & Documents
<!--
For pull requests that relate or close an issue, please include them
below.
For example having the text: "closes #1234" would connect the current
pull
request to issue 1234. And when we merge the pull request, Github will
automatically close the issue.
-->
- Related Issue #
- Closes #
## QA Instructions, Screenshots, Recordings
<!--
Please provide steps on how to test changes, any hardware or
software specifications as well as any other pertinent information.
-->
## Merge Plan
<!--
A merge plan describes how this PR should be handled after it is
approved.
Example merge plans:
- "This PR can be merged when approved"
- "This must be squash-merged when approved"
- "DO NOT MERGE - I will rebase and tidy commits before merging"
- "#dev-chat on discord needs to be advised of this change when it is
merged"
A merge plan is particularly important for large PRs or PRs that touch
the
database in any way.
-->
## Added/updated tests?
- [ ] Yes
- [ ] No : _please replace this line with details on why tests
have not been included_
## [optional] Are there any post deployment tasks we need to perform?
## What type of PR is this? (check all applicable)
InvokeAI v3.5.0
## Have you discussed this change with the InvokeAI team?
- [X] Yes
- [ ] No, because:
## Have you updated all relevant documentation?
- [X] Yes
- [ ] No
## Description
3.5.0 release
## QA Instructions, Screenshots, Recordings
Test Installer:
[InvokeAI-installer-v3.5.0.zip](https://github.com/invoke-ai/InvokeAI/files/13776161/InvokeAI-installer-v3.5.0.zip)
## Added/updated tests?
- [ ] Yes
- [ ] No : _please replace this line with details on why tests
have not been included_
## [optional] Are there any post deployment tasks we need to perform?
* Update front end .gitignore & remove the fe build
## What type of PR is this? (check all applicable)
- [ ] Refactor
- [ ] Feature
- [X] Bug Fix
- [ ] Optimization
- [ ] Documentation Update
- [ ] Community Node Submission
## Have you discussed this change with the InvokeAI team?
- [ ] Yes
- [ ] No, because:
## Have you updated all relevant documentation?
- [ ] Yes
- [ ] No
## Description
## Related Tickets & Documents
<!--
For pull requests that relate or close an issue, please include them
below.
For example having the text: "closes #1234" would connect the current
pull
request to issue 1234. And when we merge the pull request, Github will
automatically close the issue.
-->
- Related Issue #
- Closes #
## QA Instructions, Screenshots, Recordings
<!--
Please provide steps on how to test changes, any hardware or
software specifications as well as any other pertinent information.
-->
## Merge Plan
<!--
A merge plan describes how this PR should be handled after it is
approved.
Example merge plans:
- "This PR can be merged when approved"
- "This must be squash-merged when approved"
- "DO NOT MERGE - I will rebase and tidy commits before merging"
- "#dev-chat on discord needs to be advised of this change when it is
merged"
A merge plan is particularly important for large PRs or PRs that touch
the
database in any way.
-->
## Added/updated tests?
- [ ] Yes
- [ ] No : _please replace this line with details on why tests
have not been included_
## [optional] Are there any post deployment tasks we need to perform?
## What type of PR is this? (check all applicable)
- [ ] Refactor
- [ ] Feature
- [x] Bug Fix
- [ ] Optimization
- [ ] Documentation Update
- [ ] Community Node Submission
## Have you discussed this change with the InvokeAI team?
- [x] Yes
- [ ] No, because:
## Description
For example, if PIL tries to open a *really* big image, it will raise an
exception to prevent reading a huge object into memory.
## Related Tickets & Documents
<!--
For pull requests that relate or close an issue, please include them
below.
For example having the text: "closes #1234" would connect the current
pull
request to issue 1234. And when we merge the pull request, Github will
automatically close the issue.
-->
-
https://discord.com/channels/1020123559063990373/1149513695567810630/1186200089149046804
## QA Instructions, Screenshots, Recordings
This should fix the error in the discord thread
<!--
Please provide steps on how to test changes, any hardware or
software specifications as well as any other pertinent information.
-->
## Merge Plan
Can be merged when @Millu confirms it fixes the issue he ran into
<!--
A merge plan describes how this PR should be handled after it is
approved.
Example merge plans:
- "This PR can be merged when approved"
- "This must be squash-merged when approved"
- "DO NOT MERGE - I will rebase and tidy commits before merging"
- "#dev-chat on discord needs to be advised of this change when it is
merged"
A merge plan is particularly important for large PRs or PRs that touch
the
database in any way.
-->
* add base definition of download manager
* basic functionality working
* add unit tests for download queue
* add documentation and FastAPI route
* fix docs
* add missing test dependency; fix import ordering
* fix file path length checking on windows
* fix ruff check error
* move release() into the __del__ method
* disable testing of stderr messages due to issues with pytest capsys fixture
* fix unsorted imports
* harmonized implementation of start() and stop() calls in download and & install modules
* Update invokeai/app/services/download/download_base.py
Co-authored-by: Ryan Dick <ryanjdick3@gmail.com>
* replace test datadir fixture with tmp_path
* replace DownloadJobBase->DownloadJob in download manager documentation
* make source and dest arguments to download_queue.download() an AnyHttpURL and Path respectively
* fix pydantic typecheck errors in the download unit test
* ruff formatting
* add "job cancelled" as an event rather than an exception
* fix ruff errors
* Update invokeai/app/services/download/download_default.py
Co-authored-by: psychedelicious <4822129+psychedelicious@users.noreply.github.com>
* use threading.Event to stop service worker threads; handle unfinished job edge cases
* remove dangling STOP job definition
* fix ruff complaint
* fix ruff check again
* avoid race condition when start() and stop() are called simultaneously from different threads
* avoid race condition in stop() when a job becomes active while shutting down
---------
Co-authored-by: Lincoln Stein <lstein@gmail.com>
Co-authored-by: Ryan Dick <ryanjdick3@gmail.com>
Co-authored-by: psychedelicious <4822129+psychedelicious@users.noreply.github.com>
Co-authored-by: Kent Keirsey <31807370+hipsterusername@users.noreply.github.com>
The graph library occasionally causes issues when the default graph changes substantially between versions and pydantic validation fails. See #5289 for an example.
We are not currently using the graph library, so we can disable it until we are ready to use it. It's possible that the workflow library will supersede it anyways.
* remove MacOS Sonoma check in devices.py
As of pytorch 2.1.0, float16 works with our MPS fixes on Sonoma, so the check is no longer needed.
* remove unused platform import
The project is no longer using yarn as a package manager and have moved
to pnpm, So I wanted to update the documentation on the contribution
page.
## What type of PR is this? (check all applicable)
- [ ] Refactor
- [ ] Feature
- [ ] Bug Fix
- [ ] Optimization
- [x] Documentation Update
- [ ] Community Node Submission
## Have you discussed this change with the InvokeAI team?
- [x] Yes
- [] No, because:
I spoke with user: imic in the #dev-chat on discord.
## Have you updated all relevant documentation?
- [x] Yes
- [ ] No
## Merge Plan
- "This PR can be merged when approved"
## What type of PR is this? (check all applicable)
- [ ] Refactor
- [X] Feature
- [ ] Bug Fix
- [ ] Optimization
- [ ] Documentation Update
- [ ] Community Node Submission
## Have you discussed this change with the InvokeAI team?
- [X] Yes
- [ ] No, because:
## Have you updated all relevant documentation?
- [X] Yes
- [ ] No
## Description
Added more default workflows to the workflow library
## Related Tickets & Documents
<!--
For pull requests that relate or close an issue, please include them
below.
For example having the text: "closes #1234" would connect the current
pull
request to issue 1234. And when we merge the pull request, Github will
automatically close the issue.
-->
- Related Issue #
- Closes #
## QA Instructions, Screenshots, Recordings
<!--
Please provide steps on how to test changes, any hardware or
software specifications as well as any other pertinent information.
-->
## Merge Plan
<!--
A merge plan describes how this PR should be handled after it is
approved.
Example merge plans:
- "This PR can be merged when approved"
- "This must be squash-merged when approved"
- "DO NOT MERGE - I will rebase and tidy commits before merging"
- "#dev-chat on discord needs to be advised of this change when it is
merged"
A merge plan is particularly important for large PRs or PRs that touch
the
database in any way.
-->
## Added/updated tests?
- [ ] Yes
- [ ] No : _please replace this line with details on why tests
have not been included_
## [optional] Are there any post deployment tasks we need to perform?
* add code to repopulate model config records after schema update
* reformat for ruff
* migrate model records using db cursor rather than the ModelRecordConfigService
* ruff fixes
* tweak exception reporting
* fix: build frontend in pypi-release workflow
This was missing, resulting in the 3.5.0rc1 having no frontend.
* fix: use node 18, set working directory
- Node 20 has a problem with `pnpm`; set it to Node 18
- Set the working directory for the frontend commands
* Don't copy extraneous paths into installer .zip
* feat(installer): delete frontend build after creating installer
This prevents an empty `dist/` from breaking the app on startup.
* feat: add python dist as release artifact, as input to enable publish to pypi
- The release workflow never runs automatically. It must be manually kicked off.
- The release workflow has an input. When running it from the GH actions UI, you will see a "Publish build on PyPi" prompt. If this value is "true", the workflow will upload the build to PyPi, releasing it. If this is anything else (e.g. "false", the default), the workflow will build but not upload to PyPi.
- The `dist/` folder (where the python package is built) is uploaded as a workflow artifact as a zip file. This can be downloaded and inspected. This allows "dry" runs of the workflow.
- The workflow job and some steps have been renamed to clarify what they do
* translationBot(ui): update translation files
Updated by "Cleanup translation files" hook in Weblate.
Co-authored-by: Hosted Weblate <hosted@weblate.org>
Translate-URL: https://hosted.weblate.org/projects/invokeai/web-ui/
Translation: InvokeAI/Web UI
* freeze yaml migration logic at upgrade to 3.5
* moved migration code to migration_3
---------
Co-authored-by: Lincoln Stein <lstein@gmail.com>
Co-authored-by: psychedelicious <4822129+psychedelicious@users.noreply.github.com>
Co-authored-by: Hosted Weblate <hosted@weblate.org>
## What type of PR is this? (check all applicable)
- [ ] Refactor
- [ ] Feature
- [ ] Bug Fix
- [X] Optimization
- [ ] Documentation Update
- [ ] Community Node Submission
## Have you discussed this change with the InvokeAI team?
- [X] Yes
- [ ] No, because:
## Have you updated all relevant documentation?
- [ ] Yes
- [X] No
## Description
Updater script pulls from PyPI instead of GitHub releases (this is why
the RC packages are having issues when updating through the launcher
script)
## Related Tickets & Documents
<!--
For pull requests that relate or close an issue, please include them
below.
For example having the text: "closes #1234" would connect the current
pull
request to issue 1234. And when we merge the pull request, Github will
automatically close the issue.
-->
- Related Issue #
- Closes #
## QA Instructions, Screenshots, Recordings
<!--
Please provide steps on how to test changes, any hardware or
software specifications as well as any other pertinent information.
-->
## Merge Plan
<!--
A merge plan describes how this PR should be handled after it is
approved.
Example merge plans:
- "This PR can be merged when approved"
- "This must be squash-merged when approved"
- "DO NOT MERGE - I will rebase and tidy commits before merging"
- "#dev-chat on discord needs to be advised of this change when it is
merged"
A merge plan is particularly important for large PRs or PRs that touch
the
database in any way.
-->
## Added/updated tests?
- [ ] Yes
- [X] No : _please replace this line with details on why tests
have not been included_
## [optional] Are there any post deployment tasks we need to perform?
## What type of PR is this? (check all applicable)
- [ ] Refactor
- [ ] Feature
- [x] Bug Fix
- [ ] Optimization
- [ ] Documentation Update
- [ ] Community Node Submission
## Have you updated all relevant documentation?
- [x] Yes (N/A)
- [ ] No
## Description
This change enables the model probe to work with TI embeddings that have
the follow state_dict structure:
```python
{
"<any_key>": torch.Tensor(...), # where the tensor has shape (N, embedding_dim)
}
```
## QA Instructions, Screenshots, Recordings
I can't imagine an embedding format that would previously have passed
the model probe, and would now fail after this change. That being said,
I'll exercise a bunch of existing TIs before merging.
- [x] Exercise existing TI formats
## Added/updated tests?
- [ ] Yes
- [x] No : _We could really benefit from tests for all of the supported
TI formats... but I'm not taking on that project right now._
## What type of PR is this? (check all applicable)
- [X] Refactor
- [ ] Feature
- [ ] Bug Fix
- [ ] Optimization
- [ ] Documentation Update
- [ ] Community Node Submission
## Have you discussed this change with the InvokeAI team?
- [X] Yes
- [ ] No, because:
## Have you updated all relevant documentation?
- [X] Yes
- [ ] No
## Description
As discussed with @psychedelicious , this PR changes the swagger label
on the model manager V2 routes to `model_manager_v2_unstable` in order
to warn community members that the API is liable to change.
## Related Tickets & Documents
<!--
For pull requests that relate or close an issue, please include them
below.
For example having the text: "closes #1234" would connect the current
pull
request to issue 1234. And when we merge the pull request, Github will
automatically close the issue.
-->
- Related Issue #
- Closes #
## QA Instructions, Screenshots, Recordings
<!--
Please provide steps on how to test changes, any hardware or
software specifications as well as any other pertinent information.
-->
## Merge Plan
<!--
A merge plan describes how this PR should be handled after it is
approved.
Example merge plans:
- "This PR can be merged when approved"
- "This must be squash-merged when approved"
- "DO NOT MERGE - I will rebase and tidy commits before merging"
- "#dev-chat on discord needs to be advised of this change when it is
merged"
A merge plan is particularly important for large PRs or PRs that touch
the
database in any way.
-->
## Added/updated tests?
- [ ] Yes
- [ ] No : _please replace this line with details on why tests
have not been included_
## [optional] Are there any post deployment tasks we need to perform?
## What type of PR is this? (check all applicable)
- [ ] Refactor
- [x] Feature
- [ ] Bug Fix
- [ ] Optimization
- [ ] Documentation Update
- [ ] Community Node Submission
## Have you discussed this change with the InvokeAI team?
- [x] Yes
- [ ] No, because:
## Have you updated all relevant documentation?
- [ ] Yes
- [x] No
## Description
Change CalculateImageTilesEvenSplitInvocation to have an overlap in
pixels rather than as a percentage of the tile. This makes it easier to
have predictable blending of the seams as you have a known overlap size.
## Related Tickets & Documents
<!--
For pull requests that relate or close an issue, please include them
below.
For example having the text: "closes #1234" would connect the current
pull
request to issue 1234. And when we merge the pull request, Github will
automatically close the issue.
-->
- Related Issue #
- Closes #
## QA Instructions, Screenshots, Recordings
<!--
Please provide steps on how to test changes, any hardware or
software specifications as well as any other pertinent information.
-->
## Merge Plan
<!--
A merge plan describes how this PR should be handled after it is
approved.
Example merge plans:
- "This PR can be merged when approved"
- "This must be squash-merged when approved"
- "DO NOT MERGE - I will rebase and tidy commits before merging"
- "#dev-chat on discord needs to be advised of this change when it is
merged"
A merge plan is particularly important for large PRs or PRs that touch
the
database in any way.
-->
## Added/updated tests?
- [x] Yes
- [ ] No : _please replace this line with details on why tests
have not been included_
## [optional] Are there any post deployment tasks we need to perform?
## What type of PR is this? (check all applicable)
- [x] Refactor
- [x] Feature
- [ ] Bug Fix
- [ ] Optimization
- [ ] Documentation Update
- [ ] Community Node Submission
## Have you discussed this change with the InvokeAI team?
- [x] Yes -
https://github.com/invoke-ai/InvokeAI/pull/5007#discussion_r1378792615
- [ ] No, because:
## Have you updated all relevant documentation?
- [x] Yes
- [ ] No
## Description
Simplify Docker image creation and execution to a single script that
spins up the right service in the docker compose file.
## Related Tickets & Documents
<!--
For pull requests that relate or close an issue, please include them
below.
For example having the text: "closes #1234" would connect the current
pull
request to issue 1234. And when we merge the pull request, Github will
automatically close the issue.
-->
- Depends on #5007
## QA Instructions, Screenshots, Recordings
N/A
<!--
Please provide steps on how to test changes, any hardware or
software specifications as well as any other pertinent information.
-->
## Added/updated tests?
- [ ] Yes
- [x] No : same tests should work.
## [optional] Are there any post deployment tasks we need to perform?
Not to my knowledge.
## What type of PR is this? (check all applicable)
- [ ] Refactor
- [ ] Feature
- [x] Bug Fix
- [ ] Optimization
- [ ] Documentation Update
- [ ] Community Node Submission
## Have you discussed this change with the InvokeAI team?
- [x] Yes
- [ ] No, because:
## Description
This was missing, resulting in the 3.5.0rc1 having no frontend.
## Related Tickets & Documents
<!--
For pull requests that relate or close an issue, please include them
below.
For example having the text: "closes #1234" would connect the current
pull
request to issue 1234. And when we merge the pull request, Github will
automatically close the issue.
-->
- Discord installer thread:
https://discord.com/channels/1020123559063990373/1149513695567810630/1185200427717898260
- Comments from here in the release chat:
https://discord.com/channels/1020123559063990373/1020123559831539744/1185004017521279007
## QA Instructions, Screenshots, Recordings
I've run this locally and it works (I commented out the final steps of
the workflow that do PyPi stuff to ensure I didn't accidentally deploy
something).
You can run the workflow locally with https://github.com/nektos/act.
Suggest using the `gh` CLI version, its very easy to set up if you have
the github CLI installed. Then you can run `gh act -W
.github/workflows/pypi-release.yml` to run the workflow locally in a
docker image.
I don't know this local action runner would actually release to PyPi -
as mentioned, I commented those steps out when testing - but it does
successfully do both frontend and backend builds.
<!--
Please provide steps on how to test changes, any hardware or
software specifications as well as any other pertinent information.
-->
## Merge Plan
This needs @lstein 's approval.
<!--
A merge plan describes how this PR should be handled after it is
approved.
Example merge plans:
- "This PR can be merged when approved"
- "This must be squash-merged when approved"
- "DO NOT MERGE - I will rebase and tidy commits before merging"
- "#dev-chat on discord needs to be advised of this change when it is
merged"
A merge plan is particularly important for large PRs or PRs that touch
the
database in any way.
-->
## [optional] Are there any post deployment tasks we need to perform?
Cut an RC2
- The release workflow never runs automatically. It must be manually kicked off.
- The release workflow has an input. When running it from the GH actions UI, you will see a "Publish build on PyPi" prompt. If this value is "true", the workflow will upload the build to PyPi, releasing it. If this is anything else (e.g. "false", the default), the workflow will build but not upload to PyPi.
- The `dist/` folder (where the python package is built) is uploaded as a workflow artifact as a zip file. This can be downloaded and inspected. This allows "dry" runs of the workflow.
- The workflow job and some steps have been renamed to clarify what they do
The VAE decode on linear graphs was getting cached. This caused some unexpected behaviour around image outputs.
For example, say you ran the exact same graph twice. The first time, you get an image written to disk and added to gallery. The second time, the VAE decode is cached and no image file is created. But, the UI still gets the graph complete event and selects the first image in the gallery. The second run does not add an image to the gallery.
There are probbably edge cases related to this - the UI does not expect this to happen. I'm not sure how to handle it any better in the UI.
The solution is to not cache VAE decode on the linear graphs, ever. If you run a graph twice in linear, you expect two images.
This simple change disables the node cache for terminal VAE decode nodes in all linear graphs, ensuring you always get images. If they graph was fully cached, all images after the first will be created very quickly of course.
## What type of PR is this? (check all applicable)
- [ ] Refactor
- [X] Feature
- [ ] Bug Fix
- [ ] Optimization
- [ ] Documentation Update
- [ ] Community Node Submission
## Have you discussed this change with the InvokeAI team?
- [X] Yes
- [ ] No, because:
## Have you updated all relevant documentation?
- [X] Yes
- [ ] No
## Description
This adds a probe for the SDXL LoRA format found in the wild at
https://civitai.com/models/224641.
## Related Tickets & Documents
<!--
For pull requests that relate or close an issue, please include them
below.
For example having the text: "closes #1234" would connect the current
pull
request to issue 1234. And when we merge the pull request, Github will
automatically close the issue.
-->
See discord message at:
https://discord.com/channels/1020123559063990373/1149510134058471514/1184982133912113182
## QA Instructions, Screenshots, Recordings
Try installing the SDXL LoRA at the URL given above.
## Merge Plan
This can be merged when approved.
## Added/updated tests?
- [ ] Yes
- [X] No : we do not yet have a comprehensive suite of models to test
probing on.
## [optional] Are there any post deployment tasks we need to perform?
## What type of PR is this? (check all applicable)
- [ ] Refactor
- [X] Feature
- [ ] Bug Fix
- [ ] Optimization
- [ ] Documentation Update
- [ ] Community Node Submission
## Have you discussed this change with the InvokeAI team?
- [X] Yes
- [ ] No, because:
## Have you updated all relevant documentation?
- [X] Yes
- [ ] No
## Description
This minor change adds the ability to filter the model lists returned by
V2 of the model manager using the model file format (e.g. "checkpoint").
Just thought this would be a useful feature.
## Related Tickets & Documents
<!--
For pull requests that relate or close an issue, please include them
below.
For example having the text: "closes #1234" would connect the current
pull
request to issue 1234. And when we merge the pull request, Github will
automatically close the issue.
-->
- Related Issue #
- Closes #
## QA Instructions, Screenshots, Recordings
<!--
Please provide steps on how to test changes, any hardware or
software specifications as well as any other pertinent information.
-->
## Merge Plan
This can be merged when approved without any adverse effects.
<!--
A merge plan describes how this PR should be handled after it is
approved.
Example merge plans:
- "This PR can be merged when approved"
- "This must be squash-merged when approved"
- "DO NOT MERGE - I will rebase and tidy commits before merging"
- "#dev-chat on discord needs to be advised of this change when it is
merged"
A merge plan is particularly important for large PRs or PRs that touch
the
database in any way.
-->
## Added/updated tests?
- [ ] Yes
- [X] No : minor feature - tested informally using the router API
## [optional] Are there any post deployment tasks we need to perform?
## What type of PR is this? (check all applicable)
- [ ] Refactor
- [ ] Feature
- [ ] Bug Fix
- [ ] Optimization
- [ x ] Documentation Update
- [ ] Community Node Submission
## Have you discussed this change with the InvokeAI team?
- [ x ] Yes
- [ ] No, because:
## Have you updated all relevant documentation?
- [ x ] Yes
- [ ] No
## Description
This adds the Kapa assistant to our docs.
- "Reset Workflow Editor" -> "New Workflow"
- "New Workflow" gets nodes icon & is no longer danger coloured
- When creating a new workflow, if the current workflow has unsaved changes, you get a dialog asking for confirmation. If the current workflow is saved, it immediately creates a new workflow.
- "Download Workflow" -> "Save to File"
- "Upload Workflow" -> "Load from File"
- Moved "Load from File" up 1 in the menu
This model was a bit too strict, and raised validation errors when workflows we expect to *not* have an ID (eg, an embedded workflow) have one.
Now it strips unknown attributes, allowing those workflows to load.
- Handle an image file not existing despite being in the database.
- Add a simple pydantic model that tests only for the existence of a workflow's version.
- Check against this new model when migrating workflows, skipping if the workflow fails validation. If it succeeds, the frontend should be able to handle the workflow.
Currently translated at 98.1% (1340 of 1365 strings)
translationBot(ui): update translation (Russian)
Currently translated at 84.2% (1150 of 1365 strings)
translationBot(ui): update translation (Russian)
Currently translated at 83.1% (1135 of 1365 strings)
Co-authored-by: Васянатор <ilabulanov339@gmail.com>
Translate-URL: https://hosted.weblate.org/projects/invokeai/web-ui/ru/
Translation: InvokeAI/Web UI
## What type of PR is this? (check all applicable)
- [ ] Refactor
- [ ] Feature
- [ ] Bug Fix
- [ X ] Optimization
- [ ] Documentation Update
- [ ] Community Node Submission
## Have you discussed this change with the InvokeAI team?
- [ ] Yes
- [ X ] No, because: dependency bump
## Have you updated all relevant documentation?
- [ ] Yes
- [ x ] No
## Description
Updating diffusers to .24 - fixes a few issues. Needs to be tested to
ensure things like our IP Adapter implementation don't break
## What type of PR is this? (check all applicable)
- [x] Refactor
- [x] Feature
- [ ] Bug Fix
- [x] Optimization
- [ ] Documentation Update
- [ ] Community Node Submission
## Have you discussed this change with the InvokeAI team?
- [x] Yes
- [ ] No, because:
## Description
This PR enhances our SQLite database with migration logic.
### `SQLiteMigrator` class
The new `SQLiteMigrator` class handles safely running database
migrations. It is initialized in the `SqliteDatabase` class's init, and
immediately runs all database migrations.
### `Migration` class
Migrations are reprsented by a `Migration` class, which has 3
attributes:
- `db_version: int`: The database version this migration results in.
- `app_version: str`: The semver app version this migration is run for.
- `migrate: Callable[[sqlite3.Cursor], None]`: A function that performs
the migration. It receives a cursor _only_, but can do anything it wants
to do. A convention is established for these functions.
All schema-creating SQL now lives in a `migrate` function. We haven't
needed to make any data migrations yet, but when we do, this will also
be handled within one of these callbacks.
### Migration Flow
First, migrations are registered with `SQLiteMigrator` with it's
`register_migration` method. This performs some basic checks of the
migration version.
After registering all migrations, they are run with the `run_migrations`
method. This does a few things:
- Creates a `version` table in the DB, if it doesn't already exist. This
table has `db_version INTEGER`, `app_version TEXT` and `migrated_at
DATETIME` columns.
- Sort the migrations by their `db_version`.
- Do some checks to see if we need a migration.
- Backs up the database (if it's a file database). The migration bails
out if this fails.
- Runs each migration. If there is a problem, restore from backup.
### Included Migrations
Migrations are in `invokeai/app/services/shared/sqlite/migrations`.
#### `migrate_1.py`
All\* schema SQL up to 3.4.0post2 is in `migration_1.py`. Running only
this migration should result in a database that is identical to the one
you get from starting up 3.4.0post2.
SQL in this migration is **idempotent** (same as it was when the SQL was
spread across the various services).
#### `migrate_2.py`
Schema changes through 3.5.0 (the upcoming release) are in
`migration_2.py`.
SQL in this migration is **not idempotent**. Future migrations need not
be idempotent, as the migration logic ensures each will only be run
once.
### \*Caveat - ItemStorage
This class provides a generic document-db-like interface for storing
objects. Our `graph_executions` and `graphs` tables are created and
managed by this service. This PR does not touch this class and therefore
does not touch either of those two tables.
We can decide how to handle those tables in the future as the need
arises.
### Change to Model Manager Metadata table
I noticed that there is a `model_manager_metadata` table which included
the app version, and whose `version` property wasn't accessed outside
the service.
I believe the new `version` table fulfills the purpose of this table,
and have removed it.
@lstein Please let me know if this is not right.
## QA Instructions, Screenshots, Recordings
1. Case 1 - Upgrade
- Back up your 3.4.0post2 database
- Run this PR
- It should upgrade your database and everything should work exactly
like it did before
2. Case 2 - New Install
- Move your database out of the invoke root so that when the app starts,
it creates a new one
- Run this PR
- It should work just like a new install
3. Case 3 - With an In-Memory Database
- Enable the in-memory memory database (set `use_memory_db` under
`Paths` in `invokeai.yaml` to `true`)
- Run this PR
- It should work just like a new install
## Added/updated tests?
- [x] Yes: Fairly comprehensive tests are added for the
`SQLiteMigrator`.
- [ ] No : _please replace this line with details on why tests
have not been included_
- use simpler pattern for migration dependencies
- move SqliteDatabase & migration to utility method `init_db`, use this in both the app and tests, ensuring the same db schema is used in both
This fixes a problem with `Annotated` which prevented us from using pydantic's `Field` to specify a discriminator for a union. We had to use FastAPI's `Body` as a workaround.
* selector added
* ref and useeffect added
* scrolling done using useeffect
* fixed scroll and changed the ref name
* fixed scroll again
* created hook for scroll logic
* feat(ui): debounce metadata fetch by 300ms
This vastly reduces the network requests when using the arrow keys to quickly skim through images.
* feat(ui): extract logic to determine virtuoso scrollToIndex align
This needs to be used in `useNextPrevImage()` to ensure the scrolling puts the image at the top or bottom appropriately
* feat(ui): add debounce to image workflow hook
This was spamming network requests like the metadata query
---------
Co-authored-by: psychedelicious <4822129+psychedelicious@users.noreply.github.com>
Invocations now have a classification:
- Stable: LTS
- Beta: LTS planned, API may change
- Prototype: No LTS planned, API may change, may be removed entirely
The `@invocation` decorator has a new arg `classification`, and an enum `Classification` is added to `baseinvocation.py`.
The default is Stable; this is a non-breaking change.
The classification is presented in the node header as a hammer icon (Beta) or flask icon (prototype).
The icon has a tooltip briefly describing the classification.
## What type of PR is this? (check all applicable)
- [ ] Refactor
- [X] Feature
- [ ] Bug Fix
- [ ] Optimization
- [ ] Documentation Update
- [ ] Community Node Submission
## Have you discussed this change with the InvokeAI team?
- [X] Yes
- [ ] No, because:
## Have you updated all relevant documentation?
- [ ] Yes
- [X] No
## Description
1. The new model manager sqlite3-based configuration record storage
system is automatically populated with probed values from existing
models found in the models path when `invokeai-web` starts up for the
first time. However, the user's customization of these models in
`invokeai.yaml`, including such things as the prediction type and model
description, are not automatically copied over. This PR enhances the
`invokeai-migrate-models-to-db` script so that any customized
configuration data from `invokeai.yaml` replaces the original probed
values. This script only needs to be run once, but it does not hurt to
run it additional times. In the near future, I'm going to register this
module with psychedelicious's sqlite migration system so that the update
happens automatically during database migration.
2. The SQL-based model config record system stores a JSON version of the
config, as well as several fields that are broken out into individual
columns for search/indexing purposes. This PR keeps the JSON and the
broken-out fields in sync using the `json_extract()` sqlite3 function to
populate the broken out `base`, `type`, `name`, `path` and `format`
fields in the `model_config` table.
3. Finally, this PR fixes the annoying `invokeai-web` shutdown message:
`TypeError: ModelInstallService.stop() takes 1 positional argument but 2
were given`
## Related Tickets & Documents
- Related Issue #
- Closes #
## QA Instructions, Screenshots, Recordings
If you've run `invokeai-web` at any time since PR #5039, your
`invokeai.db` will have a `model_config` table containing probe
information from all models in the invokeai models directory as well as
those in `autoimport` (if applicable). However, any models present in
`models.yaml` whose paths are outside these directories will not be
present. To add them, and to update the description and other values
from `models.yaml`, run the command `invokeai-migrate-models-to-db`. You
should see the missing models added to the database table with the
correct information.
<!--
Please provide steps on how to test changes, any hardware or
software specifications as well as any other pertinent information.
-->
## Added/updated tests?
- [X] Yes
- [ ] No : _please replace this line with details on why tests
have not been included_
## [optional] Are there any post deployment tasks we need to perform?
## What type of PR is this? (check all applicable)
- [ ] Refactor
- [X] Feature
- [ ] Bug Fix
- [ ] Optimization
- [ ] Documentation Update
- [ ] Community Node Submission
## Have you discussed this change with the InvokeAI team?
- [X] Yes
- [ ] No, because:
## Have you updated all relevant documentation?
- [X] Yes
- [ ] No
## Description
This PR does three things:
1) It separates out the script that creates the installer zipfile
(`create_installer.sh`) from the script that tags the repository with
the current release version (now called `tag_release.sh`)
2) It adds new targets to Makefile for running the installer script and
tagging.
3) It adds a `help` target that lists the Makefile targets:
```
$ make help
Developer commands:
ruff Run ruff, fixing any safely-fixable errors and formatting
ruff-unsafe Run ruff, fixing all fixable errors and formatting
mypy Run mypy using the config in pyproject.toml to identify type mismatches and other coding errors
mypy-all Run mypy ignoring the config in pyproject.tom but still ignoring missing imports
frontend-build Build the frontend in order to run on localhost:9090
frontend-dev Run the frontend in developer mode on localhost:5173
installer-zip Build the installer .zip file for the current version
tag-release Tag the GitHub repository with the current version (use at release time only!)
```
`help` is also the default target so that the help message will print
out when only `make` is issued.
## Related Tickets & Documents
<!--
For pull requests that relate or close an issue, please include them
below.
For example having the text: "closes #1234" would connect the current
pull
request to issue 1234. And when we merge the pull request, Github will
automatically close the issue.
-->
- Related Issue #
- Closes #
## QA Instructions, Screenshots, Recordings
<!--
Please provide steps on how to test changes, any hardware or
software specifications as well as any other pertinent information.
-->
## Added/updated tests?
- [ ] Yes
- [X] No: not needed
## [optional] Are there any post deployment tasks we need to perform?
## What type of PR is this? (check all applicable)
- [ ] Refactor
- [x] Feature
- [ ] Bug Fix
- [ ] Optimization
- [ ] Documentation Update
- [ ] Community Node Submission
## Have you discussed this change with the InvokeAI team?
- [x] Yes
- [ ] No, because:
## Have you updated all relevant documentation?
- [ ] Yes
- [x] No
## Description
Additional tile generation nodes of
CalculateImageTilesEvenSplitInvocation &
CalculateImageTilesMinimumOverlapInvocation
Additional blending method of merge_tiles_with_seam_blending
Updated Node MergeTilesToImageInvocation with seam blending
## Related Tickets & Documents
<!--
For pull requests that relate or close an issue, please include them
below.
For example having the text: "closes #1234" would connect the current
pull
request to issue 1234. And when we merge the pull request, Github will
automatically close the issue.
-->
- Related Issue #
- Closes #
## QA Instructions, Screenshots, Recordings
<!--
Please provide steps on how to test changes, any hardware or
software specifications as well as any other pertinent information.
-->
## Added/updated tests?
- [ ] Yes
- [ ] No : _please replace this line with details on why tests
have not been included_
## [optional] Are there any post deployment tasks we need to perform?
Simplifies a couple things:
- Init is more straightforward
- It's clear in the migrator that the connection we are working with is related to the SqliteDatabase
- Simplify init args to path (None means use memory), logger, and verbose
- Add docstrings to SqliteDatabase (it had almost none)
- Update all usages of the class
CONTAINER_UID is used for the user ID within the container, however I noticed the UID was hard coded to 1000 in the Dockerfile chown -R command.
This leaves the default as 1000, but allows it to be overrriden by setting CONTAINER_UID.
- min_overlap removed * restrictions and round_to_8
- min_overlap handles tile size > image size by clipping the num tiles to 1.
- Updated assert test on min_overlap.
On Windows, we must ensure the connection to the database is closed before exiting the tempfile context.
Also, rejiggered the thing to use the file directly.
## What type of PR is this? (check all applicable)
- [X] Refactor
- [X] Feature
- [ ] Bug Fix
- [ ] Optimization
- [X] Documentation Update
- [ ] Community Node Submission
## Have you discussed this change with the InvokeAI team?
- [X] Yes
- [ ] No, because:
## Have you updated all relevant documentation?
- [X] Yes
- [ ] No
## Description
This is the next phase of the model manager refactor, as discussed with
@psychedelicious and @RyanJDick. This implements the model installer,
which is responsible for managing model weights on disk and installing
new models.
Currently only installation of local files and directories is supported.
Remote installation will be implemented after the queued download
manager is reviewed and approved.
Please see the documentation located at
[docs/contributing/MODEL_MANAGER.md](8695ad6f59/docs/contributing/MODEL_MANAGER.md (model-installation))
for an explanation of how this module works.
Things that have changed relative to the current implementation.
1. Model importation runs in a background thread. Access to the
installation status is through a ModelInstallJob object returned by the
`import_model()` call. In addition, the installation process generates a
series of `model_install` events on the event bus.
2. `model_install_progress` events are documented, but not currently
issued. These will be issued when background downloading is implemented.
3. The model installer currently runs in parallel to the current model
manager. The frontend continues to use `configs/models.yaml` and ignores
what is in the `model_config` table of `invokeai.db`.
4. When the installer is initialized at app startup time, it
synchronizes its database to the contents of the InvokeAI `models`
directory. The current model manager does this as well, so you will see
two log messages indicating that this directory is being scanned.
## Related Tickets & Documents
<!--
For pull requests that relate or close an issue, please include them
below.
For example having the text: "closes #1234" would connect the current
pull
request to issue 1234. And when we merge the pull request, Github will
automatically close the issue.
-->
- Related Issue #
- Closes #
## QA Instructions, Screenshots, Recordings
You can test using the FastAPI swagger pages at
http://localhost:9090/docs. Use the calls listed under
`model_manager_v2`. Be aware that only installation of local models
(indicated by their file or directory path) are currently supported.
## Added/updated tests?
- [X] Yes -- see
`tests/app/services/model_install/test_model_install.py`
- [ ] No : _please replace this line with details on why tests
have not been included_
## [optional] Are there any post deployment tasks we need to perform?
In other words, build frontend when creating installer.
Changes to `create_installer.sh`
- If `python` is not in `PATH` but `python3` is, alias them (well, via function). This is needed on some machines to run the installer without symlinking to `python3`.
- Make the messages about pushing tags clearer. The script force-pushes, so it's possible to accidentally take destructive action. I'm not sure how to otherwise prevent damage, so I just added a warning.
- Print out `pwd` when prompting about being in the `installer` dir.
- Rebuild the frontend - if there is already a frontend build, first checks if the user wants to rebuild it.
- Checks for existence of `../build` dir before deleting - if the dir doesn't exist, the script errors and exits at this point.
- Format and spell check.
Other changes:
- Ignore `dist/` folder.
- Delete `dist/`.
**Note: you may need to use `git rm --cached invokeai/app/frontend/web/dist/` if git still wants to track `dist/`.**
Calling `inspect.getmembers()` on a pydantic field results in `getattr` being called on all members of the field. Pydantic has some attrs that are marked deprecated.
In our test suite, we do not filter deprecation warnings, so this is surfaced.
Use a context manager to ignore deprecation warnings when calling the function.
In the latest redux, unknown actions are typed as `unknown`. This forces type-safety upon us, requiring us to be more careful about the shape of actions.
In this case, we don't know if the rejection has a payload or what shape it may be in, so we need to do runtime checks. This is implemented with a simple zod schema, but probably the right way to handle this is to have consistent types in our RTK-Query error logic.
There are a few breaking changes, which I've addressed.
The vast majority of changes are related to new handling of `reselect`'s `createSelector` options.
For better or worse, we memoize just about all our selectors using lodash `isEqual` for `resultEqualityCheck`. The upgrade requires we explicitly set the `memoize` option to `lruMemoize` to continue using lodash here.
Doing that required changing our `defaultSelectorOptions`.
Instead of changing that and finding dozens of instances where we weren't using that and instead were defining selector options manually, I've created a pre-configured selector: `createMemoizedSelector`.
This is now used everywhere instead of `createSelector`.
- update all scripts
- update the frontend GH action
- remove yarn-related files
- update ignores
Yarn classic + storybook has some weird module resolution issue due to how it hoists dependencies.
See https://github.com/storybookjs/storybook/issues/22431#issuecomment-1630086092
When I did the `package.json` solution in this thread, it broke vite. Next option is to upgrade to yarn 3 or pnpm. I chose pnpm.
Using default_factory to autogenerate UUIDs doesn't make sense here, and results awkward typescript types.
Remove the default factory and instead manually create a UUID for workflow id. There are only two places where this needs to happen so it's not a big change.
This addresses an edge case where:
1. the workflow references fields that are present on the workflow's nodes, but not on the invocation templates for those nodes and
2. The invocation template for that type does exist
This should be a fairly obscure edge case, but could happen if a user fiddled around with the workflow manually.
I ran into it as a result of two nodes having accidentally mixed up their invocation types, a problem introduced with a wonky merge commit.
This logic is moved into a hook.
This is needed for our context menus to close when the user clicks something in reactflow. It needed to be extended to support menus also.
Disabling these introduces an issue where, if you were on an image with a workflow/metadata, then switch to one without, you can end up on a disabled tab. This could potentially cause a runtime error.
* chore: bump pydantic to 2.5.2
This release fixespydantic/pydantic#8175 and allows us to use `JsonValue`
* fix(ui): exclude public/en.json from prettier config
* fix(workflow_records): fix SQLite workflow insertion to ignore duplicates
* feat(backend): update workflows handling
Update workflows handling for Workflow Library.
**Updated Workflow Storage**
"Embedded Workflows" are workflows associated with images, and are now only stored in the image files. "Library Workflows" are not associated with images, and are stored only in DB.
This works out nicely. We have always saved workflows to files, but recently began saving them to the DB in addition to in image files. When that happened, we stopped reading workflows from files, so all the workflows that only existed in images were inaccessible. With this change, access to those workflows is restored, and no workflows are lost.
**Updated Workflow Handling in Nodes**
Prior to this change, workflows were embedded in images by passing the whole workflow JSON to a special workflow field on a node. In the node's `invoke()` function, the node was able to access this workflow and save it with the image. This (inaccurately) models workflows as a property of an image and is rather awkward technically.
A workflow is now a property of a batch/session queue item. It is available in the InvocationContext and therefore available to all nodes during `invoke()`.
**Database Migrations**
Added a `SQLiteMigrator` class to handle database migrations. Migrations were needed to accomodate the DB-related changes in this PR. See the code for details.
The `images`, `workflows` and `session_queue` tables required migrations for this PR, and are using the new migrator. Other tables/services are still creating tables themselves. A followup PR will adapt them to use the migrator.
**Other/Support Changes**
- Add a `has_workflow` column to `images` table to indicate that the image has an embedded workflow.
- Add handling for retrieving the workflow from an image in python. The image file must be fetched, the workflow extracted, and then sent to client, avoiding needing the browser to parse the image file. With the `has_workflow` column, the UI knows if there is a workflow to be fetched, and only fetches when the user requests to load the workflow.
- Add route to get the workflow from an image
- Add CRUD service/routes for the library workflows
- `workflow_images` table and services removed (no longer needed now that embedded workflows are not in the DB)
* feat(ui): updated workflow handling (WIP)
Clientside updates for the backend workflow changes.
Includes roughed-out workflow library UI.
* feat: revert SQLiteMigrator class
Will pursue this in a separate PR.
* feat(nodes): do not overwrite custom node module names
Use a different, simpler method to detect if a node is custom.
* feat(nodes): restore WithWorkflow as no-op class
This class is deprecated and no longer needed. Set its workflow attr value to None (meaning it is now a no-op), and issue a warning when an invocation subclasses it.
* fix(nodes): fix get_workflow from queue item dict func
* feat(backend): add WorkflowRecordListItemDTO
This is the id, name, description, created at and updated at workflow columns/attrs. Used to display lists of workflowsl
* chore(ui): typegen
* feat(ui): add workflow loading, deleting to workflow library UI
* feat(ui): workflow library pagination button styles
* wip
* feat: workflow library WIP
- Save to library
- Duplicate
- Filter/sort
- UI/queries
* feat: workflow library - system graphs - wip
* feat(backend): sync system workflows to db
* fix: merge conflicts
* feat: simplify default workflows
- Rename "system" -> "default"
- Simplify syncing logic
- Update UI to match
* feat(workflows): update default workflows
- Update TextToImage_SD15
- Add TextToImage_SDXL
- Add README
* feat(ui): refine workflow list UI
* fix(workflow_records): typo
* fix(tests): fix tests
* feat(ui): clean up workflow library hooks
* fix(db): fix mis-ordered db cleanup step
It was happening before pruning queue items - should happen afterwards, else you have to restart the app again to free disk space made available by the pruning.
* feat(ui): tweak reset workflow editor translations
* feat(ui): split out workflow redux state
The `nodes` slice is a rather complicated slice. Removing `workflow` makes it a bit more reasonable.
Also helps to flatten state out a bit.
* docs: update default workflows README
* fix: tidy up unused files, unrelated changes
* fix(backend): revert unrelated service organisational changes
* feat(backend): workflow_records.get_many arg "filter_text" -> "query"
* feat(ui): use custom hook in current image buttons
Already in use elsewhere, forgot to use it here.
* fix(ui): remove commented out property
* fix(ui): fix workflow loading
- Different handling for loading from library vs external
- Fix bug where only nodes and edges loaded
* fix(ui): fix save/save-as workflow naming
* fix(ui): fix circular dependency
* fix(db): fix bug with releasing without lock in db.clean()
* fix(db): remove extraneous lock
* chore: bump ruff
* fix(workflow_records): default `category` to `WorkflowCategory.User`
This allows old workflows to validate when reading them from the db or image files.
* hide workflow library buttons if feature is disabled
---------
Co-authored-by: Mary Hipp <maryhipp@Marys-MacBook-Air.local>
* add middleware to handle 403 errors
* remove log
* add logic to warn the user if not all requested images could be deleted
* lint
* fix copy
* feat(ui): simplify batchEnqueuedListener error toast logic
* feat(ui): use translations for error messages
* chore(ui): lint
---------
Co-authored-by: Mary Hipp <maryhipp@Marys-MacBook-Air.local>
Co-authored-by: psychedelicious <4822129+psychedelicious@users.noreply.github.com>
## What type of PR is this? (check all applicable)
- [ ] Refactor
- [x] Feature
- [ ] Bug Fix
- [ ] Optimization
- [ ] Documentation Update
- [ ] Community Node Submission
## Description
You can only have one pre-commit setup on a repo. Removing husky so it
doesn't interfere with the python pre-commit.
## Related Tickets & Documents
<!--
For pull requests that relate or close an issue, please include them
below.
For example having the text: "closes #1234" would connect the current
pull
request to issue 1234. And when we merge the pull request, Github will
automatically close the issue.
-->
- Related Issue
https://discord.com/channels/1020123559063990373/1149513625321603162/1181752622684831884
## What type of PR is this? (check all applicable)
- [ ] Refactor
- [ ] Feature
- [x] Bug Fix
- [ ] Optimization
- [ ] Documentation Update
- [ ] Community Node Submission
## Have you discussed this change with the InvokeAI team?
- [ ] Yes
- [X] No, because: minor bug
## Have you updated all relevant documentation?
- [X] Yes
- [ ] No
## Description
While writing regression tests for the queued downloader I discovered
that when using `InvokeAILogger.get_logger()` to fetch a
previously-created logger it resets that logger's log level to the
default specified in the global config. In other words, this didn't work
as expected:
```
import logging
from invokeai.backend.util.logging import InvokeAILogger
logger1 = InvokeAILogger.get_logger('TestLogger')
logger1.setLevel(logging.DEBUG)
logger2 = InvokeAILogger.get_logger('TestLogger')
assert logger1.level == logging.DEBUG
assert logger2.level == logging.DEBUG
```
This PR fixes the problem and adds a corresponding pytest.
## Related Tickets & Documents
<!--
For pull requests that relate or close an issue, please include them
below.
For example having the text: "closes #1234" would connect the current
pull
request to issue 1234. And when we merge the pull request, Github will
automatically close the issue.
-->
- Related Issue #
- Closes #
## QA Instructions, Screenshots, Recordings
<!--
Please provide steps on how to test changes, any hardware or
software specifications as well as any other pertinent information.
-->
## Added/updated tests?
- [X] Yes
- [ ] No
## [optional] Are there any post deployment tasks we need to perform?
Adds logic to `DiskLatentsStorage.start()` to empty the latents folder on startup.
Adds start and stop methods to `ForwardCacheLatentsStorage`. This is required for `DiskLatentsStorage.start()` to be called, due to how this particular service breaks the direct DI pattern, wrapping the underlying storage with a cache.
## What type of PR is this? (check all applicable)
- [ ] Refactor
- [ ] Feature
- [X] Bug Fix
- [ ] Optimization
- [ ] Documentation Update
- [ ] Community Node Submission
## Have you discussed this change with the InvokeAI team?
- [X] Yes
- [ ] No, because:
## Have you updated all relevant documentation?
- [X] Yes
- [ ] No
## Description
This adds support for at least some of the SDXL embeddings currently
available on Civitai. The embeddings I have tested include:
- https://civitai.com/models/154898/marblingtixl?modelVersionId=173668
- https://civitai.com/models/148131?modelVersionId=167640
-
https://civitai.com/models/123485/hannah-ferguson-or-sdxl-or-comfyui-only-or-embedding?modelVersionId=134674
(said to be "comfyui only")
-
https://civitai.com/models/185938/kendall-jenner-sdxl-embedding?modelVersionId=208785
I am _not entirely sure_ that I have implemented support in the most
elegant way. The issue is that these embeddings have two weight tensors,
`clip_g` and `clip_l`, which correspond to `text_encoder` and
`text_encoder_2` in the main model. When the patcher calls the
ModelPatcher's `apply_ti()` method, I simply check the dimensions of the
incoming text encoder and choose the weights that match the dimensions
of the encoder.
While writing this, I also ran into a possible issue with the Compel
library's `get_pooled_embeddings()` call. It pads the input token list
to the model's max token length and then calls the TI manager to add the
additional tokens from the embedding. However, this ends up making the
input token list longer than the max length, and CLIPTextEncoder crashes
with a tensor size mismatch. I worked around this behavior by making the
TI manager's `expand_textual_inversion_token_ids_if_necessary()` method
remove the excess pads at the end of the token list.
Also note that I have made similar changes to `apply_ti()` in the
ONNXModelPatcher, but haven't tested them yet.
## Related Tickets & Documents
<!--
For pull requests that relate or close an issue, please include them
below.
For example having the text: "closes #1234" would connect the current
pull
request to issue 1234. And when we merge the pull request, Github will
automatically close the issue.
-->
- Related Issue #
- Closes#4401
## QA Instructions, Screenshots, Recordings
<!--
Please provide steps on how to test changes, any hardware or
software specifications as well as any other pertinent information.
-->
## Added/updated tests?
- [ ] Yes
- [X] No : We need to create tests for model patching...
## [optional] Are there any post deployment tasks we need to perform?
IndexedDB has a much larger storage limit than LocalStorage, and is widely supported.
Implemented as a custom storage driver for `redux-remember` via `idb-keyval`. `idb-keyval` is a simple wrapper for IndexedDB that allows it to be used easily as a key-value store.
The logic to clear persisted storage has been updated throughout the app.
- Reset init image, control adapter images, and node image fields when their selected image fails to load
- Only do this if the app is connected via socket (this indicates that the image is "really" gone, and there isn't just a transient network issue)
It's possible for image parameters/nodes/states to have reference a deleted image. For example, a resize image node might have an image set on it, and the workflow saved. The workflow contains a hard reference to that image.
The image is deleted and the workflow loaded again later. The deleted image is still in that workflow, but the app doesn't detect that. The result is that the workflow/graph appears to be valid, but will fail on invoke.
This creates a really confusing user experience, where when somebody shares a workflow with an image baked into it, and another person opens it, everything *looks* ok, but the workflow fails with a mysterious error about a missing image.
The problem affects node images, control adapter images and the img2img init image. Resetting the image when it fails to load *and* socket is connected resolves this in a simple way.
The problem also affects canvas images, but we have handle that by displaying an error fallback image, so no change is made there.
Closes#5121
- Parse `anyOf` for enums (present when they are optional)
- Consolidate `FieldTypeParseError` and `UnsupportedFieldTypeError` into `FieldParseError` (there was no difference in handling and it simplifies things a bit)
* add centerpadcrop node
- Allows users to add padding to or crop images from the center
- Also outputs a white mask with the dimensions of the output image for use with outpainting
* add CenterPadCrop to NODES.md
Updates NODES.md with CenterPadCrop entry.
* remove mask & output class
- Remove "ImageMaskOutput" where both image and mask are output
- Remove ability to output mask from node
---------
Co-authored-by: psychedelicious <4822129+psychedelicious@users.noreply.github.com>
Use UTF-8 encoding on reading prompts from files to allow Unicode characters to load correctly.
The following examples currently will not load correctly from a file:
Hello, 世界!
😭🤮💔
Added New Match Histogram node
Updated XYGrid nodes and Prompt Tools nodes
## What type of PR is this? (check all applicable)
- [ ] Refactor
- [ ] Feature
- [ ] Bug Fix
- [ ] Optimization
- [x] Documentation Update
- [ ] Community Node Submission
## Have you discussed this change with the InvokeAI team?
- [ ] Yes
- [ ] No, because:
## Have you updated all relevant documentation?
- [ ] Yes
- [ ] No
## Description
## Related Tickets & Documents
<!--
For pull requests that relate or close an issue, please include them
below.
For example having the text: "closes #1234" would connect the current
pull
request to issue 1234. And when we merge the pull request, Github will
automatically close the issue.
-->
- Related Issue #
- Closes #
## QA Instructions, Screenshots, Recordings
<!--
Please provide steps on how to test changes, any hardware or
software specifications as well as any other pertinent information.
-->
## Added/updated tests?
- [ ] Yes
- [ ] No : _please replace this line with details on why tests
have not been included_
## [optional] Are there any post deployment tasks we need to perform?
This new name more accurately represents that these are fields with a type of `T | T[]`, where the "base" type must be the same on both sides of the union.
Custom nodes have a new attribute `node_pack` indicating the node pack they came from.
- This is displayed in the UI in the icon icon tooltip.
- If a workflow is loaded and a node is unavailable, its node pack will be displayed (if it is known).
- If a workflow is migrated from v1 to v2, and the node is unknown, it falls back to "Unknown". If the missing node pack is installed and the node is updated, the node pack will be updated as expected.
Node authors may now create their own arbitrary/custom field types. Any pydantic model is supported.
Two notes:
1. Your field type's class name must be unique.
Suggest prefixing fields with something related to the node pack as a kind of namespace.
2. Custom field types function as connection-only fields.
For example, if your custom field has string attributes, you will not get a text input for that attribute when you give a node a field with your custom type.
This is the same behaviour as other complex fields that don't have custom UIs in the workflow editor - like, say, a string collection.
feat(ui): fix tooltips for custom types
We need to hold onto the original type of the field so they don't all just show up as "Unknown".
fix(ui): fix ts error with custom fields
feat(ui): custom field types connection validation
In the initial commit, a custom field's original type was added to the *field templates* only as `originalType`. Custom fields' `type` property was `"Custom"`*. This allowed for type safety throughout the UI logic.
*Actually, it was `"Unknown"`, but I changed it to custom for clarity.
Connection validation logic, however, uses the *field instance* of the node/field. Like the templates, *field instances* with custom types have their `type` set to `"Custom"`, but they didn't have an `originalType` property. As a result, all custom fields could be connected to all other custom fields.
To resolve this, we need to add `originalType` to the *field instances*, then switch the validation logic to use this instead of `type`.
This ended up needing a bit of fanagling:
- If we make `originalType` a required property on field instances, existing workflows will break during connection validation, because they won't have this property. We'd need a new layer of logic to migrate the workflows, adding the new `originalType` property.
While this layer is probably needed anyways, typing `originalType` as optional is much simpler. Workflow migration logic can come layer.
(Technically, we could remove all references to field types from the workflow files, and let the templates hold all this information. This feels like a significant change and I'm reluctant to do it now.)
- Because `originalType` is optional, anywhere we care about the type of a field, we need to use it over `type`. So there are a number of `field.originalType ?? field.type` expressions. This is a bit of a gotcha, we'll need to remember this in the future.
- We use `Array.prototype.includes()` often in the workflow editor, e.g. `COLLECTION_TYPES.includes(type)`. In these cases, the const array is of type `FieldType[]`, and `type` is is `FieldType`.
Because we now support custom types, the arg `type` is now widened from `FieldType` to `string`.
This causes a TS error. This behaviour is somewhat controversial (see https://github.com/microsoft/TypeScript/issues/14520). These expressions are now rewritten as `COLLECTION_TYPES.some((t) => t === type)` to satisfy TS. It's logically equivalent.
fix(ui): typo
feat(ui): add CustomCollection and CustomPolymorphic field types
feat(ui): add validation for CustomCollection & CustomPolymorphic types
- Update connection validation for custom types
- Use simple string parsing to determine if a field is a collection or polymorphic type.
- No longer need to keep a list of collection and polymorphic types.
- Added runtime checks in `baseinvocation.py` to ensure no fields are named in such a way that it could mess up the new parsing
chore(ui): remove errant console.log
fix(ui): rename 'nodes.currentConnectionFieldType' -> 'nodes.connectionStartFieldType'
This was confusingly named and kept tripping me up. Renamed to be consistent with the `reactflow` `ConnectionStartParams` type.
fix(ui): fix ts error
feat(nodes): add runtime check for custom field names
"Custom", "CustomCollection" and "CustomPolymorphic" are reserved field names.
chore(ui): add TODO for revising field type names
wip refactor fieldtype structured
wip refactor field types
wip refactor types
wip refactor types
fix node layout
refactor field types
chore: mypy
organisation
organisation
organisation
fix(nodes): fix field orig_required, field_kind and input statuses
feat(nodes): remove broken implementation of default_factory on InputField
Use of this could break connection validation due to the difference in node schemas required fields and invoke() required args.
Removed entirely for now. It wasn't ever actually used by the system, because all graphs always had values provided for fields where default_factory was used.
Also, pydantic is smart enough to not reuse the same object when specifying a default value - it clones the object first. So, the common pattern of `default_factory=list` is extraneous. It can just be `default=[]`.
fix(nodes): fix InputField name validation
workflow validation
validation
chore: ruff
feat(nodes): fix up baseinvocation comments
fix(ui): improve typing & logic of buildFieldInputTemplate
improved error handling in parseFieldType
fix: back compat for deprecated default_factory and UIType
feat(nodes): do not show node packs loaded log if none loaded
chore(ui): typegen
We used the `RealESRGANer` utility class from the repo. It handled model loading and tiled upscaling logic.
Unfortunately, it hasn't been updated in over a year, had no types, and annoyingly printed to console.
I've adapted the class, cleaning it up a bit and removing the bits that are not relevant for us.
Upscaling functionality is identical.
## What type of PR is this? (check all applicable)
- [ ] Refactor
- [ ] Feature
- [ ] Bug Fix
- [ ] Optimization
- [x] Documentation Update
- [ ] Community Node Submission
## Have you discussed this change with the InvokeAI team?
- [ ] Yes
- [x] No, because:
## Have you updated all relevant documentation?
- [ ] Yes
- [x] No
## Description
Fixes wrong Q&A Troubleshooting link (original leads to 404)
## Related Tickets & Documents
<!--
For pull requests that relate or close an issue, please include them
below.
For example having the text: "closes #1234" would connect the current
pull
request to issue 1234. And when we merge the pull request, Github will
automatically close the issue.
-->
- Related Issue #
- Closes #
## QA Instructions, Screenshots, Recordings
<!--
Please provide steps on how to test changes, any hardware or
software specifications as well as any other pertinent information.
-->
## Added/updated tests?
- [ ] Yes
- [x] No : _please replace this line with details on why tests
have not been included_
## [optional] Are there any post deployment tasks we need to perform?
* working on recall height/width
* working on adding resize
* working on feature
* fix(ui): move added translation from dist/ to public/
* fix(ui): use `metadata` as hotkey cb dependency
Using `imageDTO` may result in stale data being used
---------
Co-authored-by: psychedelicious <4822129+psychedelicious@users.noreply.github.com>
* eslint added and new string added
* strings and translation hook added
* more changes made
* missing translation added
* final errors resolve in progress
* all errors resolved
* fix(ui): fix missing import of `t()`
* fix(ui): use plurals for moving images to board translation
* fix(ui): fix typo in translation key
* fix(ui): do not use translation for "invoke ai"
* chore(ui): lint
---------
Co-authored-by: psychedelicious <4822129+psychedelicious@users.noreply.github.com>
## What type of PR is this? (check all applicable)
- [ ] Refactor
- [X] Feature
- [ ] Bug Fix
- [ ] Optimization
- [ ] Documentation Update
- [ ] Community Node Submission
## Have you discussed this change with the InvokeAI team?
- [ ] Yes
- [X] No, because: Small obvious fix
## Have you updated all relevant documentation?
- [X] Yes
- [ ] No
## Description
This one-line patch adds support for LCM models such as
`SimianLuo/LCM_Dreamshaper_v7`
## Related Tickets & Documents
<!--
For pull requests that relate or close an issue, please include them
below.
For example having the text: "closes #1234" would connect the current
pull
request to issue 1234. And when we merge the pull request, Github will
automatically close the issue.
-->
- Closes#4951
## QA Instructions, Screenshots, Recordings
Try installing `SimianLuo/LCM_Dreamshaper_v7` and using with CFG 2.5 and
the LCM scheduler.
<!--
Please provide steps on how to test changes, any hardware or
software specifications as well as any other pertinent information.
-->
## Added/updated tests?
- [ ] Yes
- [X] Not needed
This PR adds a link and description to the Remote Image node.
## What type of PR is this? (check all applicable)
- [ ] Refactor
- [ ] Feature
- [ ] Bug Fix
- [ ] Optimization
- [ ] Documentation Update
- [x] Community Node Submission
## Have you discussed this change with the InvokeAI team?
- [x] Yes
- [ ] No, because:
## Have you updated all relevant documentation?
- [x] Yes
- [ ] No
## Description
Adds a description and link to a new community node
## Related Tickets & Documents
<!--
For pull requests that relate or close an issue, please include them
below.
For example having the text: "closes #1234" would connect the current
pull
request to issue 1234. And when we merge the pull request, Github will
automatically close the issue.
-->
- Related Issue #
- Closes #
## QA Instructions, Screenshots, Recordings
<!--
Please provide steps on how to test changes, any hardware or
software specifications as well as any other pertinent information.
-->
## Added/updated tests?
- [ ] Yes
- [x] No : This is only a documentation change
## [optional] Are there any post deployment tasks we need to perform?
## What type of PR is this? (check all applicable)
- [ ] Refactor
- [ ] Feature
- [ ] Bug Fix
- [ ] Optimization
- [x] Documentation Update
- [ ] Community Node Submission
## Have you discussed this change with the InvokeAI team?
- [ ] Yes
- [x] No, because: community nodes already use these import paths
## Have you updated all relevant documentation?
- [x] Yes
- [ ] No
## Description
The example custom node code in the docs uses old (?) import paths for
invokeai modules. These paths cause the module to fail to load. This PR
updates them.
## QA Instructions, Screenshots, Recordings
- [x] verified that example code is loaded successfully when copied to
custom nodes directory
- [x] verified that custom node works as expected in workflows
## Added/updated tests?
- [ ] Yes
- [x] No : documentation update
## What type of PR is this? (check all applicable)
3.4.0post3
## Have you discussed this change with the InvokeAI team?
- [x] Yes
- [ ] No, because:
## Have you updated all relevant documentation?
N/A
## Description
3.4.0post2 release - mainly fixes duplicate LoRA patching
* first string only to test
* more strings changed
* almost half strings added in json file
* more strings added
* more changes
* few strings and t function changed
* resolved
* errors resolved
* chore(ui): fmt en.json
---------
Co-authored-by: psychedelicious <4822129+psychedelicious@users.noreply.github.com>
## What type of PR is this? (check all applicable)
3.4 Release Updates
## Have you discussed this change with the InvokeAI team?
- [X] Yes
- [ ] No, because:
## Have you updated all relevant documentation?
- [X] Yes
- [ ] No
## Description
## Related Tickets & Documents
## [optional] Are there any post deployment tasks we need to perform?
## What type of PR is this? (check all applicable)
- [ ] Refactor
- [ ] Feature
- [x] Bug Fix
- [ ] Optimization
- [ ] Documentation Update
- [ ] Community Node Submission
## Description
Resolves two bugs introduced in #5106:
1. Linear UI images sometimes didn't make it to the gallery.
This was a race condition. The VAE decode nodes were handled by the
socketInvocationComplete listener. At that moment, the image was marked
as intermediate. Immediately after this node was handled, a
LinearUIOutputInvocation, introduced in #5106, was handled by
socketInvocationComplete. This node internally sets changed the image to
not intermediate.
During the handling of that socketInvocationComplete, RTK Query would
sometimes use its cache instead of retrieving the image DTO again. The
result is that the UI never got the message that the image was not
intermediate, so it wasn't added to the gallery.
This is resolved by refactoring the socketInvocationComplete listener.
We now skip the gallery processing for linear UI events, except for the
LinearUIOutputInvocation. Images now always make it to the gallery, and
network requests to get image DTOs are substantially reduced.
2. Canvas temp images always went into the gallery
The LinearUIOutputInvocation was always setting its image's
is_intermediate to false. This included all canvas images and resulted
in all canvas temp images going to gallery.
This is resolved by making LinearUIOutputInvocation set is_intermediate
based on `self.is_intermediate`. The behaviour now more or less
mirroring the behaviour of is_intermediate on other image-outputting
nodes, except it doesn't save the image again - only changes it.
One extra minor change - LinearUIOutputInvocation only changes
is_intermediate if it differs from the image's current setting. Very
minor optimisation.
## Related Tickets & Documents
<!--
For pull requests that relate or close an issue, please include them
below.
For example having the text: "closes #1234" would connect the current
pull
request to issue 1234. And when we merge the pull request, Github will
automatically close the issue.
-->
- Related Issue
https://discord.com/channels/1020123559063990373/1149513625321603162/1174721072826945638
## QA Instructions, Screenshots, Recordings
Try to reproduce the issues described int he discord thread:
- Images should always go to the gallery from txt2img and img2img
- Canvas temp images should not go to the gallery unless auto-save is
enabled
<!--
Please provide steps on how to test changes, any hardware or
software specifications as well as any other pertinent information.
-->
## What type of PR is this? (check all applicable)
- [ ] Refactor
- [ ] Feature
- [ ] Bug Fix
- [ ] Optimization
- [ ] Documentation Update
- [X] Community Node Submission
## Have you discussed this change with the InvokeAI team?
- [ ] Yes
- [X] No, because:
## Have you updated all relevant documentation?
- [X] Yes
- [ ] No
## Description
## Related Tickets & Documents
<!--
For pull requests that relate or close an issue, please include them
below.
For example having the text: "closes #1234" would connect the current
pull
request to issue 1234. And when we merge the pull request, Github will
automatically close the issue.
-->
- Related Issue #
- Closes #
## QA Instructions, Screenshots, Recordings
<!--
Please provide steps on how to test changes, any hardware or
software specifications as well as any other pertinent information.
-->
## Added/updated tests?
- [ ] Yes
- [X] No : _please replace this line with details on why tests
have not been included_
## [optional] Are there any post deployment tasks we need to perform?
Resolves two bugs introduced in #5106:
1. Linear UI images sometimes didn't make it to the gallery.
This was a race condition. The VAE decode nodes were handled by the socketInvocationComplete listener. At that moment, the image was marked as intermediate. Immediately after this node was handled, a LinearUIOutputInvocation, introduced in #5106, was handled by socketInvocationComplete. This node internally sets changed the image to not intermediate.
During the handling of that socketInvocationComplete, RTK Query would sometimes use its cache instead of retrieving the image DTO again. The result is that the UI never got the message that the image was not intermediate, so it wasn't added to the gallery.
This is resolved by refactoring the socketInvocationComplete listener. We now skip the gallery processing for linear UI events, except for the LinearUIOutputInvocation. Images now always make it to the gallery, and network requests to get image DTOs are substantially reduced.
2. Canvas temp images always went into the gallery
The LinearUIOutputInvocation was always setting its image's is_intermediate to false. This included all canvas images and resulted in all canvas temp images going to gallery.
This is resolved by making LinearUIOutputInvocation set is_intermediate based on `self.is_intermediate`. The behaviour now more or less mirroring the behaviour of is_intermediate on other image-outputting nodes, except it doesn't save the image again - only changes it.
One extra minor change - LinearUIOutputInvocation only changes is_intermediate if it differs from the image's current setting. Very minor optimisation.
## What type of PR is this? (check all applicable)
- [x] Refactor
- [ ] Feature
- [ ] Bug Fix
- [x] Optimization
- [ ] Documentation Update
- [ ] Community Node Submission
## Have you discussed this change with the InvokeAI team?
- [x] Yes
- [ ] No, because:
## Description
[feat: add private node for linear UI image
outputting](4599517c6c)
Add a LinearUIOutputInvocation node to be the new terminal node for
Linear UI graphs. This node is private and hidden from the Workflow
Editor, as it is an implementation detail.
The Linear UI was using the Save Image node for this purpose. It allowed
every linear graph to end a single node type, which handled saving
metadata and board. This substantially reduced the complexity of the
linear graphs.
This caused two related issues:
- Images were saved to disk twice
- Noticeable delay between when an image was decoded and showed up in
the UI
To resolve this, the new LinearUIOutputInvocation node will handle
adding an image to a board if one is provided.
Metadata is no longer provided in this unified node. Instead, the
metadata graph helpers now need to know the node to add metadata to and
provide it to the last node that actually outputs an image. This is a
`l2i` node for txt2img & img2img graphs, and a different
image-outputting node for canvas graphs.
HRF poses another complication, in that it changes the terminal node. To
handle this, a new metadata util is added called
`setMetadataReceivingNode()`. HRF calls this to change the node that
should receive the graph's metadata.
This resolves the duplicate images issue and improves perf without
otherwise changing the user experience.
---
Also fixed an issue with HRF metadata.
## Related Tickets & Documents
<!--
For pull requests that relate or close an issue, please include them
below.
For example having the text: "closes #1234" would connect the current
pull
request to issue 1234. And when we merge the pull request, Github will
automatically close the issue.
-->
- Closes#4688
- Closes#4645
## QA Instructions, Screenshots, Recordings
Generate some images with and without a board selected. Images should
end up in the right board per usual, but a bit quicker. Metadata should
still work.
<!--
Please provide steps on how to test changes, any hardware or
software specifications as well as any other pertinent information.
-->
Add a LinearUIOutputInvocation node to be the new terminal node for Linear UI graphs. This node is private and hidden from the Workflow Editor, as it is an implementation detail.
The Linear UI was using the Save Image node for this purpose. It allowed every linear graph to end a single node type, which handled saving metadata and board. This substantially reduced the complexity of the linear graphs.
This caused two related issues:
- Images were saved to disk twice
- Noticeable delay between when an image was decoded and showed up in the UI
To resolve this, the new LinearUIOutputInvocation node will handle adding an image to a board if one is provided.
Metadata is no longer provided in this unified node. Instead, the metadata graph helpers now need to know the node to add metadata to and provide it to the last node that actually outputs an image. This is a `l2i` node for txt2img & img2img graphs, and a different image-outputting node for canvas graphs.
HRF poses another complication, in that it changes the terminal node. To handle this, a new metadata util is added called `setMetadataReceivingNode()`. HRF calls this to change the node that should receive the graph's metadata.
This resolves the duplicate images issue and improves perf without otherwise changing the user experience.
## What type of PR is this? (check all applicable)
- [ ] Refactor
- [ ] Feature
- [ ] Bug Fix
- [ ] Optimization
- [X] Documentation Update
- [ ] Community Node Submission
## Have you discussed this change with the InvokeAI team?
- [ ] Yes
- [ ] No, because:
## Have you updated all relevant documentation?
- [ ] Yes
- [ ] No
## Description
## Related Tickets & Documents
<!--
For pull requests that relate or close an issue, please include them
below.
For example having the text: "closes #1234" would connect the current
pull
request to issue 1234. And when we merge the pull request, Github will
automatically close the issue.
-->
- Related Issue #
- Closes #
## QA Instructions, Screenshots, Recordings
<!--
Please provide steps on how to test changes, any hardware or
software specifications as well as any other pertinent information.
-->
## Added/updated tests?
- [ ] Yes
- [ ] No : _please replace this line with details on why tests
have not been included_
## [optional] Are there any post deployment tasks we need to perform?
## What type of PR is this? (check all applicable)
- [ ] Refactor
- [x] Feature
- [ ] Bug Fix
- [ ] Optimization
- [ ] Documentation Update
- [ ] Community Node Submission
## Have you discussed this change with the InvokeAI team?
- [x] Yes
- [ ] No, because:
## Have you updated all relevant documentation?
- [ ] Yes
- [x] No
## Description
[fix(nodes): bump version of nodes post-pydantic
v2](5cb3fdb64c)
This was not done, despite new metadata fields being added to many
nodes.
[feat(ui): add update node
functionality](3f6e8e9d6b)
A workflow's nodes may update itself, if its major version matches the
template's major version.
If the major versions do not match, the user will need to delete and
re-add the node (current behaviour).
The update functionality is not automatic (for now). The logic to update
the node is pretty simple, but I want to ensure it works well first
before doing it automatically when a workflow is loaded.
- New `Details` tab on Workflow Inspector, displays node title, type,
version, and notes
- Button to update the node is displayed on the `Details` tab
- Add hook to determine if a node needs an update, may be updated (i.e.
major versions match), and the callback to update the node in state
- Remove the notes modal from the little info icon
- Modularize the node building logic
## Related Tickets & Documents
<!--
For pull requests that relate or close an issue, please include them
below.
For example having the text: "closes #1234" would connect the current
pull
request to issue 1234. And when we merge the pull request, Github will
automatically close the issue.
-->
Probably exist but not sure where.
## QA Instructions, Screenshots, Recordings
Load an old workflow with nodes that need to be updated. Click on each
node that needs updating and click the update button. Workflow should
work.
<!--
Please provide steps on how to test changes, any hardware or
software specifications as well as any other pertinent information.
-->
A workflow's nodes may update itself, if its major version matches the template's major version.
If the major versions do not match, the user will need to delete and re-add the node (current behaviour).
The update functionality is not automatic (for now). The logic to update the node is pretty simple, but I want to ensure it works well first before doing it automatically when a workflow is loaded.
- New `Details` tab on Workflow Inspector, displays node title, type, version, and notes
- Button to update the node is displayed on the `Details` tab
- Add hook to determine if a node needs an update, may be updated (i.e. major versions match), and the callback to update the node in state
- Remove the notes modal from the little info icon
- Modularize the node building logic
## Description
pin torch==2.1.0, torchvision=0.16.0
Prevents accidental upgrade to unreleased torch 2.1.1, which breaks
stuff
## Related Tickets & Documents
<!--
For pull requests that relate or close an issue, please include them
below.
For example having the text: "closes #1234" would connect the current
pull
request to issue 1234. And when we merge the pull request, Github will
automatically close the issue.
-->
- Related Issue #5065
## What type of PR is this? (check all applicable)
- [ ] Refactor
- [X] Feature
- [ ] Bug Fix
- [ ] Optimization
- [ ] Documentation Update
- [ ] Community Node Submission
## Have you discussed this change with the InvokeAI team?
- [ ] Yes
- [X] No, because: it is trivial
## Have you updated all relevant documentation?
- [ ] Yes
- [X] No
## Description
After the switch to the "ruff" linter, I noticed that the stylecheck
workflow is still described as "black" in the action logs. This small PR
should fix the issue.
No breaking changes for us.
Pydantic is working on its own faster JSON parser, `jiter`, and 2.5.0 starts bringing this in. See https://github.com/pydantic/jiter
There are a number of other bugfixes and minor changes in this version of pydantic.
The FastAPI update is mostly internal but let's stay up to date.
## What type of PR is this? (check all applicable)
- [ ] Refactor
- [ ] Feature
- [ ] Bug Fix
- [X] Optimization
- [ ] Documentation Update
- [ ] Community Node Submission
## Have you discussed this change with the InvokeAI team?
- [X] Yes
- [ ] No, because:
## Have you updated all relevant documentation?
- [x] Yes
- [ ] No
## Description
## Related Tickets & Documents
<!--
For pull requests that relate or close an issue, please include them
below.
For example having the text: "closes #1234" would connect the current
pull
request to issue 1234. And when we merge the pull request, Github will
automatically close the issue.
-->
- Related Issue #
- Closes #
## QA Instructions, Screenshots, Recordings
<!--
Please provide steps on how to test changes, any hardware or
software specifications as well as any other pertinent information.
-->
## Added/updated tests?
- [ ] Yes
- [ ] No : _please replace this line with details on why tests
have not been included_
## [optional] Are there any post deployment tasks we need to perform?
## What type of PR is this? (check all applicable)
- [ ] Refactor
- [ ] Feature
- [ ] Bug Fix
- [ ] Optimization
- [x] Documentation Update
- [ ] Community Node Submission
## Have you discussed this change with the InvokeAI team?
- [ ] Yes
- [x] No, because:
## Have you updated all relevant documentation?
- [x] Yes
- [ ] No
## Description
## Related Tickets & Documents
<!--
For pull requests that relate or close an issue, please include them
below.
For example having the text: "closes #1234" would connect the current
pull
request to issue 1234. And when we merge the pull request, Github will
automatically close the issue.
-->
- Related Issue #
- Closes #
## QA Instructions, Screenshots, Recordings
<!--
Please provide steps on how to test changes, any hardware or
software specifications as well as any other pertinent information.
-->
## Added/updated tests?
- [ ] Yes
- [x] No : _please replace this line with details on why tests
have not been included_
## [optional] Are there any post deployment tasks we need to perform?
## What type of PR is this? (check all applicable)
- [X] Refactor
## Have you discussed this change with the InvokeAI team?
- [X] Extensively
- [ ] No, because:
## Have you updated all relevant documentation?
- [X] Yes
- [ ] No
## Description
As discussed with @psychedelicious and @RyanJDick, this is the first
phase of the model manager refactor. In this phase, I've added support
for storing model configuration information the `invokeai.db` SQL3
database. All the code is separate from the original model manager, so
for the time being the frontend is still using the original YAML-based
configuration, so the web app still works.
To keep things clean, I've added a new FastAPI route called
`model_records` which can add, update, retrieve and delete model
records.
The architecture is described in the first section of
`docs/contributing/MODEL_MANAGER.md`.
## QA Instructions, Screenshots, Recordings
There is a pytest for the model sql storage backend in
`tests/backend/model_manager_2/test_model_storage_sql.py`.
To populate `invokeai.db` with models from your current `models.yaml`,
do the following:
1. Stop the running server
2. Back up `invokeai.db`
3. Run `pip install -e .` to install the command used in the next step.
4. Run `invokeai-migrate-models-to-db`
This will iterate through `models.yaml` and create equivalent database
entries in the `model_config` table of `invokeai.db`. Only the models
named in the yaml file will be migrated, so anything that is autoloaded
will be ignored.
Note that in order to get the `model_records` router to be recognized by
the swagger API, I had to rebuild the frontend. Not sure why this was
necessary and would appreciate a pointer on a less radical way to do
this.
## Added/updated tests?
- [X] Yes
- [ ] No
## What type of PR is this? (check all applicable)
- [ ] Refactor
- [ ] Feature
- [X] Bug Fix
- [X] Optimization
- [ ] Documentation Update
- [ ] Community Node Submission
## Have you discussed this change with the InvokeAI team?
- [ ] Yes
- [X] No, because it's required
## Have you updated all relevant documentation?
- [ ] Yes
- [X] No, not necessary
## Description
We use Pytorch ~2.1.0 as a dependency for InvokeAI, but the installer
still installs 2.0.1 first until Invoke AIs dependencies kick in which
causes it to get deleted anyway and replaced with 2.1.0. This is
unnecessary and probably not wanted.
Fixed the dependencies for the installation script to install Pytorch
~2.1.0 to begin with.
P.s. Is there any reason why "torchmetrics==0.11.4" is pinned? What is
the reason for that? Does that change with Pytorch 2.1? It seems to work
since we use it already. It would be nice to know the reason.
Greetings
## Related Tickets & Documents
<!--
For pull requests that relate or close an issue, please include them
below.
For example having the text: "closes #1234" would connect the current
pull
request to issue 1234. And when we merge the pull request, Github will
automatically close the issue.
-->
- Related Issue #
- Closes #
## QA Instructions, Screenshots, Recordings
<!--
Please provide steps on how to test changes, any hardware or
software specifications as well as any other pertinent information.
-->
## Added/updated tests?
- [ ] Yes
- [ ] No : _please replace this line with details on why tests
have not been included_
## [optional] Are there any post deployment tasks we need to perform?
## What type of PR is this? (check all applicable)
- [ ] Refactor
- [ ] Feature
- [ ] Bug Fix
- [x] Optimization
- [ ] Documentation Update
- [ ] Community Node Submission
## Description
Bit of a cleanup.
[chore(ui): delete unused
files](5eaea9dd64)
[feat(ui): add eslint rule
react/jsx-no-bind](3a0ec635c9)
This rule enforces no arrow functions in component props. In practice,
it means all functions passed as component props must be wrapped in
`useCallback()`.
This is a performance optimization to prevent unnecessary rerenders.
The rule is added and all violations have been fixed, whew!
[chore(ui): move useCopyImageToClipboard to
common/hooks/](f2d26a3a3c)
[chore(ui): move MM components & store to
features/](bb52861896)
Somehow they had ended up in `features/ui/tabs` which isn't right
## QA Instructions, Screenshots, Recordings
UI should still work.
It builds successfully, and I tested things out - looks good to me.
Do not use `strict=True` when scaling controlnet conditioning.
When using `guess_mode` (e.g. `more_control` or `more_prompt`), `down_block_res_samples` and `scales` are zipped.
These two objects are of different lengths, so using zip's strict mode raises an error.
In testing, `len(scales) === len(down_block_res_samples) + 1`.
It appears this behaviour is intentional, as the final "extra" item in `scales` is used immediately afterwards.
## What type of PR is this? (check all applicable)
- [ ] Refactor
- [ ] Feature
- [ ] Bug Fix
- [X] Optimization
- [ ] Documentation Update
- [ ] Community Node Submission
## Have you discussed this change with the InvokeAI team?
- [ ] Yes
- [X] No, because: This is just housekeeping
## Have you updated all relevant documentation?
- [ ] Yes
- [X] No, not needed
## Description
Update Accelerate to the most recent version. No breaking changes.
Tested for 1 week in productive use now.
## Related Tickets & Documents
<!--
For pull requests that relate or close an issue, please include them
below.
For example having the text: "closes #1234" would connect the current
pull
request to issue 1234. And when we merge the pull request, Github will
automatically close the issue.
-->
- Related Issue #
- Closes #
## QA Instructions, Screenshots, Recordings
<!--
Please provide steps on how to test changes, any hardware or
software specifications as well as any other pertinent information.
-->
## Added/updated tests?
- [ ] Yes
- [ ] No : _please replace this line with details on why tests
have not been included_
## [optional] Are there any post deployment tasks we need to perform?
## What type of PR is this? (check all applicable)
- [ ] Refactor
- [x] Feature
- [x] Bug Fix
- [x] Optimization
- [ ] Documentation Update
- [ ] Community Node Submission
## Description
This PR introduces [`ruff`](https://github.com/astral-sh/ruff) as the
only linter and formatter needed for the project. It is really fast.
Like, alarmingly fast.
It is a drop-in replacement for flake8, isort, black, and much more.
I've configured it similarly to our existing config.
Note: we had enabled a number of flake8 plugins but didn't have the
packages themselves installed, so they did nothing. Ruff used the
existing config, and found a good number of changes needed to adhere to
those flake8 plugins. I've resolved all violations.
### Code changes
- many
[flake8-comprehensions](https://docs.astral.sh/ruff/rules/#flake8-comprehensions-c4)
violations, almost all auto-fixed
- a good handful of
[flake8-bugbear](https://docs.astral.sh/ruff/rules/#flake8-bugbear-b)
violations
- handful of
[pycodestyle](https://docs.astral.sh/ruff/rules/#pycodestyle-e-w)
violations
- some formatting
### Developer Experience
[Ruff integrates with most
editors](https://docs.astral.sh/ruff/integrations/):
- Official VSCode extension
- `ruff-lsp` python package allows it to integrate with any LSP-capable
editor (vim, emacs, etc)
- Can be configured as an external tool in PyCharm
### Github Actions
I've updated the `style-checks` action to use ruff, and deleted the
`pyflakes` action.
## Related Tickets & Documents
<!--
For pull requests that relate or close an issue, please include them
below.
For example having the text: "closes #1234" would connect the current
pull
request to issue 1234. And when we merge the pull request, Github will
automatically close the issue.
-->
- Closes#5066
## QA Instructions, Screenshots, Recordings
Have a poke around, and run the app. There were some logic changes but
it was all pretty straightforward.
~~Not sure how to best test the changed github action.~~ Looks like it
just used the action from this PR, that's kinda unexpected but OK.
<!--
Please provide steps on how to test changes, any hardware or
software specifications as well as any other pertinent information.
-->
## Added/updated tests?
- [ ] Yes
- [ ] No : _please replace this line with details on why tests
have not been included_
## [optional] Are there any post deployment tasks we need to perform?
This rule enforces no arrow functions in component props. In practice, it means all functions passed as component props must be wrapped in `useCallback()`.
This is a performance optimization to prevent unnecessary rerenders.
The rule is added and all violations have been fixed, whew!
* adding VAE recall when using all parameters
* adding VAE to the RecallParameters tab in ImageMetadataActions
* checking for nil vae and casting to null if undefined
* adding default VAE to recall actions list if VAE is nullish
* fix(ui): use `lodash-es` for tree-shakeable imports
---------
Co-authored-by: psychedelicious <4822129+psychedelicious@users.noreply.github.com>
* working
* added selector for method
* refactoring graph
* added ersgan method
* fixing yarn build
* add tooltips
* a conjuction
* rephrase
* removed manual sliders, set HRF to calculate dimensions automatically to match 512^2 pixels
* working
* working
* working
* fixed tooltip
* add hrf to use all parameters
* adding hrf method to parameters
* working on parameter recall
* working on parameter recall
* cleaning
* fix(ui): fix unnecessary casts in addHrfToGraph
* chore(ui): use camelCase in addHrfToGraph
* fix(ui): do not add HRF metadata unless HRF is added to graph
* fix(ui): remove unused imports in addHrfToGraph
* feat(ui): do not hide HRF params when disabled, only disable them
* fix(ui): remove unused vars in addHrfToGraph
* feat(ui): default HRF str to 0.35, method ESRGAN
* fix(ui): use isValidBoolean to check hrfEnabled param
* fix(nodes): update CoreMetadataInvocation fields for HRF
* feat(ui): set hrf strength default to 0.45
* fix(ui): set default hrf strength in configSlice
* feat(ui): use translations for HRF features
---------
Co-authored-by: psychedelicious <4822129+psychedelicious@users.noreply.github.com>
## What type of PR is this? (check all applicable)
- [ ] Refactor
- [ ] Feature
- [X] Bug Fix
- [ ] Optimization
- [ ] Documentation Update
- [ ] Community Node Submission
## Have you discussed this change with the InvokeAI team?
- [ ] Yes
- [ ] No, because:
## Have you updated all relevant documentation?
- [ ] Yes
- [ ] No
## Description
## Related Tickets & Documents
<!--
For pull requests that relate or close an issue, please include them
below.
For example having the text: "closes #1234" would connect the current
pull
request to issue 1234. And when we merge the pull request, Github will
automatically close the issue.
-->
- Related Issue #
- Closes #
## QA Instructions, Screenshots, Recordings
<!--
Please provide steps on how to test changes, any hardware or
software specifications as well as any other pertinent information.
-->
## Added/updated tests?
- [ ] Yes
- [ ] No : _please replace this line with details on why tests
have not been included_
## [optional] Are there any post deployment tasks we need to perform?
## What type of PR is this? (check all applicable)
- [ ] Refactor
- [ ] Feature
- [X] Bug Fix
- [X] Optimization
- [ ] Documentation Update
- [ ] Community Node Submission
## Have you discussed this change with the InvokeAI team?
- [X] Yes, with @blessedcoolant
- [ ] No, because:
## Have you updated all relevant documentation?
- [ ] Yes
- [ ] No
## Description
This PR updates Transformers to the most recent version and fixes the
value `pad_to_multiple_of` for `text_encoder.resize_token_embeddings`
which was introduced with
https://github.com/huggingface/transformers/pull/25088 in Transformers
4.32.0.
According to the [Nvidia
Documentation](https://docs.nvidia.com/deeplearning/performance/dl-performance-matrix-multiplication/index.html#requirements-tc),
`Performance is better when equivalent matrix dimensions M, N, and K are
aligned to multiples of 8 bytes (or 64 bytes on A100) for FP16`
This fixes the following error that was popping up before every
invocation starting with Transformers 4.32.0
`You are resizing the embedding layer without providing a
pad_to_multiple_of parameter. This means that the new embedding
dimension will be None. This might induce some performance reduction as
Tensor Cores will not be available. For more details about this, or help
on choosing the correct value for resizing, refer to this guide:
https://docs.nvidia.com/deeplearning/performance/dl-performance-matrix-multiplication/index.html#requirements-tc`
This is my first "real" fix PR, so I hope this is fine. Please inform me
if there is anything wrong with this. I am glad to help.
Have a nice day and thank you!
## Related Tickets & Documents
<!--
For pull requests that relate or close an issue, please include them
below.
For example having the text: "closes #1234" would connect the current
pull
request to issue 1234. And when we merge the pull request, Github will
automatically close the issue.
-->
- Related Issue:
https://github.com/huggingface/transformers/issues/26303
- Related Discord discussion:
https://discord.com/channels/1020123559063990373/1154152783579197571
- Closes #
## QA Instructions, Screenshots, Recordings
<!--
Please provide steps on how to test changes, any hardware or
software specifications as well as any other pertinent information.
-->
## Added/updated tests?
- [ ] Yes
- [ ] No : _please replace this line with details on why tests
have not been included_
## [optional] Are there any post deployment tasks we need to perform?
## What type of PR is this? (check all applicable)
- [ ] Refactor
- [X] Feature
- [ ] Bug Fix
- [ ] Optimization
- [ ] Documentation Update
- [ ] Community Node Submission
## Have you discussed this change with the InvokeAI team?
- [X] Yes
- [ ] No, because:
## Have you updated all relevant documentation?
- [X] Yes
- [ ] No
## Description
## Related Tickets & Documents
<!--
For pull requests that relate or close an issue, please include them
below.
For example having the text: "closes #1234" would connect the current
pull
request to issue 1234. And when we merge the pull request, Github will
automatically close the issue.
-->
- Related Issue #
- Closes #
## QA Instructions, Screenshots, Recordings
<!--
Please provide steps on how to test changes, any hardware or
software specifications as well as any other pertinent information.
-->
## Added/updated tests?
- [ ] Yes
- [ ] No : _please replace this line with details on why tests
have not been included_
## [optional] Are there any post deployment tasks we need to perform?
## What type of PR is this? (check all applicable)
- [ ] Refactor
- [ ] Feature
- [x] Bug Fix
- [ ] Optimization
- [ ] Documentation Update
- [ ] Community Node Submission
## Have you discussed this change with the InvokeAI team?
- [x] Yes
- [ ] No, because:
## Have you updated all relevant documentation?
- [ ] Yes
- [x] No
## Description
## Related Tickets & Documents
<!--
For pull requests that relate or close an issue, please include them
below.
For example having the text: "closes #1234" would connect the current
pull
request to issue 1234. And when we merge the pull request, Github will
automatically close the issue.
-->
- Related Issue #
- Closes #
## QA Instructions, Screenshots, Recordings
<!--
Please provide steps on how to test changes, any hardware or
software specifications as well as any other pertinent information.
-->
## Added/updated tests?
- [ ] Yes
- [ ] No : _please replace this line with details on why tests
have not been included_
## [optional] Are there any post deployment tasks we need to perform?
We have a number of shared classes, objects, and functions that are used in multiple places. This causes circular import issues.
This commit creates a new `app/shared/` module to hold these shared classes, objects, and functions.
Initially, only `FreeUConfig` and `FieldDescriptions` are moved here. This resolves a circular import issue with custom nodes.
Other shared classes, objects, and functions will be moved here in future commits.
## What type of PR is this? (check all applicable)
- [ ] Refactor
- [ ] Feature
- [X] Bug Fix
- [ ] Optimization
- [ ] Documentation Update
- [ ] Community Node Submission
## Have you discussed this change with the InvokeAI team?
- [X] Yes: @psychedelicious told me to do this :)
- [ ] No, because:
## Have you updated all relevant documentation?
- [ ] Yes
- [ ] No
## Description
## Related Tickets & Documents
<!--
For pull requests that relate or close an issue, please include them
below.
For example having the text: "closes #1234" would connect the current
pull
request to issue 1234. And when we merge the pull request, Github will
automatically close the issue.
-->
- Related Issue #
- Closes #
## QA Instructions, Screenshots, Recordings
<!--
Please provide steps on how to test changes, any hardware or
software specifications as well as any other pertinent information.
-->
## Added/updated tests?
- [ ] Yes
- [ ] No : _please replace this line with details on why tests
have not been included_
## [optional] Are there any post deployment tasks we need to perform?
I'm not sure if it's correct way of handling things, but correcting this
string to '==0.0.20' fixes xformers install for me - and maybe for
others it will too. Sorry for absolutely incorrect PR.
Please see [this
thread](https://github.com/facebookresearch/xformers/issues/740), this
is the issue I had (trying to install InvokeAI with
Automatic/Manual/StableMatrix way).
With ~=0.0.19 (0.0.22):
```
(InvokeAI) pip install torch torchvision xformers~=0.0.19
Collecting torch
Obtaining dependency information for torch from edce54779f/torch-2.1.0-cp311-cp311-win_amd64.whl.metadata
Using cached torch-2.1.0-cp311-cp311-win_amd64.whl.metadata (25 kB)
Collecting torchvision
Obtaining dependency information for torchvision from ab6f42af83/torchvision-0.16.0-cp311-cp311-win_amd64.whl.metadata
Using cached torchvision-0.16.0-cp311-cp311-win_amd64.whl.metadata (6.6 kB)
Collecting xformers
Using cached xformers-0.0.22.post3.tar.gz (3.9 MB)
Installing build dependencies ... done
Getting requirements to build wheel ... error
error: subprocess-exited-with-error
× Getting requirements to build wheel did not run successfully.
│ exit code: 1
╰─> [20 lines of output]
Traceback (most recent call last):
File "C:\Users\Drun\invokeai\.venv\Lib\site-packages\pip\_vendor\pyproject_hooks\_in_process\_in_process.py", line 353, in <module>
main()
File "C:\Users\Drun\invokeai\.venv\Lib\site-packages\pip\_vendor\pyproject_hooks\_in_process\_in_process.py", line 335, in main
json_out['return_val'] = hook(**hook_input['kwargs'])
^^^^^^^^^^^^^^^^^^^^^^^^^^^^
File "C:\Users\Drun\invokeai\.venv\Lib\site-packages\pip\_vendor\pyproject_hooks\_in_process\_in_process.py", line 118, in get_requires_for_build_wheel
return hook(config_settings)
^^^^^^^^^^^^^^^^^^^^^
File "C:\Users\Drun\AppData\Local\Temp\pip-build-env-rmhvraqj\overlay\Lib\site-packages\setuptools\build_meta.py", line 355, in get_requires_for_build_wheel
return self._get_build_requires(config_settings, requirements=['wheel'])
^^^^^^^^^^^^^^^^^^^^^^^^^^^^^^^^^^^^^^^^^^^^^^^^^^^^^^^^^^^^^^^^^
File "C:\Users\Drun\AppData\Local\Temp\pip-build-env-rmhvraqj\overlay\Lib\site-packages\setuptools\build_meta.py", line 325, in _get_build_requires
self.run_setup()
File "C:\Users\Drun\AppData\Local\Temp\pip-build-env-rmhvraqj\overlay\Lib\site-packages\setuptools\build_meta.py", line 507, in run_setup
super(_BuildMetaLegacyBackend, self).run_setup(setup_script=setup_script)
File "C:\Users\Drun\AppData\Local\Temp\pip-build-env-rmhvraqj\overlay\Lib\site-packages\setuptools\build_meta.py", line 341, in run_setup
exec(code, locals())
File "<string>", line 23, in <module>
ModuleNotFoundError: No module named 'torch'
```
With 0.0.20:
```
(InvokeAI) pip install torch torchvision xformers==0.0.20
Collecting torch
Obtaining dependency information for torch from edce54779f/torch-2.1.0-cp311-cp311-win_amd64.whl.metadata
Using cached torch-2.1.0-cp311-cp311-win_amd64.whl.metadata (25 kB)
Collecting torchvision
Obtaining dependency information for torchvision from ab6f42af83/torchvision-0.16.0-cp311-cp311-win_amd64.whl.metadata
Using cached torchvision-0.16.0-cp311-cp311-win_amd64.whl.metadata (6.6 kB)
Collecting xformers==0.0.20
Obtaining dependency information for xformers==0.0.20 from d4a42f582a/xformers-0.0.20-cp311-cp311-win_amd64.whl.metadata
Using cached xformers-0.0.20-cp311-cp311-win_amd64.whl.metadata (1.1 kB)
Collecting numpy (from xformers==0.0.20)
Obtaining dependency information for numpy from 3f826c6d15/numpy-1.26.0-cp311-cp311-win_amd64.whl.metadata
Using cached numpy-1.26.0-cp311-cp311-win_amd64.whl.metadata (61 kB)
Collecting pyre-extensions==0.0.29 (from xformers==0.0.20)
Using cached pyre_extensions-0.0.29-py3-none-any.whl (12 kB)
Collecting torch
Using cached torch-2.0.1-cp311-cp311-win_amd64.whl (172.3 MB)
Collecting filelock (from torch)
Obtaining dependency information for filelock from 97afbafd9d/filelock-3.12.4-py3-none-any.whl.metadata
Using cached filelock-3.12.4-py3-none-any.whl.metadata (2.8 kB)
Requirement already satisfied: typing-extensions in c:\users\drun\invokeai\.venv\lib\site-packages (from torch) (4.8.0)
Requirement already satisfied: sympy in c:\users\drun\invokeai\.venv\lib\site-packages (from torch) (1.12)
Collecting networkx (from torch)
Using cached networkx-3.1-py3-none-any.whl (2.1 MB)
Collecting jinja2 (from torch)
Using cached Jinja2-3.1.2-py3-none-any.whl (133 kB)
Collecting typing-inspect (from pyre-extensions==0.0.29->xformers==0.0.20)
Obtaining dependency information for typing-inspect from 107a22063b/typing_inspect-0.9.0-py3-none-any.whl.metadata
Using cached typing_inspect-0.9.0-py3-none-any.whl.metadata (1.5 kB)
Collecting requests (from torchvision)
Obtaining dependency information for requests from 0e2d847013/requests-2.31.0-py3-none-any.whl.metadata
Using cached requests-2.31.0-py3-none-any.whl.metadata (4.6 kB)
INFO: pip is looking at multiple versions of torchvision to determine which version is compatible with other requirements. This could take a while.
Collecting torchvision
Using cached torchvision-0.15.2-cp311-cp311-win_amd64.whl (1.2 MB)
Collecting pillow!=8.3.*,>=5.3.0 (from torchvision)
Obtaining dependency information for pillow!=8.3.*,>=5.3.0 from debe992677/Pillow-10.0.1-cp311-cp311-win_amd64.whl.metadata
Using cached Pillow-10.0.1-cp311-cp311-win_amd64.whl.metadata (9.6 kB)
Collecting MarkupSafe>=2.0 (from jinja2->torch)
Obtaining dependency information for MarkupSafe>=2.0 from 08b85bc194/MarkupSafe-2.1.3-cp311-cp311-win_amd64.whl.metadata
Using cached MarkupSafe-2.1.3-cp311-cp311-win_amd64.whl.metadata (3.1 kB)
Collecting charset-normalizer<4,>=2 (from requests->torchvision)
Obtaining dependency information for charset-normalizer<4,>=2 from 50028bbb26/charset_normalizer-3.3.0-cp311-cp311-win_amd64.whl.metadata
Using cached charset_normalizer-3.3.0-cp311-cp311-win_amd64.whl.metadata (33 kB)
Collecting idna<4,>=2.5 (from requests->torchvision)
Using cached idna-3.4-py3-none-any.whl (61 kB)
Collecting urllib3<3,>=1.21.1 (from requests->torchvision)
Obtaining dependency information for urllib3<3,>=1.21.1 from 9957270221/urllib3-2.0.6-py3-none-any.whl.metadata
Using cached urllib3-2.0.6-py3-none-any.whl.metadata (6.6 kB)
Collecting certifi>=2017.4.17 (from requests->torchvision)
Obtaining dependency information for certifi>=2017.4.17 from 2234eab223/certifi-2023.7.22-py3-none-any.whl.metadata
Using cached certifi-2023.7.22-py3-none-any.whl.metadata (2.2 kB)
Requirement already satisfied: mpmath>=0.19 in c:\users\drun\invokeai\.venv\lib\site-packages (from sympy->torch) (1.3.0)
Collecting mypy-extensions>=0.3.0 (from typing-inspect->pyre-extensions==0.0.29->xformers==0.0.20)
Using cached mypy_extensions-1.0.0-py3-none-any.whl (4.7 kB)
Using cached xformers-0.0.20-cp311-cp311-win_amd64.whl (97.6 MB)
Using cached Pillow-10.0.1-cp311-cp311-win_amd64.whl (2.5 MB)
Using cached filelock-3.12.4-py3-none-any.whl (11 kB)
Using cached numpy-1.26.0-cp311-cp311-win_amd64.whl (15.8 MB)
Using cached requests-2.31.0-py3-none-any.whl (62 kB)
Using cached certifi-2023.7.22-py3-none-any.whl (158 kB)
Using cached charset_normalizer-3.3.0-cp311-cp311-win_amd64.whl (97 kB)
Using cached MarkupSafe-2.1.3-cp311-cp311-win_amd64.whl (17 kB)
Using cached urllib3-2.0.6-py3-none-any.whl (123 kB)
Using cached typing_inspect-0.9.0-py3-none-any.whl (8.8 kB)
Installing collected packages: urllib3, pillow, numpy, networkx, mypy-extensions, MarkupSafe, idna, filelock, charset-normalizer, certifi, typing-inspect, requests, jinja2, torch, pyre-extensions, xformers, torchvision
Successfully installed MarkupSafe-2.1.3 certifi-2023.7.22 charset-normalizer-3.3.0 filelock-3.12.4 idna-3.4 jinja2-3.1.2 mypy-extensions-1.0.0 networkx-3.1 numpy-1.26.0 pillow-10.0.1 pyre-extensions-0.0.29 requests-2.31.0 torch-2.0.1 torchvision-0.15.2 typing-inspect-0.9.0 urllib3-2.0.6 xformers-0.0.20
```
## What type of PR is this? (check all applicable)
- [ ] Refactor
- [ ] Feature
- [x] Bug Fix
- [ ] Optimization
- [ ] Documentation Update
- [ ] Community Node Submission
## Have you discussed this change with the InvokeAI team?
- [ ] Yes
- [x] No, because: I'm no-brainer. It fixed issue for me, so I did PR.
Who knows?
## Technical details:
Windows 11, Standalone clean and freshly-installed Python 3.11
## What type of PR is this? (check all applicable)
- [ ] Refactor
- [ ] Feature
- [X] Bug Fix
- [ ] Optimization
- [ ] Documentation Update
- [ ] Community Node Submission
## Have you discussed this change with the InvokeAI team?
- [ ] Yes
- [X] No, because:
## Have you updated all relevant documentation?
- [ ] Yes
- [X] No
## Description
Removing LowRA from the initial models as it's been deleted from
CivitAI.
## Related Tickets & Documents
https://discord.com/channels/1020123559063990373/1168415065205112872
- Related Issue #
- Closes #
## QA Instructions, Screenshots, Recordings
<!--
Please provide steps on how to test changes, any hardware or
software specifications as well as any other pertinent information.
-->
## Added/updated tests?
- [ ] Yes
- [ ] No : _please replace this line with details on why tests
have not been included_
## [optional] Are there any post deployment tasks we need to perform?
## What type of PR is this? (check all applicable)
- [ ] Refactor
- [ ] Feature
- [ ] Bug Fix
- [x] Optimization
- [ ] Documentation Update
- [ ] Community Node Submission
## Have you discussed this change with the InvokeAI team?
- [x] Yes
- [ ] No, because:
## Have you updated all relevant documentation?
- [x] Yes
- [ ] No
## Description
Improve LoRA patching speed with the following changes:
- Calculate LoRA layer weights on the same device as the target model.
Prior to this change, weights were always calculated on the CPU. If the
target model is on the GPU, this significantly improves performance.
- Move models to their target devices _before_ applying LoRA patches.
- Improve the ordering of Tensor copy / cast operations.
## QA Instructions, Screenshots, Recordings
Tests:
- [x] Tested with a CUDA GPU, saw savings of ~10secs with 1 LoRA applied
to an SDXL model.
- [x] No regression in CPU-only environment
- [ ] No regression (and possible improvement?) on Mac with MPS.
- [x] Weights get restored correctly after using a LoRA
- [x] Stacking multiple LoRAs
Please hammer away with a variety of LoRAs in case there is some edge
case that I've missed.
## Added/updated tests?
- [x] Yes (Added some minimal unit tests. Definitely would benefit from
more, but it's a step in the right direction.)
- [ ] No
## What type of PR is this? (check all applicable)
- [ ] Refactor
- [X] Feature
- [ ] Bug Fix
- [ ] Optimization
- [ ] Documentation Update
- [ ] Community Node Submission
## Have you discussed this change with the InvokeAI team?
- [X] Yes
- [ ] No, because:
## Have you updated all relevant documentation?
- [X] Yes
- [ ] No
## Description
This PR gives the user the option of upgrading to the latest PRE-RELEASE
in addition to the default of updating to the latest release. This will
allow users to conveniently try out the latest pre-release for a while
and then back out to the official release if it doesn't work for them.
Added Average Images node
## What type of PR is this? (check all applicable)
- [ ] Refactor
- [ ] Feature
- [ ] Bug Fix
- [ ] Optimization
- [ ] Documentation Update
- [X] Community Node Submission
## Have you discussed this change with the InvokeAI team?
- [ ] Yes
- [X] No, because:
## Have you updated all relevant documentation?
- [X] Yes
- [ ] No
## Description
Added a new community node that averages input images.
## What type of PR is this? (check all applicable)
- [ ] Refactor
- [ ] Feature
- [X] Bug Fix
- [ ] Optimization
- [ ] Documentation Update
- [ ] Community Node Submission
## Have you discussed this change with the InvokeAI team?
- [X] Yes
- [ ] No, because:
## Have you updated all relevant documentation?
- [X] Yes
- [ ] No
## Description
This PR prevents the invokeai update script from offering prereleases.
Currently translated at 37.7% (460 of 1217 strings)
translationBot(ui): update translation (German)
Currently translated at 36.4% (444 of 1217 strings)
translationBot(ui): update translation (German)
Currently translated at 36.0% (439 of 1217 strings)
Co-authored-by: Alexander Eichhorn <pfannkuchensack@einfach-doof.de>
Translate-URL: https://hosted.weblate.org/projects/invokeai/web-ui/de/
Translation: InvokeAI/Web UI
Currently translated at 37.7% (460 of 1217 strings)
translationBot(ui): update translation (German)
Currently translated at 36.4% (444 of 1217 strings)
translationBot(ui): update translation (German)
Currently translated at 36.4% (443 of 1217 strings)
translationBot(ui): update translation (German)
Currently translated at 36.0% (439 of 1217 strings)
translationBot(ui): update translation (German)
Currently translated at 35.5% (433 of 1217 strings)
Co-authored-by: Fabian Bahl <fabian98@bahl-netz.de>
Translate-URL: https://hosted.weblate.org/projects/invokeai/web-ui/de/
Translation: InvokeAI/Web UI
Currently translated at 36.0% (439 of 1217 strings)
translationBot(ui): update translation (German)
Currently translated at 35.5% (433 of 1217 strings)
Co-authored-by: Jaulustus <jaulustus@gmail.com>
Translate-URL: https://hosted.weblate.org/projects/invokeai/web-ui/de/
Translation: InvokeAI/Web UI
Currently translated at 56.1% (683 of 1217 strings)
translationBot(ui): update translation (Japanese)
Currently translated at 40.3% (491 of 1217 strings)
Co-authored-by: Gohsuke Shimada <ghoskay@gmail.com>
Translate-URL: https://hosted.weblate.org/projects/invokeai/web-ui/ja/
Translation: InvokeAI/Web UI
Update to Load Video Frame node to reflect changes made in link
locations... a.k.a. fixing broken links.
## What type of PR is this? (check all applicable)
- [ ] Refactor
- [ ] Feature
- [ ] Bug Fix
- [ ] Optimization
- [x ] Documentation Update
- [x ] Community Node Submission
## Have you discussed this change with the InvokeAI team?
- [ ] Yes
- [x ] No, because: Its just a doc change to fix links I made for
resources that the page depends on from my github.
## Have you updated all relevant documentation?
- [? ] Yes
- [ ] No
## Description
load vid frame community node layout and link change.
## Related Tickets & Documents
<!--
For pull requests that relate or close an issue, please include them
below.
For example having the text: "closes #1234" would connect the current
pull
request to issue 1234. And when we merge the pull request, Github will
automatically close the issue.
-->
- Related Issue #
- Closes #
## QA Instructions, Screenshots, Recordings
<!--
Please provide steps on how to test changes, any hardware or
software specifications as well as any other pertinent information.
-->
## Added/updated tests?
- [ ] Yes
- [ ] No : _please replace this line with details on why tests
have not been included_
## [optional] Are there any post deployment tasks we need to perform?
## What type of PR is this? (check all applicable)
- [ ] Refactor
- [ ] Feature
- [X] Bug Fix
- [ ] Optimization
- [ ] Documentation Update
- [ ] Community Node Submission
## Have you discussed this change with the InvokeAI team?
- [ ] Yes
- [X] No, because n/a
## Have you updated all relevant documentation?
- [X] Yes
- [ ] No
## Description
The introduction of `BaseModelType.Any` broke the code in the merge
script which relied on sd-1 coming first in the BaseModelType enum. This
assumption has been removed and the code should be less brittle now.
## Related Tickets & Documents
<!--
For pull requests that relate or close an issue, please include them
below.
For example having the text: "closes #1234" would connect the current
pull
request to issue 1234. And when we merge the pull request, Github will
automatically close the issue.
-->
- Related Issue #
- Closes #
## QA Instructions, Screenshots, Recordings
<!--
Please provide steps on how to test changes, any hardware or
software specifications as well as any other pertinent information.
-->
## Added/updated tests?
- [ ] Yes
- [ ] No : _please replace this line with details on why tests
have not been included_
## [optional] Are there any post deployment tasks we need to perform?
## What type of PR is this? (check all applicable)
- [ ] Refactor
- [ ] Feature
- [X] Bug Fix
- [ ] Optimization
- [ ] Documentation Update
- [ ] Community Node Submission
## Have you discussed this change with the InvokeAI team?
- [X] Yes
- [ ] No, because:
## Have you updated all relevant documentation?
- [X] Yes
- [ ] No
## Description
Fix textual inversion training script crash caused by reorg of services.
## Related Tickets & Documents
- closes#4975
<!--
For pull requests that relate or close an issue, please include them
below.
For example having the text: "closes #1234" would connect the current
pull
request to issue 1234. And when we merge the pull request, Github will
automatically close the issue.
-->
- Related Issue #
- Closes #
## QA Instructions, Screenshots, Recordings
<!--
Please provide steps on how to test changes, any hardware or
software specifications as well as any other pertinent information.
-->
## Added/updated tests?
- [ ] Yes
- [ ] No : _please replace this line with details on why tests
have not been included_
## [optional] Are there any post deployment tasks we need to perform?
## What type of PR is this? (check all applicable)
- [ ] Refactor
- [X] Feature
- [ ] Bug Fix
- [ ] Optimization
- [ ] Documentation Update
- [ ] Community Node Submission
## Have you discussed this change with the InvokeAI team?
- [X] Yes
- [ ] No, because:
## Have you updated all relevant documentation?
- [X] Yes
- [ ] No
## Description
This PR allows users to install checkpoint (safetensors) versions of
controlnet models. The models will be converted into diffusers format
and cached on the fly.
This only works for sd-1 and sd-2 controlnets, as I was unable to find
controlnet sdxl checkpoint models or their corresponding .yaml config
files.
After updating, please run `invokeai-configure --yes --default-only` to
install the missing config files. Users should be instructed to select
option [7] from the launcher "Re-run the configure script to fix a
broken install or to complete a major upgrade".
## Related Tickets & Documents
User request at
https://discord.com/channels/1020123559063990373/1160318627631870092/1160318627631870092
<!--
For pull requests that relate or close an issue, please include them
below.
For example having the text: "closes #1234" would connect the current
pull
request to issue 1234. And when we merge the pull request, Github will
automatically close the issue.
-->
- Related Issue #4743
- Closes #
## QA Instructions, Screenshots, Recordings
<!--
Please provide steps on how to test changes, any hardware or
software specifications as well as any other pertinent information.
-->
See above for instructions on updating the config files after checking
out the PR.
## What type of PR is this? (check all applicable)
- [ ] Refactor
- [ ] Feature
- [x] Bug Fix
- [ ] Optimization
- [ ] Documentation Update
- [ ] Community Node Submission
## Have you discussed this change with the InvokeAI team?
- [x] Yes
- [ ] No, because:
## Description
[fix(nodes): fix missing generation
modes](8615d53e65)
Lax typing on the metadata util functions allowed a typing issue to slip
through. Fixed the lax typing, updated core metadata node.
## Related Tickets & Documents
<!--
For pull requests that relate or close an issue, please include them
below.
For example having the text: "closes #1234" would connect the current
pull
request to issue 1234. And when we merge the pull request, Github will
automatically close the issue.
-->
- Related Issue #
- Closes#4959 (thanks @coder543)
## What type of PR is this? (check all applicable)
- [ ] Refactor
- [ ] Feature
- [x] Bug Fix
- [ ] Optimization
- [ ] Documentation Update
- [ ] Community Node Submission
## Description
fix(nodes): explicitly include custom nodes files
setuptools ignores markdown files - explicitly include all files in
`"invokeai.app.invocations"` to ensure all custom node files are
included
## What type of PR is this? (check all applicable)
- [ ] Refactor
- [x] Feature
- [ ] Bug Fix
- [x] Optimization
- [x] Documentation Update
- [ ] Community Node Submission
## Have you discussed this change with the InvokeAI team?
- [x] Yes
- [ ] No, because:
## Have you updated all relevant documentation?
- [x] Yes
- [ ] No
## Description
- updates the Docker image with ubuntu23.04 base, python3.11
- use the newer pytorch wheel with cuda12.1 support
- corrects `docker compose` CLI in shell script wrappers and docs
- update / overhaul Docker docs
- clean up obsolete lines in `.gitignore`
## QA Instructions, Screenshots, Recordings
Follow the documentation changes, or simply:
```bash
cd docker
cp .env.sample .env
# Set your INVOKEAI_ROOT in .env
docker compose up
```
## Added/updated tests?
- [ ] Yes
- [x] No : N/A
Custom nodes may be places in `$INVOKEAI_ROOT/nodes/` (configurable with `custom_nodes_dir` option).
On app startup, an `__init__.py` is copied into the custom nodes dir, which recursively loads all python files in the directory as modules (files starting with `_` are ignored). The custom nodes dir is now a python module itself.
When we `from invocations import *` to load init all invocations, we load the custom nodes dir, registering all custom nodes.
Also added config options for metadata and workflow debounce times (`metadataFetchDebounce` & `workflowFetchDebounce`).
Falls back to 0 if not provided.
In OSS, because we have no major latency concerns, the debounce is 0. But in other environments, it may be desirable to set this to something like 300ms.
- Refactor how metadata is handled to support a user-defined metadata in graphs
- Update workflow embed handling
- Update UI to work with these changes
- Update tests to support metadata/workflow changes
This fixes a weird issue where the list images method needed to handle `None` for its `limit` and `offset` arguments, in order to get a count of all intermediates.
On our local installs this will be a very minor change. For those running on remote servers, load times should be slightly improved.
It's a small change but I think correct.
This should prevent `index.html` from *ever* being cached, so UIs will never be out of date.
Minor organisation to accomodate this.
Deleting old unused files from the early days
## What type of PR is this? (check all applicable)
- [ ] Refactor
- [x] Feature
- [ ] Bug Fix
- [ ] Optimization
- [ ] Documentation Update
- [ ] Community Node Submission
## Description
This PR adds the ability to pass multiple images to a single IP-Adapter
(note the difference from using _multiple IP-Adapters at once_, which is
already supported.). The image embeddings are combined in the IP-Adapter
attention layers. This is the same strategy for combining multiple
images as used in Insta-LoRA workflows
(https://civitai.com/articles/2345).
This PR only adds multi-image support in the backend and the node
editor. The Linear UI still needs to be updated.
## QA Instructions, Screenshots, Recordings
I have manually tested the following via the workflow editor:
- Multiple images with a single IP-Adapter
- Multiple images per IP-Adapter, and multiple IP-Adapters
- Both standard and sequential conditioning
- IP-Adapters still work in the Linear UI.
Please hammer at this feature some more with manual testing.
## Added/updated tests?
- [x] Yes
- [ ] No
I updated the existing IP-Adapter smoke test, but it provides pretty
limited coverage of this feature. This feature would probably be best
tested by an end-to-end workflow test, which is not currently supported.
(I'm hoping to put some effort into workflow-level testing soon.)
## What type of PR is this? (check all applicable)
- [ ] Refactor
- [ ] Feature
- [x] Bug Fix
- [ ] Optimization
- [ ] Documentation Update
- [ ] Community Node Submission
## Have you discussed this change with the InvokeAI team?
- [x] Yes
- [ ] No, because:
## Description
fix(ui): use pidi processor for sketch control adapters
Also, the PREVIOUS commit (@8d3885d, which was already pushed to github repo) was wrongly commented, but too late to fix without a force push or other mucking that I'm reluctant to do. That commit is actually the one that has all the changes to diffusers_pipeline.py to use additional arg down_intrablock_additional_residuals (introduced in diffusers PR https://github.com/huggingface/diffusers/pull/5362) to detangle T2I-Adapter from ControlNet inputs to main UNet.
Upgrade pydantic and fastapi to latest.
- pydantic~=2.4.2
- fastapi~=103.2
- fastapi-events~=0.9.1
**Big Changes**
There are a number of logic changes needed to support pydantic v2. Most changes are very simple, like using the new methods to serialized and deserialize models, but there are a few more complex changes.
**Invocations**
The biggest change relates to invocation creation, instantiation and validation.
Because pydantic v2 moves all validation logic into the rust pydantic-core, we may no longer directly stick our fingers into the validation pie.
Previously, we (ab)used models and fields to allow invocation fields to be optional at instantiation, but required when `invoke()` is called. We directly manipulated the fields and invocation models when calling `invoke()`.
With pydantic v2, this is much more involved. Changes to the python wrapper do not propagate down to the rust validation logic - you have to rebuild the model. This causes problem with concurrent access to the invocation classes and is not a free operation.
This logic has been totally refactored and we do not need to change the model any more. The details are in `baseinvocation.py`, in the `InputField` function and `BaseInvocation.invoke_internal()` method.
In the end, this implementation is cleaner.
**Invocation Fields**
In pydantic v2, you can no longer directly add or remove fields from a model.
Previously, we did this to add the `type` field to invocations.
**Invocation Decorators**
With pydantic v2, we instead use the imperative `create_model()` API to create a new model with the additional field. This is done in `baseinvocation.py` in the `invocation()` wrapper.
A similar technique is used for `invocation_output()`.
**Minor Changes**
There are a number of minor changes around the pydantic v2 models API.
**Protected `model_` Namespace**
All models' pydantic-provided methods and attributes are prefixed with `model_` and this is considered a protected namespace. This causes some conflict, because "model" means something to us, and we have a ton of pydantic models with attributes starting with "model_".
Forunately, there are no direct conflicts. However, in any pydantic model where we define an attribute or method that starts with "model_", we must tell set the protected namespaces to an empty tuple.
```py
class IPAdapterModelField(BaseModel):
model_name: str = Field(description="Name of the IP-Adapter model")
base_model: BaseModelType = Field(description="Base model")
model_config = ConfigDict(protected_namespaces=())
```
**Model Serialization**
Pydantic models no longer have `Model.dict()` or `Model.json()`.
Instead, we use `Model.model_dump()` or `Model.model_dump_json()`.
**Model Deserialization**
Pydantic models no longer have `Model.parse_obj()` or `Model.parse_raw()`, and there are no `parse_raw_as()` or `parse_obj_as()` functions.
Instead, you need to create a `TypeAdapter` object to parse python objects or JSON into a model.
```py
adapter_graph = TypeAdapter(Graph)
deserialized_graph_from_json = adapter_graph.validate_json(graph_json)
deserialized_graph_from_dict = adapter_graph.validate_python(graph_dict)
```
**Field Customisation**
Pydantic `Field`s no longer accept arbitrary args.
Now, you must put all additional arbitrary args in a `json_schema_extra` arg on the field.
**Schema Customisation**
FastAPI and pydantic schema generation now follows the OpenAPI version 3.1 spec.
This necessitates two changes:
- Our schema customization logic has been revised
- Schema parsing to build node templates has been revised
The specific aren't important, but this does present additional surface area for bugs.
**Performance Improvements**
Pydantic v2 is a full rewrite with a rust backend. This offers a substantial performance improvement (pydantic claims 5x to 50x depending on the task). We'll notice this the most during serialization and deserialization of sessions/graphs, which happens very very often - a couple times per node.
I haven't done any benchmarks, but anecdotally, graph execution is much faster. Also, very larges graphs - like with massive iterators - are much, much faster.
There's a bug in chrome that screws with headers on fetch requests and 307 responses. This causes images to fail to copy in the commercial environment.
This change attempts to get around this by copying images in a different way (similar to how the canvas works). When the user requests a copy we:
- create an `<img />` element
- set `crossOrigin` if needed
- add an onload handler:
- create a canvas element
- draw image onto it
- export canvas to blob
This is wrapped in a promise which resolves to the blob, which can then be copied to clipboard.
---
A customized version of Konva's `useImage` hook is also included, which returns the image blob in addition to the `<img />` element. Unfortunately, this hook is not suitable for use across the app, because it does all the image fetching up front, regardless of whether we actually want to copy the image.
In other words, we'd have to fetch the whole image file even if the user is just skipping through image metadata, in order to have the blob to copy. The callback approach means we only fetch the image when the user clicks copy. The hook is thus currently unused.
## What type of PR is this? (check all applicable)
- [ ] Refactor
- [ ] Feature
- [x] Bug Fix
- [ ] Optimization
- [ ] Documentation Update
- [ ] Community Node Submission
## Have you discussed this change with the InvokeAI team?
- [x] Yes
- [ ] No, because:
## Description
Fix for breaking change in `python-socketio` 5.10.0 in which
`enter_room` and `leave_room` were made coroutines.
## Related Tickets & Documents
<!--
For pull requests that relate or close an issue, please include them
below.
For example having the text: "closes #1234" would connect the current
pull
request to issue 1234. And when we merge the pull request, Github will
automatically close the issue.
-->
- Closes#4899
## What type of PR is this? (check all applicable)
- [ ] Refactor
- [ ] Feature
- [x] Bug Fix
- [ ] Optimization
- [ ] Documentation Update
- [ ] Community Node Submission
## Description
fix(ui): fix control adapter translation string
Missed this during a previous change
## Related Tickets & Documents
<!--
For pull requests that relate or close an issue, please include them
below.
For example having the text: "closes #1234" would connect the current
pull
request to issue 1234. And when we merge the pull request, Github will
automatically close the issue.
-->
Reported by @Harvester62 :
https://discord.com/channels/1020123559063990373/1054129386447716433/1162018775437148160
## What type of PR is this? (check all applicable)
- [ ] Refactor
- [ ] Feature
- [X] Bug Fix
- [ ] Optimization
- [ ] Documentation Update
- [ ] Community Node Submission
## Have you discussed this change with the InvokeAI team?
- [X] Yes
- [ ] No, because:
## Have you updated all relevant documentation?
- [X] Yes
- [ ] No
## Description
This PR strips leading and trailing whitespace from URLs that are
entered into either the Web Model Manager import field, or using the
TUI.
## Related Tickets & Documents
Closes#4536
## QA Instructions, Screenshots, Recordings
Try to import a URL with leading or trailing whitespace. Should not work
in current main. This PR should fix it.
## What type of PR is this? (check all applicable)
- [ ] Refactor
- [ ] Feature
- [X] Bug Fix
- [ ] Optimization
- [ ] Documentation Update
- [ ] Community Node Submission
## Have you discussed this change with the InvokeAI team?
- [X] Yes
- [ ] No, because:
## Have you updated all relevant documentation?
- [X] Yes
- [ ] No
## Description
Mac users have a recurring issue in which a `.DS_Store` directory is
created in their `models` hierarchy, causing the new model scanner to
freak out. This PR skips over any paths that begin with a dot. I haven't
tested it on a Macintosh, so I'm not 100% certain it will do the trick.
## Related Tickets & Documents
- Related Issue #4815
## QA Instructions, Screenshots, Recordings
Someone with a Mac please try to reproduce the `.DS_Store` crash and
then see if applying this PR addresses the issue.
## What type of PR is this? (check all applicable)
- [ ] Refactor
- [ ] Feature
- [x] Bug Fix
- [ ] Optimization
- [ ] Documentation Update
- [ ] Community Node Submission
## Description
This was in the original fix in #4829 but I must have removed it
accidentally.
## Related Tickets & Documents
<!--
For pull requests that relate or close an issue, please include them
below.
For example having the text: "closes #1234" would connect the current
pull
request to issue 1234. And when we merge the pull request, Github will
automatically close the issue.
-->
- Related Issue #
- Closes#4889
## QA Instructions, Screenshots, Recordings
- Start from a fresh canvas session (may need to let a generation finish
or reset web UI if yours is locked)
- Invoke/add to queue
- Immediately cancel current, clear queue, or clear batch (can do this
from the queue tab)
- Canvas should return to normal state
<!--
Please provide steps on how to test changes, any hardware or
software specifications as well as any other pertinent information.
-->
Facetools nodes were cutting off faces that extended beyond chunk boundaries in some cases. All faces found are considered and are coalesced rather than pruned, meaning that you should not see half a face any more.
## What type of PR is this? (check all applicable)
- [ ] Refactor
- [ ] Feature
- [x] Bug Fix
- [ ] Optimization
- [ ] Documentation Update
- [ ] Community Node Submission
## Have you discussed this change with the InvokeAI team?
- [x] Yes
- [ ] No, because:
## Description
[fix(nodes,ui): optional
metadata](78b8cfede3)
- Make all metadata items optional. This will reduce errors related to
metadata not being provided when we update the backend but old queue
items still exist
- Fix a bug in t2i adapter metadata handling where it checked for ip
adapter metadata instaed of t2i adapter metadata
- Fix some metadata fields that were not using `InputField`
- Make all metadata items optional. This will reduce errors related to metadata not being provided when we update the backend but old queue items still exist
- Fix a bug in t2i adapter metadata handling where it checked for ip adapter metadata instaed of t2i adapter metadata
- Fix some metadata fields that were not using `InputField`
Currently translated at 91.4% (1112 of 1216 strings)
translationBot(ui): update translation (Italian)
Currently translated at 90.4% (1100 of 1216 strings)
translationBot(ui): update translation (Italian)
Currently translated at 90.4% (1100 of 1216 strings)
Co-authored-by: Riccardo Giovanetti <riccardo.giovanetti@gmail.com>
Translate-URL: https://hosted.weblate.org/projects/invokeai/web-ui/it/
Translation: InvokeAI/Web UI
`mallinfo2` is not available on `glibc` < 2.33.
On these systems, we successfully load the library but get an `AttributeError` on attempting to access `mallinfo2`.
I'm not sure if the old `mallinfo` will work, and not sure how to install it safely to test, so for now we just handle the `AttributeError`.
This means the enhanced memory snapshot logic will be skipped for these systems, which isn't a big deal.
## What type of PR is this? (check all applicable)
- [X] Optimization
-
## Have you discussed this change with the InvokeAI team?
- [X] Yes
- [ ] No, because:
## Have you updated all relevant documentation?
- [X] Yes
- [ ] No
## Description
This PR changes the pypi-release workflow so that it will upload to PyPi
whenever a release is initiated from the `main` branch or another branch
beginning with `release/`. Previous support for v2.3 branches has been
removed.
I'm not sure if it's correct way of handling things, but correcting this string to '==0.0.20' fixes xformers install for me - and maybe for others too.
Please see this thread, this is the issue I had (trying to install InvokeAI):
https://github.com/facebookresearch/xformers/issues/740
* added HrfScale type with initial value
* working
* working
* working
* working
* working
* added addHrfToGraph
* continueing to implement this
* working on this
* comments
* working
* made hrf into its own collapse
* working on adding strength slider
* working
* working
* refactoring
* working
* change of this working: 0
* removed onnx support since apparently its not used
* working
* made scale integer
* trying out psycicpebbles idea
* working
* working on this
* working
* added toggle
* comments
* self review
* fixing things
* remove 'any' type
* fixing typing
* changed initial strength value to 3 (large values cause issues)
* set denoising start to be 1 - strength to resemble image to image
* set initial value
* added image to image
* pr1
* pr2
* updating to resolution finding
* working
* working
* working
* working
* working
* working
* working
* working
* working
* use memo
* connect rescale hw to noise
* working
* fixed min bug
* nit
* hides elements conditionally
* style
* feat(ui): add config for HRF, disable if feature disabled or ONNX model in use
* fix(ui): use `useCallback` for HRF toggle
---------
Co-authored-by: psychedelicious <4822129+psychedelicious@users.noreply.github.com>
* #4665 hides value of the corresponding metadata item by click on arrow
* #4787 return recall button back:)
* #4787 optional hide of metadata item, truncation and scrolling
* remove unused import
* #4787 recall parameters as separate tab in panel
* #4787 remove debug code
* fix(ui): undo changes to dist/locales/en.json
This file is autogenerated by our translation system and shouldn't be modified directly
* feat(ui): use scrollbar-enabled component for parameter recall tab
* fix(ui): revert unnecessary changes to DataViewer component
---------
Co-authored-by: psychedelicious <4822129+psychedelicious@users.noreply.github.com>
v3.3.0 was accidentally released with more changes than intended. This workflows change will allow us release to pypi from a separate branch rather than main.
## What type of PR is this? (check all applicable)
v3.3.0 release
## Have you discussed this change with the InvokeAI team?
- [X] Yes
- [ ] No, because:
## Have you updated all relevant documentation?
- [X] Yes
- [ ] No
## What type of PR is this? (check all applicable)
- [ ] Refactor
- [ ] Feature
- [X] Bug Fix
- [ ] Optimization
- [ ] Documentation Update
- [ ] Community Node Submission
## Have you discussed this change with the InvokeAI team?
- [X] Yes
- [ ] No, because:
## Have you updated all relevant documentation?
- [ ] Yes
- [ ] No
## Description
The `invokeai-configure` TUI's slider for the RAM cache was not picking
up the current settings in `invokeai.yaml`, leading users to think their
change hadn't taken effect. This is fixed in this PR.
## Related Tickets & Documents
First described here:
https://discord.com/channels/1020123559063990373/1161919551441735711/1162058518417907743
## What type of PR is this? (check all applicable)
- [ ] Refactor
- [ ] Feature
- [X] Bug Fix
- [ ] Optimization
- [ ] Documentation Update
- [ ] Community Node Submission
## Have you discussed this change with the InvokeAI team?
- [X] Yes
- [ ] No, because:
## Have you updated all relevant documentation?
- [X] Yes
- [ ] No
## Description
A regression in 3.2.0 causes a seemingly nonsensical multiple choice
menu to appear when importing an SD-1 checkpoint model from the
autoimport directory. The menu asks the user to identify which type of
SD-2 model they are trying to import, which makes no sense.
In fact, the menu is popping up because there are now both "epsilon" and
"vprediction" SchedulerPredictionTypes for SD-1 as well as SD-2 models,
and the prober can't determine which prediction type to use. This PR
does two things:
1) rewords the menu as shown below
2) defaults to the most likely choice -- epsilon for v1 models and
vprediction for v2s
Here is the revised multiple-choice menu:
```
Please select the scheduler prediction type of the checkpoint named v1-5-pruned-emaonly.safetensors:
[1] "epsilon" - most v1.5 models and v2 models trained on 512 pixel images
[2] "vprediction" - v2 models trained on 768 pixel images and a few v1.5 models
[3] Accept the best guess; you can fix it in the Web UI later
select [3]>
```
Note that one can also put the appropriate config file into the same
directory as the checkpoint you wish to import. Give it the same name as
the model file, but with the extension `.yaml`. For example
`v1-5-pruned-emaonly.yaml`. The system will notice the yaml file and use
that, suppressing the quiz entirely.
## Related Tickets & Documents
- Closes#4768
- Closes#4827
Refactor services folder/module structure.
**Motivation**
While working on our services I've repeatedly encountered circular imports and a general lack of clarity regarding where to put things. The structure introduced goes a long way towards resolving those issues, setting us up for a clean structure going forward.
**Services**
Services are now in their own folder with a few files:
- `services/{service_name}/__init__.py`: init as needed, mostly empty now
- `services/{service_name}/{service_name}_base.py`: the base class for the service
- `services/{service_name}/{service_name}_{impl_type}.py`: the default concrete implementation of the service - typically one of `sqlite`, `default`, or `memory`
- `services/{service_name}/{service_name}_common.py`: any common items - models, exceptions, utilities, etc
Though it's a bit verbose to have the service name both as the folder name and the prefix for files, I found it is _extremely_ confusing to have all of the base classes just be named `base.py`. So, at the cost of some verbosity when importing things, I've included the service name in the filename.
There are some minor logic changes. For example, in `InvocationProcessor`, instead of assigning the model manager service to a variable to be used later in the file, the service is used directly via the `Invoker`.
**Shared**
Things that are used across disparate services are in `services/shared/`:
- `default_graphs.py`: previously in `services/`
- `graphs.py`: previously in `services/`
- `paginatation`: generic pagination models used in a few services
- `sqlite`: the `SqliteDatabase` class, other sqlite-specific things
**Service Dependencies**
Services that depend on other services now access those services via the `Invoker` object. This object is provided to the service as a kwarg to its `start()` method.
Until now, most services did not utilize this feature, and several services required their dependencies to be initialized and passed in on init.
Additionally, _all_ services are now registered as invocation services - including the low-level services. This obviates issues with inter-dependent services we would otherwise experience as we add workflow storage.
**Database Access**
Previously, we were passing in a separate sqlite connection and corresponding lock as args to services in their init. A good amount of posturing was done in each service that uses the db.
These objects, along with the sqlite startup and cleanup logic, is now abstracted into a simple `SqliteDatabase` class. This creates the shared connection and lock objects, enables foreign keys, and provides a `clean()` method to do startup db maintenance.
This is not a service as it's only used by sqlite services.
Currently translated at 98.0% (1186 of 1210 strings)
translationBot(ui): update translation (Chinese (Simplified))
Currently translated at 98.0% (1179 of 1203 strings)
translationBot(ui): update translation (Chinese (Simplified))
Currently translated at 97.9% (1175 of 1199 strings)
Co-authored-by: Surisen <zhonghx0804@outlook.com>
Translate-URL: https://hosted.weblate.org/projects/invokeai/web-ui/zh_Hans/
Translation: InvokeAI/Web UI
Currently translated at 92.0% (1104 of 1199 strings)
translationBot(ui): update translation (Chinese (Simplified))
Currently translated at 92.1% (1105 of 1199 strings)
translationBot(ui): update translation (Chinese (Simplified))
Currently translated at 83.2% (998 of 1199 strings)
translationBot(ui): update translation (Chinese (Simplified))
Currently translated at 83.0% (996 of 1199 strings)
translationBot(ui): update translation (Chinese (Simplified))
Currently translated at 67.5% (810 of 1199 strings)
Co-authored-by: Surisen <zhonghx0804@outlook.com>
Translate-URL: https://hosted.weblate.org/projects/invokeai/web-ui/zh_Hans/
Translation: InvokeAI/Web UI
Currently translated at 85.5% (1026 of 1199 strings)
translationBot(ui): update translation (Italian)
Currently translated at 84.7% (1016 of 1199 strings)
translationBot(ui): update translation (Italian)
Currently translated at 84.7% (1016 of 1199 strings)
translationBot(ui): update translation (Italian)
Currently translated at 84.4% (1012 of 1199 strings)
translationBot(ui): update translation (Italian)
Currently translated at 84.3% (1011 of 1199 strings)
translationBot(ui): update translation (Italian)
Currently translated at 83.5% (1002 of 1199 strings)
translationBot(ui): update translation (Italian)
Currently translated at 81.5% (978 of 1199 strings)
translationBot(ui): update translation (Italian)
Currently translated at 80.8% (969 of 1199 strings)
translationBot(ui): update translation (Italian)
Currently translated at 80.7% (968 of 1199 strings)
translationBot(ui): update translation (Italian)
Currently translated at 81.3% (959 of 1179 strings)
translationBot(ui): update translation (Italian)
Currently translated at 81.3% (959 of 1179 strings)
translationBot(ui): update translation (Italian)
Currently translated at 81.3% (959 of 1179 strings)
translationBot(ui): update translation (Italian)
Currently translated at 81.3% (959 of 1179 strings)
Co-authored-by: Riccardo Giovanetti <riccardo.giovanetti@gmail.com>
Translate-URL: https://hosted.weblate.org/projects/invokeai/web-ui/it/
Translation: InvokeAI/Web UI
Currently translated at 100.0% (607 of 607 strings)
translationBot(ui): update translation (Spanish)
Currently translated at 100.0% (605 of 605 strings)
Co-authored-by: gallegonovato <fran-carro@hotmail.es>
Translate-URL: https://hosted.weblate.org/projects/invokeai/web-ui/es/
Translation: InvokeAI/Web UI
Currently translated at 65.5% (643 of 981 strings)
translationBot(ui): update translation (Russian)
Currently translated at 100.0% (605 of 605 strings)
Co-authored-by: System X - Files <vasyasos@gmail.com>
Translate-URL: https://hosted.weblate.org/projects/invokeai/web-ui/ru/
Translation: InvokeAI/Web UI
Currently translated at 81.2% (958 of 1179 strings)
translationBot(ui): update translation (Italian)
Currently translated at 81.2% (958 of 1179 strings)
translationBot(ui): update translation (Italian)
Currently translated at 76.6% (904 of 1179 strings)
translationBot(ui): update translation (Italian)
Currently translated at 76.5% (903 of 1179 strings)
translationBot(ui): update translation (Italian)
Currently translated at 71.9% (848 of 1179 strings)
translationBot(ui): update translation (Italian)
Currently translated at 71.7% (845 of 1177 strings)
translationBot(ui): update translation (Italian)
Currently translated at 71.7% (845 of 1177 strings)
translationBot(ui): update translation (Italian)
Currently translated at 67.8% (799 of 1177 strings)
translationBot(ui): update translation (Italian)
Currently translated at 58.5% (689 of 1177 strings)
translationBot(ui): update translation (Italian)
Currently translated at 59.8% (640 of 1069 strings)
translationBot(ui): update translation (Italian)
Currently translated at 57.2% (612 of 1069 strings)
translationBot(ui): update translation (Italian)
Currently translated at 100.0% (607 of 607 strings)
translationBot(ui): update translation (Italian)
Currently translated at 100.0% (605 of 605 strings)
translationBot(ui): update translation (Italian)
Currently translated at 100.0% (605 of 605 strings)
translationBot(ui): update translation (Italian)
Currently translated at 100.0% (602 of 602 strings)
Co-authored-by: Riccardo Giovanetti <riccardo.giovanetti@gmail.com>
Translate-URL: https://hosted.weblate.org/projects/invokeai/web-ui/it/
Translation: InvokeAI/Web UI
Currently translated at 97.8% (589 of 602 strings)
translationBot(ui): update translation (Italian)
Currently translated at 100.0% (603 of 603 strings)
translationBot(ui): update translation (Italian)
Currently translated at 100.0% (599 of 599 strings)
translationBot(ui): update translation (Italian)
Currently translated at 100.0% (596 of 596 strings)
translationBot(ui): update translation (Italian)
Currently translated at 100.0% (595 of 595 strings)
translationBot(ui): update translation (Italian)
Currently translated at 100.0% (595 of 595 strings)
translationBot(ui): update translation (Italian)
Currently translated at 100.0% (593 of 593 strings)
translationBot(ui): update translation (Italian)
Currently translated at 100.0% (592 of 592 strings)
Co-authored-by: Riccardo Giovanetti <riccardo.giovanetti@gmail.com>
Translate-URL: https://hosted.weblate.org/projects/invokeai/web-ui/it/
Translation: InvokeAI/Web UI
Currently translated at 99.6% (601 of 603 strings)
translationBot(ui): update translation (Spanish)
Currently translated at 99.5% (600 of 603 strings)
translationBot(ui): update translation (Spanish)
Currently translated at 100.0% (599 of 599 strings)
translationBot(ui): update translation (Spanish)
Currently translated at 100.0% (596 of 596 strings)
translationBot(ui): update translation (Spanish)
Currently translated at 99.8% (594 of 595 strings)
translationBot(ui): update translation (Spanish)
Currently translated at 100.0% (593 of 593 strings)
translationBot(ui): update translation (Spanish)
Currently translated at 100.0% (592 of 592 strings)
Co-authored-by: gallegonovato <fran-carro@hotmail.es>
Translate-URL: https://hosted.weblate.org/projects/invokeai/web-ui/es/
Translation: InvokeAI/Web UI
Currently translated at 100.0% (591 of 591 strings)
translationBot(ui): update translation (Italian)
Currently translated at 99.3% (587 of 591 strings)
translationBot(ui): update translation (Italian)
Currently translated at 100.0% (586 of 586 strings)
translationBot(ui): update translation (Italian)
Currently translated at 100.0% (578 of 578 strings)
translationBot(ui): update translation (Italian)
Currently translated at 100.0% (563 of 563 strings)
translationBot(ui): update translation (Italian)
Currently translated at 100.0% (559 of 559 strings)
translationBot(ui): update translation (Italian)
Currently translated at 100.0% (559 of 559 strings)
translationBot(ui): update translation (Italian)
Currently translated at 100.0% (551 of 551 strings)
Co-authored-by: Riccardo Giovanetti <riccardo.giovanetti@gmail.com>
Translate-URL: https://hosted.weblate.org/projects/invokeai/web-ui/it/
Translation: InvokeAI/Web UI
Currently translated at 99.5% (602 of 605 strings)
translationBot(ui): update translation (Russian)
Currently translated at 99.8% (605 of 606 strings)
translationBot(ui): update translation (Russian)
Currently translated at 100.0% (596 of 596 strings)
translationBot(ui): update translation (Russian)
Currently translated at 100.0% (595 of 595 strings)
translationBot(ui): update translation (Russian)
Currently translated at 100.0% (593 of 593 strings)
translationBot(ui): update translation (Russian)
Currently translated at 100.0% (592 of 592 strings)
translationBot(ui): update translation (Russian)
Currently translated at 90.2% (534 of 592 strings)
translationBot(ui): update translation (Russian)
Currently translated at 100.0% (543 of 543 strings)
Co-authored-by: System X - Files <vasyasos@gmail.com>
Translate-URL: https://hosted.weblate.org/projects/invokeai/web-ui/ru/
Translation: InvokeAI/Web UI
Currently translated at 100.0% (550 of 550 strings)
translationBot(ui): update translation (Italian)
Currently translated at 100.0% (548 of 548 strings)
translationBot(ui): update translation (Italian)
Currently translated at 100.0% (546 of 546 strings)
translationBot(ui): update translation (Italian)
Currently translated at 100.0% (541 of 541 strings)
translationBot(ui): update translation (Italian)
Currently translated at 100.0% (544 of 544 strings)
translationBot(ui): update translation (Italian)
Currently translated at 100.0% (543 of 543 strings)
Co-authored-by: Riccardo Giovanetti <riccardo.giovanetti@gmail.com>
Translate-URL: https://hosted.weblate.org/projects/invokeai/web-ui/it/
Translation: InvokeAI/Web UI
Currently translated at 100.0% (542 of 542 strings)
translationBot(ui): update translation (Chinese (Simplified))
Currently translated at 88.0% (477 of 542 strings)
Co-authored-by: Song, Pengcheng <17528592@qq.com>
Translate-URL: https://hosted.weblate.org/projects/invokeai/web-ui/zh_Hans/
Translation: InvokeAI/Web UI
Currently translated at 100.0% (542 of 542 strings)
translationBot(ui): update translation (Russian)
Currently translated at 100.0% (542 of 542 strings)
translationBot(ui): update translation (Russian)
Currently translated at 98.8% (536 of 542 strings)
translationBot(ui): update translation (Russian)
Currently translated at 100.0% (536 of 536 strings)
translationBot(ui): update translation (Russian)
Currently translated at 100.0% (533 of 533 strings)
Co-authored-by: System X - Files <vasyasos@gmail.com>
Translate-URL: https://hosted.weblate.org/projects/invokeai/web-ui/ru/
Translation: InvokeAI/Web UI
Currently translated at 100.0% (542 of 542 strings)
translationBot(ui): update translation (Italian)
Currently translated at 100.0% (542 of 542 strings)
translationBot(ui): update translation (Italian)
Currently translated at 100.0% (540 of 540 strings)
translationBot(ui): update translation (Italian)
Currently translated at 100.0% (538 of 538 strings)
translationBot(ui): update translation (Italian)
Currently translated at 100.0% (536 of 536 strings)
translationBot(ui): update translation (Italian)
Currently translated at 100.0% (536 of 536 strings)
translationBot(ui): update translation (Italian)
Currently translated at 100.0% (536 of 536 strings)
translationBot(ui): update translation (Italian)
Currently translated at 99.8% (535 of 536 strings)
translationBot(ui): update translation (Italian)
Currently translated at 100.0% (533 of 533 strings)
translationBot(ui): update translation (Italian)
Currently translated at 100.0% (533 of 533 strings)
Co-authored-by: Riccardo Giovanetti <riccardo.giovanetti@gmail.com>
Translate-URL: https://hosted.weblate.org/projects/invokeai/web-ui/it/
Translation: InvokeAI/Web UI
Currently translated at 100.0% (591 of 591 strings)
translationBot(ui): update translation (Spanish)
Currently translated at 100.0% (586 of 586 strings)
translationBot(ui): update translation (Spanish)
Currently translated at 100.0% (578 of 578 strings)
translationBot(ui): update translation (Spanish)
Currently translated at 100.0% (563 of 563 strings)
translationBot(ui): update translation (Spanish)
Currently translated at 100.0% (550 of 550 strings)
translationBot(ui): update translation (Spanish)
Currently translated at 100.0% (550 of 550 strings)
translationBot(ui): update translation (Spanish)
Currently translated at 100.0% (548 of 548 strings)
translationBot(ui): update translation (Spanish)
Currently translated at 100.0% (546 of 546 strings)
translationBot(ui): update translation (Spanish)
Currently translated at 100.0% (544 of 544 strings)
translationBot(ui): update translation (Spanish)
Currently translated at 100.0% (543 of 543 strings)
translationBot(ui): update translation (Spanish)
Currently translated at 100.0% (542 of 542 strings)
translationBot(ui): update translation (Spanish)
Currently translated at 100.0% (542 of 542 strings)
translationBot(ui): update translation (Spanish)
Currently translated at 100.0% (540 of 540 strings)
translationBot(ui): update translation (Spanish)
Currently translated at 100.0% (536 of 536 strings)
translationBot(ui): update translation (Spanish)
Currently translated at 100.0% (536 of 536 strings)
translationBot(ui): update translation (Spanish)
Currently translated at 100.0% (533 of 533 strings)
translationBot(ui): update translation (Spanish)
Currently translated at 99.8% (532 of 533 strings)
Co-authored-by: gallegonovato <fran-carro@hotmail.es>
Translate-URL: https://hosted.weblate.org/projects/invokeai/web-ui/es/
Translation: InvokeAI/Web UI
Currently translated at 100.0% (526 of 526 strings)
translationBot(ui): update translation (Russian)
Currently translated at 100.0% (519 of 519 strings)
Co-authored-by: System X - Files <vasyasos@gmail.com>
Translate-URL: https://hosted.weblate.org/projects/invokeai/web-ui/ru/
Translation: InvokeAI/Web UI
Currently translated at 100.0% (526 of 526 strings)
translationBot(ui): update translation (Italian)
Currently translated at 100.0% (523 of 523 strings)
translationBot(ui): update translation (Italian)
Currently translated at 100.0% (519 of 519 strings)
translationBot(ui): update translation (Italian)
Currently translated at 100.0% (515 of 515 strings)
Co-authored-by: Riccardo Giovanetti <riccardo.giovanetti@gmail.com>
Translate-URL: https://hosted.weblate.org/projects/invokeai/web-ui/it/
Translation: InvokeAI/Web UI
Currently translated at 100.0% (526 of 526 strings)
translationBot(ui): update translation (Spanish)
Currently translated at 100.0% (523 of 523 strings)
translationBot(ui): update translation (Spanish)
Currently translated at 100.0% (519 of 519 strings)
translationBot(ui): update translation (Spanish)
Currently translated at 100.0% (515 of 515 strings)
Co-authored-by: gallegonovato <fran-carro@hotmail.es>
Translate-URL: https://hosted.weblate.org/projects/invokeai/web-ui/es/
Translation: InvokeAI/Web UI
Currently translated at 98.0% (1186 of 1210 strings)
translationBot(ui): update translation (Chinese (Simplified))
Currently translated at 98.0% (1179 of 1203 strings)
translationBot(ui): update translation (Chinese (Simplified))
Currently translated at 97.9% (1175 of 1199 strings)
Co-authored-by: Surisen <zhonghx0804@outlook.com>
Translate-URL: https://hosted.weblate.org/projects/invokeai/web-ui/zh_Hans/
Translation: InvokeAI/Web UI
Currently translated at 92.0% (1104 of 1199 strings)
translationBot(ui): update translation (Chinese (Simplified))
Currently translated at 92.1% (1105 of 1199 strings)
translationBot(ui): update translation (Chinese (Simplified))
Currently translated at 83.2% (998 of 1199 strings)
translationBot(ui): update translation (Chinese (Simplified))
Currently translated at 83.0% (996 of 1199 strings)
translationBot(ui): update translation (Chinese (Simplified))
Currently translated at 67.5% (810 of 1199 strings)
Co-authored-by: Surisen <zhonghx0804@outlook.com>
Translate-URL: https://hosted.weblate.org/projects/invokeai/web-ui/zh_Hans/
Translation: InvokeAI/Web UI
Currently translated at 87.1% (1054 of 1210 strings)
translationBot(ui): update translation (Italian)
Currently translated at 85.5% (1026 of 1199 strings)
translationBot(ui): update translation (Italian)
Currently translated at 84.7% (1016 of 1199 strings)
translationBot(ui): update translation (Italian)
Currently translated at 84.7% (1016 of 1199 strings)
translationBot(ui): update translation (Italian)
Currently translated at 84.4% (1012 of 1199 strings)
translationBot(ui): update translation (Italian)
Currently translated at 84.3% (1011 of 1199 strings)
translationBot(ui): update translation (Italian)
Currently translated at 83.5% (1002 of 1199 strings)
translationBot(ui): update translation (Italian)
Currently translated at 81.5% (978 of 1199 strings)
translationBot(ui): update translation (Italian)
Currently translated at 80.8% (969 of 1199 strings)
translationBot(ui): update translation (Italian)
Currently translated at 80.7% (968 of 1199 strings)
translationBot(ui): update translation (Italian)
Currently translated at 81.3% (959 of 1179 strings)
translationBot(ui): update translation (Italian)
Currently translated at 81.3% (959 of 1179 strings)
translationBot(ui): update translation (Italian)
Currently translated at 81.3% (959 of 1179 strings)
translationBot(ui): update translation (Italian)
Currently translated at 81.3% (959 of 1179 strings)
Co-authored-by: Riccardo Giovanetti <riccardo.giovanetti@gmail.com>
Translate-URL: https://hosted.weblate.org/projects/invokeai/web-ui/it/
Translation: InvokeAI/Web UI
Currently translated at 100.0% (607 of 607 strings)
translationBot(ui): update translation (Spanish)
Currently translated at 100.0% (605 of 605 strings)
Co-authored-by: gallegonovato <fran-carro@hotmail.es>
Translate-URL: https://hosted.weblate.org/projects/invokeai/web-ui/es/
Translation: InvokeAI/Web UI
Currently translated at 65.5% (643 of 981 strings)
translationBot(ui): update translation (Russian)
Currently translated at 100.0% (605 of 605 strings)
Co-authored-by: System X - Files <vasyasos@gmail.com>
Translate-URL: https://hosted.weblate.org/projects/invokeai/web-ui/ru/
Translation: InvokeAI/Web UI
Currently translated at 81.2% (958 of 1179 strings)
translationBot(ui): update translation (Italian)
Currently translated at 81.2% (958 of 1179 strings)
translationBot(ui): update translation (Italian)
Currently translated at 76.6% (904 of 1179 strings)
translationBot(ui): update translation (Italian)
Currently translated at 76.5% (903 of 1179 strings)
translationBot(ui): update translation (Italian)
Currently translated at 71.9% (848 of 1179 strings)
translationBot(ui): update translation (Italian)
Currently translated at 71.7% (845 of 1177 strings)
translationBot(ui): update translation (Italian)
Currently translated at 71.7% (845 of 1177 strings)
translationBot(ui): update translation (Italian)
Currently translated at 67.8% (799 of 1177 strings)
translationBot(ui): update translation (Italian)
Currently translated at 58.5% (689 of 1177 strings)
translationBot(ui): update translation (Italian)
Currently translated at 59.8% (640 of 1069 strings)
translationBot(ui): update translation (Italian)
Currently translated at 57.2% (612 of 1069 strings)
translationBot(ui): update translation (Italian)
Currently translated at 100.0% (607 of 607 strings)
translationBot(ui): update translation (Italian)
Currently translated at 100.0% (605 of 605 strings)
translationBot(ui): update translation (Italian)
Currently translated at 100.0% (605 of 605 strings)
translationBot(ui): update translation (Italian)
Currently translated at 100.0% (602 of 602 strings)
Co-authored-by: Riccardo Giovanetti <riccardo.giovanetti@gmail.com>
Translate-URL: https://hosted.weblate.org/projects/invokeai/web-ui/it/
Translation: InvokeAI/Web UI
Currently translated at 97.8% (589 of 602 strings)
translationBot(ui): update translation (Italian)
Currently translated at 100.0% (603 of 603 strings)
translationBot(ui): update translation (Italian)
Currently translated at 100.0% (599 of 599 strings)
translationBot(ui): update translation (Italian)
Currently translated at 100.0% (596 of 596 strings)
translationBot(ui): update translation (Italian)
Currently translated at 100.0% (595 of 595 strings)
translationBot(ui): update translation (Italian)
Currently translated at 100.0% (595 of 595 strings)
translationBot(ui): update translation (Italian)
Currently translated at 100.0% (593 of 593 strings)
translationBot(ui): update translation (Italian)
Currently translated at 100.0% (592 of 592 strings)
Co-authored-by: Riccardo Giovanetti <riccardo.giovanetti@gmail.com>
Translate-URL: https://hosted.weblate.org/projects/invokeai/web-ui/it/
Translation: InvokeAI/Web UI
Currently translated at 99.6% (601 of 603 strings)
translationBot(ui): update translation (Spanish)
Currently translated at 99.5% (600 of 603 strings)
translationBot(ui): update translation (Spanish)
Currently translated at 100.0% (599 of 599 strings)
translationBot(ui): update translation (Spanish)
Currently translated at 100.0% (596 of 596 strings)
translationBot(ui): update translation (Spanish)
Currently translated at 99.8% (594 of 595 strings)
translationBot(ui): update translation (Spanish)
Currently translated at 100.0% (593 of 593 strings)
translationBot(ui): update translation (Spanish)
Currently translated at 100.0% (592 of 592 strings)
Co-authored-by: gallegonovato <fran-carro@hotmail.es>
Translate-URL: https://hosted.weblate.org/projects/invokeai/web-ui/es/
Translation: InvokeAI/Web UI
Currently translated at 100.0% (591 of 591 strings)
translationBot(ui): update translation (Italian)
Currently translated at 99.3% (587 of 591 strings)
translationBot(ui): update translation (Italian)
Currently translated at 100.0% (586 of 586 strings)
translationBot(ui): update translation (Italian)
Currently translated at 100.0% (578 of 578 strings)
translationBot(ui): update translation (Italian)
Currently translated at 100.0% (563 of 563 strings)
translationBot(ui): update translation (Italian)
Currently translated at 100.0% (559 of 559 strings)
translationBot(ui): update translation (Italian)
Currently translated at 100.0% (559 of 559 strings)
translationBot(ui): update translation (Italian)
Currently translated at 100.0% (551 of 551 strings)
Co-authored-by: Riccardo Giovanetti <riccardo.giovanetti@gmail.com>
Translate-URL: https://hosted.weblate.org/projects/invokeai/web-ui/it/
Translation: InvokeAI/Web UI
Currently translated at 99.5% (602 of 605 strings)
translationBot(ui): update translation (Russian)
Currently translated at 99.8% (605 of 606 strings)
translationBot(ui): update translation (Russian)
Currently translated at 100.0% (596 of 596 strings)
translationBot(ui): update translation (Russian)
Currently translated at 100.0% (595 of 595 strings)
translationBot(ui): update translation (Russian)
Currently translated at 100.0% (593 of 593 strings)
translationBot(ui): update translation (Russian)
Currently translated at 100.0% (592 of 592 strings)
translationBot(ui): update translation (Russian)
Currently translated at 90.2% (534 of 592 strings)
translationBot(ui): update translation (Russian)
Currently translated at 100.0% (543 of 543 strings)
Co-authored-by: System X - Files <vasyasos@gmail.com>
Translate-URL: https://hosted.weblate.org/projects/invokeai/web-ui/ru/
Translation: InvokeAI/Web UI
Currently translated at 100.0% (550 of 550 strings)
translationBot(ui): update translation (Italian)
Currently translated at 100.0% (548 of 548 strings)
translationBot(ui): update translation (Italian)
Currently translated at 100.0% (546 of 546 strings)
translationBot(ui): update translation (Italian)
Currently translated at 100.0% (541 of 541 strings)
translationBot(ui): update translation (Italian)
Currently translated at 100.0% (544 of 544 strings)
translationBot(ui): update translation (Italian)
Currently translated at 100.0% (543 of 543 strings)
Co-authored-by: Riccardo Giovanetti <riccardo.giovanetti@gmail.com>
Translate-URL: https://hosted.weblate.org/projects/invokeai/web-ui/it/
Translation: InvokeAI/Web UI
Currently translated at 100.0% (542 of 542 strings)
translationBot(ui): update translation (Chinese (Simplified))
Currently translated at 88.0% (477 of 542 strings)
Co-authored-by: Song, Pengcheng <17528592@qq.com>
Translate-URL: https://hosted.weblate.org/projects/invokeai/web-ui/zh_Hans/
Translation: InvokeAI/Web UI
Currently translated at 100.0% (542 of 542 strings)
translationBot(ui): update translation (Russian)
Currently translated at 100.0% (542 of 542 strings)
translationBot(ui): update translation (Russian)
Currently translated at 98.8% (536 of 542 strings)
translationBot(ui): update translation (Russian)
Currently translated at 100.0% (536 of 536 strings)
translationBot(ui): update translation (Russian)
Currently translated at 100.0% (533 of 533 strings)
Co-authored-by: System X - Files <vasyasos@gmail.com>
Translate-URL: https://hosted.weblate.org/projects/invokeai/web-ui/ru/
Translation: InvokeAI/Web UI
Currently translated at 100.0% (542 of 542 strings)
translationBot(ui): update translation (Italian)
Currently translated at 100.0% (542 of 542 strings)
translationBot(ui): update translation (Italian)
Currently translated at 100.0% (540 of 540 strings)
translationBot(ui): update translation (Italian)
Currently translated at 100.0% (538 of 538 strings)
translationBot(ui): update translation (Italian)
Currently translated at 100.0% (536 of 536 strings)
translationBot(ui): update translation (Italian)
Currently translated at 100.0% (536 of 536 strings)
translationBot(ui): update translation (Italian)
Currently translated at 100.0% (536 of 536 strings)
translationBot(ui): update translation (Italian)
Currently translated at 99.8% (535 of 536 strings)
translationBot(ui): update translation (Italian)
Currently translated at 100.0% (533 of 533 strings)
translationBot(ui): update translation (Italian)
Currently translated at 100.0% (533 of 533 strings)
Co-authored-by: Riccardo Giovanetti <riccardo.giovanetti@gmail.com>
Translate-URL: https://hosted.weblate.org/projects/invokeai/web-ui/it/
Translation: InvokeAI/Web UI
Currently translated at 100.0% (591 of 591 strings)
translationBot(ui): update translation (Spanish)
Currently translated at 100.0% (586 of 586 strings)
translationBot(ui): update translation (Spanish)
Currently translated at 100.0% (578 of 578 strings)
translationBot(ui): update translation (Spanish)
Currently translated at 100.0% (563 of 563 strings)
translationBot(ui): update translation (Spanish)
Currently translated at 100.0% (550 of 550 strings)
translationBot(ui): update translation (Spanish)
Currently translated at 100.0% (550 of 550 strings)
translationBot(ui): update translation (Spanish)
Currently translated at 100.0% (548 of 548 strings)
translationBot(ui): update translation (Spanish)
Currently translated at 100.0% (546 of 546 strings)
translationBot(ui): update translation (Spanish)
Currently translated at 100.0% (544 of 544 strings)
translationBot(ui): update translation (Spanish)
Currently translated at 100.0% (543 of 543 strings)
translationBot(ui): update translation (Spanish)
Currently translated at 100.0% (542 of 542 strings)
translationBot(ui): update translation (Spanish)
Currently translated at 100.0% (542 of 542 strings)
translationBot(ui): update translation (Spanish)
Currently translated at 100.0% (540 of 540 strings)
translationBot(ui): update translation (Spanish)
Currently translated at 100.0% (536 of 536 strings)
translationBot(ui): update translation (Spanish)
Currently translated at 100.0% (536 of 536 strings)
translationBot(ui): update translation (Spanish)
Currently translated at 100.0% (533 of 533 strings)
translationBot(ui): update translation (Spanish)
Currently translated at 99.8% (532 of 533 strings)
Co-authored-by: gallegonovato <fran-carro@hotmail.es>
Translate-URL: https://hosted.weblate.org/projects/invokeai/web-ui/es/
Translation: InvokeAI/Web UI
Currently translated at 100.0% (526 of 526 strings)
translationBot(ui): update translation (Russian)
Currently translated at 100.0% (519 of 519 strings)
Co-authored-by: System X - Files <vasyasos@gmail.com>
Translate-URL: https://hosted.weblate.org/projects/invokeai/web-ui/ru/
Translation: InvokeAI/Web UI
Currently translated at 100.0% (526 of 526 strings)
translationBot(ui): update translation (Italian)
Currently translated at 100.0% (523 of 523 strings)
translationBot(ui): update translation (Italian)
Currently translated at 100.0% (519 of 519 strings)
translationBot(ui): update translation (Italian)
Currently translated at 100.0% (515 of 515 strings)
Co-authored-by: Riccardo Giovanetti <riccardo.giovanetti@gmail.com>
Translate-URL: https://hosted.weblate.org/projects/invokeai/web-ui/it/
Translation: InvokeAI/Web UI
Currently translated at 100.0% (526 of 526 strings)
translationBot(ui): update translation (Spanish)
Currently translated at 100.0% (523 of 523 strings)
translationBot(ui): update translation (Spanish)
Currently translated at 100.0% (519 of 519 strings)
translationBot(ui): update translation (Spanish)
Currently translated at 100.0% (515 of 515 strings)
Co-authored-by: gallegonovato <fran-carro@hotmail.es>
Translate-URL: https://hosted.weblate.org/projects/invokeai/web-ui/es/
Translation: InvokeAI/Web UI
## What type of PR is this? (check all applicable)
- [ ] Refactor
- [x] Feature
- [ ] Bug Fix
- [ ] Optimization
- [ ] Documentation Update
- [ ] Community Node Submission
## Description
feat(ui): add translation strings for clear intermediates
## Related Tickets & Documents
<!--
For pull requests that relate or close an issue, please include them
below.
For example having the text: "closes #1234" would connect the current
pull
request to issue 1234. And when we merge the pull request, Github will
automatically close the issue.
-->
- Related Issue #
- Closes#4851
## [optional] Are there any post deployment tasks we need to perform?
@Millu this can go into 3.3.0
* UI for bulk downloading boards or groups of images
* placeholder route for bulk downloads that does nothing
* lint
---------
Co-authored-by: Mary Hipp <maryhipp@Marys-MacBook-Air.local>
## What type of PR is this? (check all applicable)
- [ ] Refactor
- [ ] Feature
- [ ] Bug Fix
- [x] Optimization
- [ ] Documentation Update
- [ ] Community Node Submission
## Description
@Millu pointed out this safetensors PR a few weeks ago, which claimed to
offer a performance benefit:
https://github.com/huggingface/safetensors/pull/362 . It was superseded
by https://github.com/huggingface/safetensors/pull/363 and included in
the latest [safetensors 0.4.0
release](https://github.com/huggingface/safetensors/releases/tag/v0.4.0).
Here are the results from my local performance comparison:
```
Before(0.3.1) / After(0.4.0)
sdxl:main:tokenizer from disk to cpu in 0.46s / 0.46s
sdxl:main:text_encoder from disk to cpu in 2.12s / 2.32s
embroidered_style_v1_sdxl.safetensors:sdxl:lora' from disk to cpu in 0.67s / 0.36s
VoxelXL_v1.safetensors:sdxl:lora' from disk to cpu in 1.64s / 0.60s
ryan_db_sdxl_epoch640.safetensors:sdxl:lora' from disk to cpu in 2.46s / 1.40s
sdxl:main:tokenizer_2 from disk to cpu in 0.37s / 0.39s
sdxl:main:text_encoder_2 from disk to cpu in 3.78s / 4.70s
sdxl:main:unet from disk to cpu in 4.66s / 3.08s
sdxl:main:scheduler from disk to cpu in 0.34s / 0.33s
sdxl:main:vae from disk to cpu in 0.66s / 0.51s
TOTAL GRAPH EXECUTION TIME: 56.489s / 53.416s
```
The benefit was marginal on my system (maybe even within measurement
error), but I figured we might as well pull it.
Add support for FreeU. See:
- https://huggingface.co/docs/diffusers/main/en/using-diffusers/freeu
- https://github.com/ChenyangSi/FreeU
Implementation:
- `ModelPatcher.apply_freeu()` handles the enabling freeu (which is very simple with diffusers).
- `FreeUConfig` model added to hold the hyperparameters.
- `freeu_config` added as optional sub-field on `UNetField`.
- `FreeUInvocation` added, works like LoRA - chain it to add the FreeU config to the UNet
- No support for model-dependent presets, this will be a future workflow editor enhancement
Closes#4845
## What type of PR is this? (check all applicable)
- [ ] Refactor
- [ ] Feature
- [ ] Bug Fix
- [x] Optimization
- [ ] Documentation Update
- [ ] Community Node Submission
## Have you updated all relevant documentation?
- [x] Yes
- [ ] No
## Description
This PR optimizes the time to load models from disk.
In my local testing, SDXL text_encoder_2 models saw the greatest
improvement:
- Before change, load time (disk to cpu): 14 secs
- After change, load time (disk to cpu): 4 secs
See the in-code documentation for an explanation of how this speedup is
achieved.
## Related Tickets & Documents
This change was previously proposed on the HF transformers repo, but did
not get any traction:
https://github.com/huggingface/transformers/issues/18505#issue-1330728188
## QA Instructions, Screenshots, Recordings
I don't expect any adverse effects, but the new context manager is
applied while loading **all** models, so it would make sense to exercise
everything.
## Added/updated tests?
- [x] Yes
- [ ] No
The canvas needs to be set to staging mode as soon as a canvas-destined batch is enqueued. If the batch is is fully canceled before an image is generated, we need to remove that batch from the canvas `batchIds` watchlist, else canvas gets stuck in staging mode with no way to exit.
The changes here allow the batch status to be tracked, and if a batch has all its items completed, we can remove it from the `batchIds` watchlist. The `batchIds` watchlist now accurately represents *incomplete* canvas batches, fixing this cause of soft lock.
The UI will always re-fetch queue and batch status on receiving this event, so we may as well jsut include that data in the event and save the extra network roundtrips.
## What type of PR is this? (check all applicable)
- [X] Feature
## Have you discussed this change with the InvokeAI team?
- [X] No, because: Non-controversial
## Have you updated all relevant documentation?
- [ ] Yes
- [X] N/A
## Description
This adds a list of T2I adapters to the “starter models” offered by the
TUI installer. None of the models is selected by default; this can be
done easily if requested. The models offered to the user are:
```
TencentARC/t2iadapter_canny_sd15v2
TencentARC/t2iadapter_sketch_sd15v2
TencentARC/t2iadapter_depth_sd15v2
TencentARC/t2iadapter_zoedepth_sd15v1
TencentARC/t2i-adapter-canny-sdxl-1.0
TencentARC/t2i-adapter-depth-zoe-sdxl-1.0
TencentARC/t2i-adapter-lineart-sdxl-1.0
TencentARC/t2i-adapter-sketch-sdxl-1.0
```
## Related Tickets & Documents
PR #4612
## QA Instructions, Screenshots, Recordings
The revised installer has a new IP-ADAPTERS tab that looks like this:

## Added/updated tests?
- [ ] Yes
- [X] No : It would be good to have a suite of model download tests, but
not set up yet.
- Update backend metadata for t2i adapter
- Fix typo in `T2IAdapterInvocation`: `ip_adapter_model` -> `t2i_adapter_model`
- Update linear graphs to use t2i adapter
- Add client metadata recall for t2i adapter
- Fix bug with controlnet metadata recall - processor should be set to 'none' when recalling a control adapter
Control adapters logic/state/ui is now generalized to hold controlnet, ip_adapter and t2i_adapter. In the future, other control adapter types can be added.
TODO:
- Limit IP adapter to 1
- Add T2I adapter to linear graphs
- Fix autoprocess
- T2I metadata saving & recall
- Improve on control adapters UI
## What type of PR is this? (check all applicable)
- [ ] Refactor
- [x] Feature
- [ ] Bug Fix
- [ ] Optimization
- [ ] Documentation Update
- [ ] Community Node Submission
## Have you discussed this change with the InvokeAI team?
- [x] Yes
- [ ] No, because:
## Have you updated all relevant documentation?
- [x] Yes
- [ ] No
## Description
This PR adds support for slow unit tests that depend on models. It
includes:
- Documentation explaining the handling of fast vs. slow unit tests.
- Utilities to assist with writing tests that depend on models.
- A sample test that loads and runs an IP-Adapter model. This is far
from complete test coverage of IP-Adapter - it's just intended as a
first example of how to write tests with models.
**Suggestion for reviewers**: Start with docs/contributing/TESTS.md
## QA Instructions, Screenshots, Recordings
I've tested it all, but it would make sense for others to try running
both the fast tests and the slow tests.
## Added/updated tests?
- [x] Yes
- [ ] No
## What type of PR is this? (check all applicable)
- [ ] Refactor
- [ ] Feature
- [ ] Bug Fix
- [x] Optimization
- [ ] Documentation Update
- [ ] Community Node Submission
## Have you discussed this change with the InvokeAI team?
- [x] Yes
- [ ] No, because:
## Have you updated all relevant documentation?
- [x] Yes
- [ ] No
## Description
This PR adds detailed debug logging to the model cache in order to give
more visibility into the model cache's memory utilization. **This PR
does not make any functional changes to the model cache.**
Every time a model is moved from disk to CPU, or between CPU/CUDA, a log
like this is emitted:
```bash
[2023-10-03 15:17:20,599]::[InvokeAI]::DEBUG --> Moved model '/home/ryan/invokeai/models/.cache/63742ed45b499e55620c402d6df26a20:sdxl:main:unet' from cpu to cuda in 1.23s.
Estimated model size: 4.782 GB.
Process RAM (-4.722): 6.987GB -> 2.265GB
libc mmap allocated (-4.722): 6.030GB -> 1.308GB
libc arena used (-0.061): 0.402GB -> 0.341GB
libc arena free (+0.061): 0.006GB -> 0.067GB
libc total allocated (-4.722): 6.439GB -> 1.717GB
libc total used (-4.783): 6.433GB -> 1.649GB
VRAM (+4.881): 1.538GB -> 6.418GB
```
## Related Tickets & Documents
https://github.com/invoke-ai/InvokeAI/pull/4694 contains related fixes
to some known memory issues.
## QA Instructions, Screenshots, Recordings
Make sure debug logs are enabled and you should see the new logs.
We should test each of the following environments:
- [x] Linux
- [x] Mac OS + MPS
- [x] Windows
## Added/updated tests?
- [x] Yes
- [ ] No
Added unit tests for the new utilities. Test coverage is still low for
the ModelCache, but not worse than before.
* Bump diffusers to 0.21.2.
* Add T2IAdapterInvocation boilerplate.
* Add T2I-Adapter model to model-management.
* (minor) Tidy prepare_control_image(...).
* Add logic to run the T2I-Adapter models at the start of the DenoiseLatentsInvocation.
* Add logic for applying T2I-Adapter weights and accumulating.
* Add T2IAdapter to MODEL_CLASSES map.
* yarn typegen
* Add model probes for T2I-Adapter models.
* Add all of the frontend boilerplate required to use T2I-Adapter in the nodes editor.
* Add T2IAdapterModel.convert_if_required(...).
* Fix errors in T2I-Adapter input image sizing logic.
* Fix bug with handling of multiple T2I-Adapters.
* black / flake8
* Fix typo
* yarn build
* Add num_channels param to prepare_control_image(...).
* Link to upstream diffusers bugfix PR that currently requires a workaround.
* feat: Add Color Map Preprocessor
Needed for the color T2I Adapter
* feat: Add Color Map Preprocessor to Linear UI
* Revert "feat: Add Color Map Preprocessor"
This reverts commit a1119a00bf.
* Revert "feat: Add Color Map Preprocessor to Linear UI"
This reverts commit bd8a9b82d8.
* Fix T2I-Adapter field rendering in workflow editor.
* yarn build, yarn typegen
---------
Co-authored-by: blessedcoolant <54517381+blessedcoolant@users.noreply.github.com>
Co-authored-by: psychedelicious <4822129+psychedelicious@users.noreply.github.com>
When the processor has an error and it has a queue item, mark that item failed.
This addresses processor errors resulting in `in_progress` queue items, which create a soft lock of the processor, requiring the user to cancel the `in_progress` item before anything else processes.
Makes graph validation logic more rigorous, validating graphs when they are created as part of a session or batch.
`validate_self()` method added to `Graph` model. It does all the validation that `is_valid()` did, plus a few extras:
- unique `node.id` values across graph
- node ids match their key in `Graph.nodes`
- recursively validate subgraphs
- validate all edges
- validate graph is acyclical
The new method is required because `is_valid()` just returned a boolean. That behaviour is retained, but `validate_self()` now raises appropriate exceptions for validation errors. This are then surfaced to the client.
The function is named `validate_self()` because pydantic reserves `validate()`.
There are two main places where graphs are created - in batches and in sessions.
Field validators are added to each of these for their `graph` fields, which call the new validation logic.
**Closes #4744**
In this issue, a batch is enqueued with an invalid graph. The output field is typed as optional while the input field is required. The field types themselves are not relevant - this change addresses the case where an invalid graph was created.
The mismatched types problem is not noticed until we attempt to invoke the graph, because the graph was never *fully* validated. An error is raised during the call to `graph_execution_state.next()` in `invoker.py`. This function prepares the edges and validates them, raising an exception due to the mismatched types.
This exception is caught by the session processor, but it doesn't handle this situation well - the graph is not marked as having an error and the queue item status is never changed. The queue item is therefore forever `in_progress`, so no new queue items are popped - the app won't do anything until the queue item is canceled manually.
This commit addresses this by preventing invalid graphs from being created in the first place, addressing a substantial number of fail cases.
The compress_level setting of PIL.Image.save(), used for PNG encoding. All settings are lossless. 0 = fastest, largest filesize, 9 = slowest, smallest filesize
Closes#4786
This is fired when the dnd image is moved over the 'none' board. Weren't defaulting to 'none' for the image's board_id, resulting in it being possible to drag a 'none' image onto 'none'.
Selections were not being `uniqBy()`'d, or were `uniqBy()`'d without a proper iteratee. This results in duplicate images in selections in certain situations.
Add correct `uniqBy()` to the reducer to prevent this in the future.
This caused a crapload of network requests any time an image was generated.
The counts are necessary to handle the logic for inserting images into existing image list caches; we have to keep track of the counts.
Replace tag invalidation with manual cache updates in all cases, except the initial request (which is necessary to get the initial image counts).
One subtle change is to make the counts an object instead of a number. This is required for `immer` to handle draft states. This should be raised as a bug with RTK Query, as no error is thrown when attempting to update a primitive immer draft.
The helper function `generate_face_box_mask()` had a bug that prevented larger faces from being detected in some situations. This is resolved, and its dependent nodes (all the FaceTools nodes) have a patch version bump.
## What type of PR is this? (check all applicable)
- [X] Bug Fix
## Have you discussed this change with the InvokeAI team?
- [X] Yes
## Have you updated all relevant documentation?
- [ ] Yes
- [X] No
## Description
This PR causes the font "Inter-Regular.ttf", which is needed by the
facetools Face Identifier node, to be installed along with other assets
in the virtual environment. It also fixes the font path resolution logic
in the invocation to work with both package and editable installs.
## Related Tickets & Documents
Closes#4771
## What type of PR is this? (check all applicable)
Release v3.2.0
## Have you discussed this change with the InvokeAI team?
- [X] Yes
- [ ] No, because:
## Have you updated all relevant documentation?
- [ ] Yes
- [X] No
Need to update prompting docs
## Description
3.2.0 release version
## [optional] Are there any post deployment tasks we need to perform?
* feat(ui): max upscale pixels config
Add `maxUpscalePixels: number` to the app config. The number should be the *total* number of pixels eg `maxUpscalePixels: 4096 * 4096`.
If not provided, any size image may be upscaled.
If the config is provided, users will see be advised if their image is too large for either model, or told to switch to an x2 model if it's only too large for x4.
The message is via tooltip in the popover and via toast if the user uses the hotkey to upscale.
* feat(ui): "mayUpscale" -> "isAllowedToUpscale"
## What type of PR is this? (check all applicable)
- [ ] Refactor
- [ ] Feature
- [ ] Bug Fix
- [ ] Optimization
- [ ] Documentation Update
- [x] Community Node Submission
## Have you discussed this change with the InvokeAI team?
- [x] Yes
- [ ] No, because:
## Have you updated all relevant documentation?
- [x] Yes
- [ ] No
## Description
Grid to Gif is two custom nodes, one that divides a grid image into an
image collection, the other converts an image collection into a animated
gif
## What type of PR is this? (check all applicable)
- [ ] Refactor
- [ ] Feature
- [ ] Bug Fix
- [ ] Optimization
- [ x ] Documentation Update
- [ ] Community Node Submission
## Have you discussed this change with the InvokeAI team?
- [ ] Yes
- [ x ] No, because:
## Have you updated all relevant documentation?
- [x ] Yes
- [ ] No
cv2 infill node was missing a version in its decorator, resulting in a
red exclamation mark on the node
## What type of PR is this? (check all applicable)
- [ ] Refactor
- [ ] Feature
- [x] Bug Fix
- [ ] Optimization
- [ ] Documentation Update
- [ ] Community Node Submission
## Have you discussed this change with the InvokeAI team?
- [ ] Yes
- [x] No, because: is tiny
## Have you updated all relevant documentation?
- [ ] Yes
- [x] No
## What type of PR is this? (check all applicable)
- [ ] Refactor
- [ ] Feature
- [x] Bug Fix
- [ ] Optimization
- [ ] Documentation Update
- [ ] Community Node Submission
## Description
Very tall IP adapter images didn't get fit to the panel. Now they do
* Initial commit of edge drag feature.
* Fixed build warnings
* code cleanup and drag to existing node
* improved isValidConnection check
* fixed build issues, removed cyclic dependency
* edge created nodes now spawn at cursor
* Add Node popover will no longer show when using drag to delete an edge.
* Fixed collection handling, added priority for handles matching name of source handle, removed current image/notes nodes from filtered list
* Fixed not properly clearing startParams when closing the Add Node popover
* fix(ui): do not allow Collect -> Iterate connection
This can be removed when #3956 is resolved
* feat(ui): use existing node validation logic in add-node-on-drop
This logic handles a number of special cases
---------
Co-authored-by: Millun Atluri <Millu@users.noreply.github.com>
Co-authored-by: psychedelicious <4822129+psychedelicious@users.noreply.github.com>
* node-FaceTools
* Added more documentation for facetools
* invert FaceMask masking
- FaceMask had face protected and surroundings change by default (face white, else black)
- Change to how FaceOff/others work: the opposite where surroundings protected, face changes by default (face black, else white)
* reflect changed facemask behaviour in docs
* add FaceOff+FaceMask workflows
- Add FaceOff and FaceMask example workflows to docs/workflows
* add FaceMask+FaceOff workflows to exampleworkflows.md
- used invokeai URL paths mimicking other workflow URLs, hopefully they translate when/if merged
* inheriting, typehints, black/isort/flake8
- modified FaceMask and FaceOff output classes to inherit base image, height, width from ImageOutput
- Added type annotations to helper functions, required some reworking of code's stored data
* remove credit header
- Was in my personal/repo copy, don't think it's necessary if merged.
* Optionals & image declaration duplication
- Added Optional[] to optional outputs and types
- removed duplication of image = context.services.images.get_pil_images(self.image.image_name) declaration
- Still need to find a way to deal with mask_pil None typing errors
* face(facetools): fix typing issues, add validation, clean up structure
* feat(facetools): update field descriptions
* Update FaceOff_FaceScale2x.json
- update FaceOff workflow after Bounded Image field removed in place of inheriting Image out field from ImageOutput
* feat(facetools): pass through original image on facemask if invalid face ids requested
* feat(facetools): tidy variable names & fn calls
* feat(facetools): bundle inter font, draw ids with it
Inter is a SIL Open Font license. The license is included and is fully permissive. Inter is the same font the UI and commercial application already uses.
Only the "regular" version is bundled.
* chore(facetools): isort & fix mypy issues
* docs(facetools): update and format docs
---------
Co-authored-by: Millun Atluri <millun.atluri@gmail.com>
Co-authored-by: Millun Atluri <Millu@users.noreply.github.com>
Co-authored-by: psychedelicious <4822129+psychedelicious@users.noreply.github.com>
* add control net to useRecallParams
* got recall controlnets working
* fix metadata viewer controlnet
* fix type errors
* fix controlnet metadata viewer
* add ip adapter to metadata
* added ip adapter to recall parameters
* got ip adapter recall working, still need to fix type errors
* fix type issues
* clean up logs
* python formatting
* cleanup
* fix(ui): only store `image_name` as ip adapter image
* fix(ui): use nullish coalescing operator for numbers
Need to use the nullish coalescing operator `??` instead of false-y coalescing operator `||` when the value being check is a number. This prevents unintended coalescing when the value is zero and therefore false-y.
* feat(ui): fall back on default values for ip adapter metadata
* fix(ui): remove unused schema
* feat(ui): re-use existing schemas in metadata schema
* fix(ui): do not disable invocationCache
---------
Co-authored-by: psychedelicious <4822129+psychedelicious@users.noreply.github.com>
[## What type of PR is this? (check all applicable)
- [X] Feature
## Have you discussed this change with the InvokeAI team?
- [X] Yes
## Have you updated all relevant documentation?
- [X] Yes
## Description
Very rarely a model lives in the subfolder of a non-pipeline HuggingFace
repo_id. The example I've been working with is
https://huggingface.co/monster-labs/control_v1p_sd15_qrcode_monster/tree/main,
where the improved monster QR code controlnet model lives in the `v2`
subdirectory.
In order to accommodate installing such files, I have made two changes
to the model installer.
1. At installation/configuration time, if a stanza in
`INITIAL_MODELS.yaml` contains the field `subfolder`, then the model
will be installed from the indicated subfolder. The syntax in this case
is:
```
sd-1/controlnet/qrcode_monster:
repo_id: monster-labs/control_v1p_sd15_qrcode_monster
subfolder: v2
```
2. From within the Web GUI or the installer TUI, if you wish to indicate
that the model resides in a subfolder, you can tack ":_subfoldername_"
to the end of the repo_id. The resulting repo_id will look like:
```
monster-labs/control_v1p_sd15_qrcode_monster:v2
```
The code for introducing these changes is obscure and somewhat hacky.
However, the whole installer code base has been rewritten for the model
manager refactor (#4252 ) and I will reimplement this feature in a more
elegant way in that PR.
## What type of PR is this? (check all applicable)
- [ ] Refactor
- [ ] Feature
- [ ] Bug Fix
- [ ] Optimization
- [X] Documentation Update
- [ ] Community Node Submission
## Have you discussed this change with the InvokeAI team?
- [ ] Yes
- [ ] No, because:
## Have you updated all relevant documentation?
- [ ] Yes
- [ ] No
## Description
## Related Tickets & Documents
<!--
For pull requests that relate or close an issue, please include them
below.
For example having the text: "closes #1234" would connect the current
pull
request to issue 1234. And when we merge the pull request, Github will
automatically close the issue.
-->
- Related Issue #
- Closes #
## QA Instructions, Screenshots, Recordings
<!--
Please provide steps on how to test changes, any hardware or
software specifications as well as any other pertinent information.
-->
## Added/updated tests?
- [ ] Yes
- [ ] No : _please replace this line with details on why tests
have not been included_
## [optional] Are there any post deployment tasks we need to perform?
This hook was rerendering any time anything changed. Moved it to a logical component, put its useEffects inside the component. This reduces the effect of the rerenders to just that tiny always-null component.
## What type of PR is this? (check all applicable)
- [ ] Refactor
- [ ] Feature
- [x] Bug Fix
- [ ] Optimization
- [ ] Documentation Update
- [ ] Community Node Submission
## Have you discussed this change with the InvokeAI team?
- [ ] Yes
- [x] No, because:
## Have you updated all relevant documentation?
- [x] Yes
- [ ] No
## Description
The IP-Adapter memory footprint was not being calculated correctly.
I think we could put checks in place to catch this type of error in the
future, but for now I'm just fixing the bug.
## QA Instructions, Screenshots, Recordings
I tested manually in a debugger. There are 3 pathways for calculating
the model size. All were tested:
- From file
- From state_dict
- From model weights
## Added/updated tests?
- [ ] Yes
- [x] No : This would require the ability to run tests that depend on
models. I'm working on this in another branch, but not ready quite yet.
* add control net to useRecallParams
* got recall controlnets working
* fix metadata viewer controlnet
* fix type errors
* fix controlnet metadata viewer
* set control image and use correct processor type and node
* clean up logs
* recall processor using substring
* feat(ui): enable controlNet when recalling one
---------
Co-authored-by: psychedelicious <4822129+psychedelicious@users.noreply.github.com>
- Current image number & total are displayed
- Left/right wrap around instead of stopping on first/last image
- Disable the left/right/number buttons when showing base layer
- improved translations
- Drag the end of an edge away from its handle to disconnect it
- Drop in empty space to delete the edge
- Drop on valid handle to reconnect it
- Update connection logic slightly to allow edge updates
* feat(ui): add error handling for enqueueBatch route, remove sessions
This re-implements the handling for the session create/invoke errors, but for batches.
Also remove all references to the old sessions routes in the UI.
* feat(ui): improve canvas image error UI
* make canvas error state gray instead of red
---------
Co-authored-by: Mary Hipp <maryhipp@Marys-MacBook-Air.local>
## What type of PR is this? (check all applicable)
- [X] Feature
## Have you discussed this change with the InvokeAI team?
- [X] Yes
- [ ] No, because:
## Have you updated all relevant documentation?
- [X] No - this should go into release notes.
## Description
During installation, the installer will now ask the user whether they
wish to perform a manual or automatic configuration of invokeai. If they
choose automatic (the default), then the install is performed without
running the TUI of the `invokeai-configure` script. Otherwise the
console-based interface is activated as usual.
This script also bumps up the default model RAM cache size to 7.5, which
improves performance on SDXL models.
* Add 'Random Float' node <3
does what it says on the tin :)
* Add random float + random seeded float nodes
altered my random float node as requested by Millu, kept the seeded version as an alternate variant for those that would like to control the randomization seed :)
* Update math.py
* Update math.py
* feat(nodes): standardize fields to match other nodes
---------
Co-authored-by: Millun Atluri <Millu@users.noreply.github.com>
Co-authored-by: psychedelicious <4822129+psychedelicious@users.noreply.github.com>
* fix(nodes): do not disable invocation cache delete methods
When the runtime disabled flag is on, do not skip the delete methods. This could lead to a hit on a missing resource.
Do skip them when the cache size is 0, because the user cannot change this (must restart app to change it).
* fix(nodes): do not use double-underscores in cache service
* Thread lock for cache
* Making cache LRU
* Bug fixes
* bugfix
* Switching to one Lock and OrderedDict cache
* Removing unused imports
* Move lock cache instance
* Addressing PR comments
---------
Co-authored-by: psychedelicious <4822129+psychedelicious@users.noreply.github.com>
Co-authored-by: Martin Kristiansen <martin@modyfi.io>
* add skeleton loading state for queue lit
* hide use cache checkbox if cache is disabled
* undo accidental add
* feat(ui): hide node footer entirely if nothing to show there
---------
Co-authored-by: Mary Hipp <maryhipp@Marys-MacBook-Air.local>
Co-authored-by: psychedelicious <4822129+psychedelicious@users.noreply.github.com>
Skeletons are for when we know the number of specific content items that are loading. When the queue is loading, we don't know how many items there are, or how many will load, so the whole list should be replaced with loading state.
The previous behaviour rendered a static number of skeletons. That number would rarely be the right number - the app shouldn't say "I'm loading 7 queue items", then load none, or load 50.
A future enhancement could use the queue item skeleton component and go by the total number of queue items, as reported by the queue status. I tried this but had some layout jankiness, not worth the effort right now.
The queue item skeleton component's styling was updated to support this future enhancement, making it exactly the same size as a queue item (it was a bit smaller before).
## What type of PR is this? (check all applicable)
- [X] Bug Fix
## Description
I left a dangling debug statement in a recent merged PR (#4674 ). This
removes it.
Updates my Image & Mask Composition Pack from 4 to 14 nodes, and moves
the Enhance Image node into it.
## What type of PR is this? (check all applicable)
- [ ] Refactor
- [ ] Feature
- [ ] Bug Fix
- [ ] Optimization
- [X] Documentation Update
- [X] Community Node Submission
## Have you discussed this change with the InvokeAI team?
- [ ] Yes
- [X] No, because:
This is an update of my existing community nodes entries.
## Have you updated all relevant documentation?
- [X] Yes
- [ ] No
## Description
Adds 9 more nodes to my Image & Mask Composition pack including Clipseg,
Image Layer Blend, Masked Latent/Noise Blend, Image Dilate/Erode,
Shadows/Highlights/Midtones masks from image, and more.
## Related Tickets & Documents
n/a
## QA Instructions, Screenshots, Recordings
<!--
Please provide steps on how to test changes, any hardware or
software specifications as well as any other pertinent information.
-->
## Added/updated tests?
- [ ] Yes
- [X] No : out of scope, tested the nodes, will integrate tests with my
own repo in time as is helpful
Adds 9 more of my nodes to the Image & Mask Composition Pack in the community nodes page, and integrates the Enhance Image node into that pack as well (formerly it was its own entry).
Add some instructions about installing the frontend toolchain when doing
a git-based install.
## What type of PR is this? (check all applicable)
- [ ] Refactor
- [ ] Feature
- [ ] Bug Fix
- [ ] Optimization
- [x] Documentation Update
- [ ] Community Node Submission
## Description
[Update
020_INSTALL_MANUAL.md](73ca8ccdb3)
Add some instructions about installing the frontend toolchain when doing
a git-based install.
## What type of PR is this? (check all applicable)
- [ ] Refactor
- [ ] Feature
- [ ] Bug Fix
- [ ] Optimization
- [ ] Documentation Update
- [ ] Community Node Submission
## Have you discussed this change with the InvokeAI team?
- [ ] Yes
- [ ] No, because:
## Have you updated all relevant documentation?
- [ ] Yes
- [ ] No
## Description
## Related Tickets & Documents
<!--
For pull requests that relate or close an issue, please include them
below.
For example having the text: "closes #1234" would connect the current
pull
request to issue 1234. And when we merge the pull request, Github will
automatically close the issue.
-->
- Related Issue #
- Closes #
## QA Instructions, Screenshots, Recordings
<!--
Please provide steps on how to test changes, any hardware or
software specifications as well as any other pertinent information.
-->
## Added/updated tests?
- [ ] Yes
- [ ] No : _please replace this line with details on why tests
have not been included_
## [optional] Are there any post deployment tasks we need to perform?
## What type of PR is this? (check all applicable)
- [ ] Refactor
- [ ] Feature
- [x] Bug Fix
- [ ] Optimization
- [ ] Documentation Update
- [ ] Community Node Submission
## Description
This is actually a platform-specific issue. `madge` is complaining about
a circular dependency on a single file -
`invokeai/frontend/web/src/features/queue/store/nanoStores.ts`. In that
file, we import from the `nanostores` package. Very similar name to the
file itself.
The error only appears on Windows and macOS, I imagine because those
systems both resolve `nanostores` to itself before resolving to the
package.
The solution is simple - rename `nanoStores.ts`. It's now
`queueNanoStore.ts`.
## Related Tickets & Documents
https://discord.com/channels/1020123559063990373/1155434451979993140
<!--
For pull requests that relate or close an issue, please include them
below.
For example having the text: "closes #1234" would connect the current
pull
request to issue 1234. And when we merge the pull request, Github will
automatically close the issue.
-->
## What type of PR is this? (check all applicable)
- [X] Feature
## Have you discussed this change with the InvokeAI team?
- [X] Yes
## Have you updated all relevant documentation?
- [X] Yes
## Description
This PR adds support for selecting and installing IP-Adapters at
configure time. The user is offered the four existing InvokeAI IP
Adapters in the UI as shown below. The matching image encoders are
selected and installed behind the scenes. That is, if the user selects
one of the three sd15 adapters, then the SD encoder will be installed.
If they select the sdxl adapter, then the SDXL encoder will be
installed.
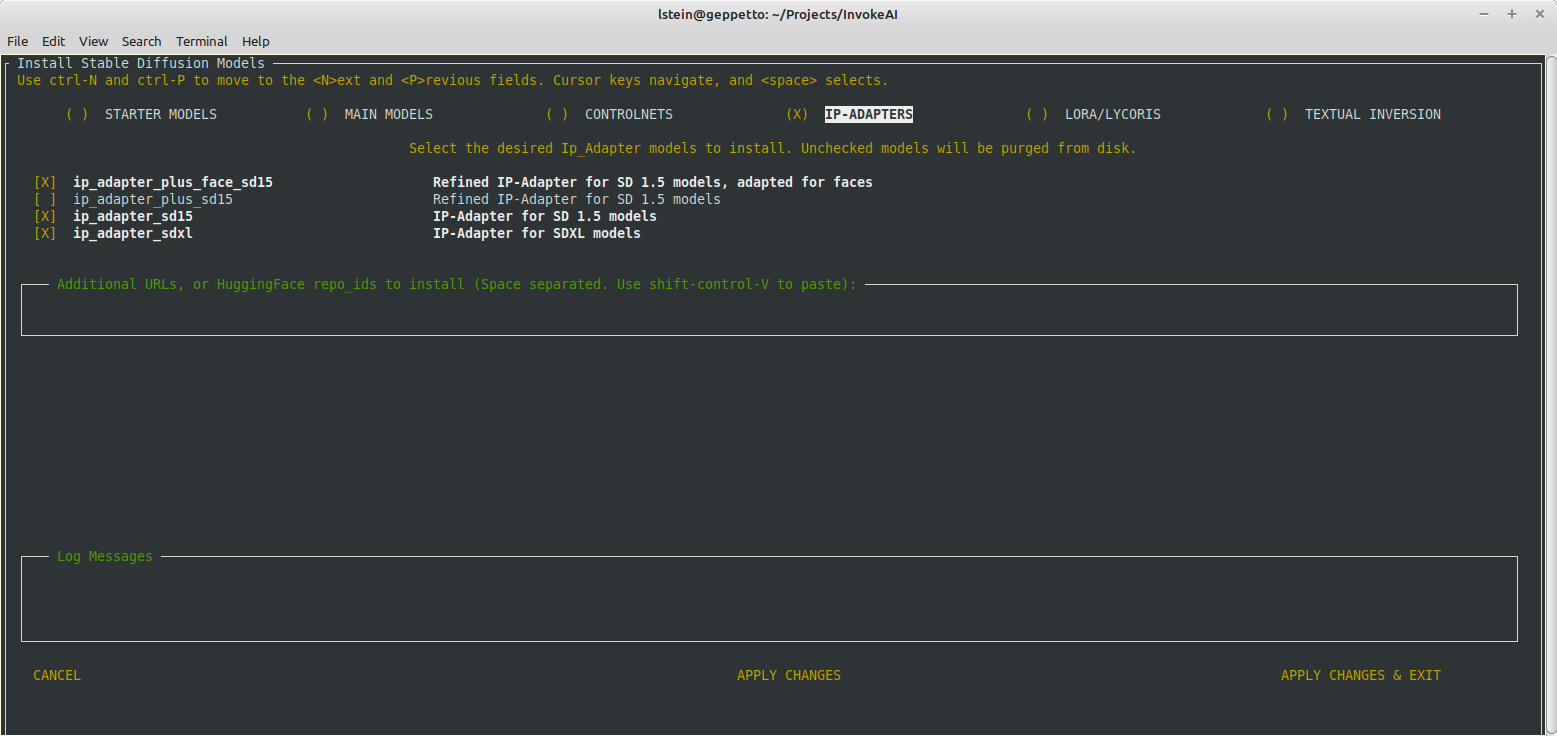
Note that the automatic selection of the encoder does not work when the
installer is run in headless mode. I may be able to fix that soon, but
I'm out of time today.
This is actually a platform-specific issue. `madge` is complaining about a circular dependency on a single file - `invokeai/frontend/web/src/features/queue/store/nanoStores.ts`. In that file, we import from the `nanostores` package. Very similar name to the file itself.
The error only appears on Windows and macOS, I imagine because those systems both resolve `nanostores` to itself before resolving to the package.
The solution is simple - rename `nanoStores.ts`. It's now `queueNanoStore.ts`.
## What type of PR is this? (check all applicable)
- [X] Bug Fix
- [ ] Optimizatio
## Have you discussed this change with the InvokeAI team?
- [ ] Yes
- [X] Np
## Have you updated all relevant documentation?
- [ ] Yes
- [X] No
## Description
ip_adapter models live in a folder containing the file
`image_encoder.txt` and a safetensors file. The load-time probe for new
models was detecting the files contained within the folder rather than
the folder itself, and so models.yaml was not getting correctly updated.
This fixes the issue.
## Added/updated tests?
- [ ] Yes
- [ ] No : _please replace this line with details on why tests
have not been included_
## [optional] Are there any post deployment tasks we need to perform?
## What type of PR is this? (check all applicable)
- [X] Feature
## Have you discussed this change with the InvokeAI team?
- [X] Yes
## Have you updated all relevant documentation?
- [X] Yes
## Description
It turns out that there are a few SD-1 models that use the
`v_prediction` SchedulerPredictionType. Examples here:
https://huggingface.co/zatochu/EasyFluff/tree/main . Previously we only
allowed the user to set the prediction type for sd-2 models. This PR
does three things:
1. Add a new checkpoint configuration file `v1-inference-v.yaml`. This
will install automatically on new installs, but for existing installs
users will need to update and then run `invokeai-configure` to get it.
2. Change the prompt on the web model install page to indicate that some
SD-1 models use the "v_prediction" method
3. Provide backend support for sd-1 models that use the v_prediction
method.
## Related Tickets & Documents
<!--
For pull requests that relate or close an issue, please include them
below.
For example having the text: "closes #1234" would connect the current
pull
request to issue 1234. And when we merge the pull request, Github will
automatically close the issue.
-->
- Related Issue #
- Closes#4277
## QA Instructions, Screenshots, Recordings
Update, run `invoke-ai-configure --yes --skip-sd --skip-support`, and
then use the web interface to install
https://huggingface.co/zatochu/EasyFluff/resolve/main/EasyFluffV11.2.safetensors
with the prediction type set to "v_prediction." Check that the installed
model uses configuration `v1-inference-v.yaml`.
If "None" is selected from the install menu, check that SD-1 models
default to `v1-inference.yaml` and SD-2 default to
`v2-inference-v.yaml`.
Also try installing a checkpoint at a local path if a like-named config
.yaml file is located next to it in the same directory. This should
override everything else and use the local path .yaml.
## Added/updated tests?
- [ ] Yes
- [X] No
## What type of PR is this? (check all applicable)
- [X] Refactor
## Have you discussed this change with the InvokeAI team?
- [ ] Yes
- [X] No, because: trivial fix
## Have you updated all relevant documentation?
- [X] Yes
- [ ] No
## Description
It annoyed me that the class method to get the invokeai logger was
`InvokeAILogger.getLogger()`. We do not use camelCase anywhere else. So
this PR renames the method `get_logger()`.
## What type of PR is this? (check all applicable)
- [ ] Refactor
- [x] Feature
- [ ] Bug Fix
- [ ] Optimization
- [ ] Documentation Update
- [ ] Community Node Submission
## Description
Pydantic handles the casting so this is always safe.
Also de-duplicate some validation logic code that was needlessly
duplicated.
- Change translations to use arrays of paragraphs instead of a single paragraph.
- Change component to accept a `feature` prop to identify the feature which the popover describes.
- Add optional `wrapperProps`: passed to the wrapper element, allowing more flexibility when using the popover
- Add optional `popoverProps`: passed to the `<Popover />` component, allowing for overriding individual instances of the popover's props
- Move definitions of features and popover settings to `invokeai/frontend/web/src/common/components/IAIInformationalPopover/constants.ts`
- Add some type safety to the `feature` prop
- Edit `POPOVER_DATA` to provide `image`, `href`, `buttonLabel`, and any popover props. The popover props are applied to all instances of the popover for the given feature. Note that the component prop `popoverProps` will override settings here.
- Remove the popover's arrow. Because the popover is wrapping groups of components, sometimes the error ends up pointing to nothing, which looks kinda janky. I've just removed the arrow entirely, but feel free to add it back if you think it looks better.
- Use a `link` variant button with external link icon to better communicate that clicking the button will open a new tab.
- Default the link button label to "Learn More" (if a label is provided, that will be used instead)
- Make default position `top`, but set manually set some to `right` - namely, anything with a dropdown. This prevents the popovers from obscuring or being obscured by the dropdowns.
- Do a bit more restructuring of the Popover component itself, and how it is integrated with other components
- More ref forwarding
- Make the open delay 1s
- Set the popovers to use lazy mounting (eg do not mount until the user opens the thing)
- Update the verbiage for many popover items and add missing dynamic prompts stuff
When the runtime disabled flag is on, do not skip the delete methods. This could lead to a hit on a missing resource.
Do skip them when the cache size is 0, because the user cannot change this (must restart app to change it).
- No longer need to make network request to add image to board after it's finished - removed
- Update linear graphs & upscale graph to save image to the board
- Update autoSwitch logic so when image is generated we still switch to the right board
- Remove the add-to-board node
- Create `BoardField` field type & add it to `save_image` node
- Add UI for `BoardField`
- Tighten up some loose types
- Make `save_image` node, in workflow editor, default to not intermediate
- Patch bump `save_image`
## What type of PR is this? (check all applicable)
- [X] Bug Fix
## Have you discussed this change with the InvokeAI team?
- [X] Yes
## Have you updated all relevant documentation?
- [ ] Yes
- [X] N/A
## Description
Pedantic was misconfigured and was not picking up the INVOKEAI_ prefix
on environment variables. Therefore, if the system had an unrelated
environment variable such as `version`, this caused pedantic validation
errors.
## Related Tickets & Documents
<!--
For pull requests that relate or close an issue, please include them
below.
For example having the text: "closes #1234" would connect the current
pull
request to issue 1234. And when we merge the pull request, Github will
automatically close the issue.
-->
- Related Issue #
- Closes#4098
## QA Instructions, Screenshots, Recordings
<!--
Please provide steps on how to test changes, any hardware or
software specifications as well as any other pertinent information.
-->
## Added/updated tests?
- [X] Yes — regression tests run; new regression test added.
* break out separate functions for preselected images, remove recallAllParameters dep as it causes circular logic with model being set
* lint
---------
Co-authored-by: Mary Hipp <maryhipp@Marys-MacBook-Air.local>
…nd move on
## What type of PR is this? (check all applicable)
- [ ] Refactor
- [ ] Feature
- [ ] Bug Fix
- [ ] Optimization
- [ ] Documentation Update
- [ ] Community Node Submission
## Have you discussed this change with the InvokeAI team?
- [ ] Yes
- [ ] No, because:
## Have you updated all relevant documentation?
- [ ] Yes
- [ ] No
## Description
## Related Tickets & Documents
<!--
For pull requests that relate or close an issue, please include them
below.
For example having the text: "closes #1234" would connect the current
pull
request to issue 1234. And when we merge the pull request, Github will
automatically close the issue.
-->
- Related Issue #
- Closes #
## QA Instructions, Screenshots, Recordings
<!--
Please provide steps on how to test changes, any hardware or
software specifications as well as any other pertinent information.
-->
## Added/updated tests?
- [ ] Yes
- [ ] No : _please replace this line with details on why tests
have not been included_
## [optional] Are there any post deployment tasks we need to perform?
- New routes to clear, enable, disable and get the status of the cache
- Status includes hits, misses, size, max size, enabled
- Add client cache queries and mutations, abstracted into hooks
- Add invocation cache status area (next to queue status) w/ buttons
## What type of PR is this? (check all applicable)
- [ ] Refactor
- [ ] Feature
- [x] Bug Fix
- [ ] Optimization
- [ ] Documentation Update
- [ ] Community Node Submission
## Description
Fixes failure on SDXL metadata node, introduced by me in #4625
## What type of PR is this? (check all applicable)
- [ ] Refactor
- [x] Feature
- [ ] Bug Fix
- [ ] Optimization
- [ ] Documentation Update
- [ ] Community Node Submission
## Have you discussed this change with the InvokeAI team?
- [x] Yes
- [ ] No, because:
## Description
[feat(ui): enable control adapters on image
drop](aa4b56baf2)
- Dropping/uploading an image on control adapter enables it (controlnet
& ip adapter)
- The image components are always enabled to allow this
Hide it until #4624 is ready
## What type of PR is this? (check all applicable)
- [ ] Refactor
- [ ] Feature
- [x] Bug Fix
- [ ] Optimization
- [ ] Documentation Update
- [ ] Community Node Submission
## Description
feat(ui): hide clipskip on sdxl; do not add to metadata
Hide it until #4624 is ready
## Related Tickets & Documents
<!--
For pull requests that relate or close an issue, please include them
below.
For example having the text: "closes #1234" would connect the current
pull
request to issue 1234. And when we merge the pull request, Github will
automatically close the issue.
-->
- Closes#4618
## What type of PR is this? (check all applicable)
- [ ] Refactor
- [ ] Feature
- [x] Bug Fix
- [ ] Optimization
- [ ] Documentation Update
- [ ] Community Node Submission
## Description
fix(ui): add control adapters to canvas coherence pass
## Related Tickets & Documents
<!--
For pull requests that relate or close an issue, please include them
below.
For example having the text: "closes #1234" would connect the current
pull
request to issue 1234. And when we merge the pull request, Github will
automatically close the issue.
-->
- Closes#4619
- Closes#4589
## QA Instructions, Screenshots, Recordings
I cannot figure out how to get the CLIP Vision model installed but I can
confirm that the graph is correct, because I get a Model Not Found error
that references this model, when invoking with IP adapter enabled..
* Initial commit. Feature works, but code might need some cleanup
* Cleaned up diff
* Made mousePosition a XYPosition again so its nicely typed
* Fixed yarn issues
* Paste now properly takes node width/height into account when pasting
* feat(ui): use react's types in the `onMouseMove` `reactflow` handler
* feat(ui): use refs to access `reactflow`'s DOM elements
* feat(ui): use a ref to store cursor position in nodes
---------
Co-authored-by: psychedelicious <4822129+psychedelicious@users.noreply.github.com>
Polymorphic fields now render the appropriate input component for their base type.
For example, float polymorphics will render the number input box.
You no longer need to specify ui_type to force it to display.
TODO: The UI *may* break if a list is provided as the default value for a polymorphic field.
* Remove fastapi-socketio dependency, doesn't really do much for us and isn't well maintained
* Run python black
* Remove fastapi_socketio import
* Add __app as class variable in case we ever need it later
* Run isort
---------
Co-authored-by: psychedelicious <4822129+psychedelicious@users.noreply.github.com>
## What type of PR is this? (check all applicable)
- [ ] Refactor
- [ ] Feature
- [x] Bug Fix
- [ ] Optimization
- [ ] Documentation Update
- [ ] Community Node Submission
## Have you discussed this change with the InvokeAI team?
- [x] Yes
- [ ] No, because:
## Have you updated all relevant documentation?
- [ ] Yes
- [ ] No
## Description
## Related Tickets & Documents
<!--
For pull requests that relate or close an issue, please include them
below.
For example having the text: "closes #1234" would connect the current
pull
request to issue 1234. And when we merge the pull request, Github will
automatically close the issue.
-->
- Related Issue #
- Closes #
## QA Instructions, Screenshots, Recordings
<!--
Please provide steps on how to test changes, any hardware or
software specifications as well as any other pertinent information.
-->
## Added/updated tests?
- [ ] Yes
- [ ] No : _please replace this line with details on why tests
have not been included_
## [optional] Are there any post deployment tasks we need to perform?
[TAESD - Tiny Autoencoder for Stable
Diffusion](https://github.com/madebyollin/taesd) - is a tiny VAE that
provides significantly better results than my single-multiplication hack
but is still very fast.
The entire TAESD model weights are under 10 MB!
This PR requires diffusers 0.20:
- [x] #4311
## To Do
Test with
- [x] SD 1.x
- [ ] SD 2.x: #4415
- [x] SDXL
## Have you discussed this change with the InvokeAI team?
- See [TAESD Invocation
API](https://discord.com/channels/1020123559063990373/1137857402453119166)
## Have you updated all relevant documentation?
- [ ] No
## Related Tickets & Documents
<!--
For pull requests that relate or close an issue, please include them
below.
For example having the text: "closes #1234" would connect the current
pull
request to issue 1234. And when we merge the pull request, Github will
automatically close the issue.
-->
- Related Issue #
- Closes #
## QA Instructions, Screenshots, Recordings
Should be able to import these models:
- [madebyollin/taesd](https://huggingface.co/madebyollin/taesd)
- [madebyollin/taesdxl](https://huggingface.co/madebyollin/taesdxl)
and use them as VAE.
<!--
Please provide steps on how to test changes, any hardware or
software specifications as well as any other pertinent information.
-->
## Added/updated tests?
- [x] Some. There are new tests for VaeFolderProbe based on VAE
configurations, but no tests that require the full model weights.
## What type of PR is this? (check all applicable)
- [ ] Refactor
- [ ] Feature
- [x] Bug Fix
- [ ] Optimization
- [ ] Documentation Update
- [ ] Community Node Submission
## Have you discussed this change with the InvokeAI team?
- [x] Yes
- [ ] No, because:
## Have you updated all relevant documentation?
- [ ] Yes
- [ ] No
## Description
## Related Tickets & Documents
<!--
For pull requests that relate or close an issue, please include them
below.
For example having the text: "closes #1234" would connect the current
pull
request to issue 1234. And when we merge the pull request, Github will
automatically close the issue.
-->
- Related Issue #
- Closes #
## QA Instructions, Screenshots, Recordings
<!--
Please provide steps on how to test changes, any hardware or
software specifications as well as any other pertinent information.
-->
## Added/updated tests?
- [ ] Yes
- [ ] No : _please replace this line with details on why tests
have not been included_
## [optional] Are there any post deployment tasks we need to perform?
## What type of PR is this? (check all applicable)
- [ ] Refactor
- [ ] Feature
- [ ] Bug Fix
- [ ] Optimization
- [X] Documentation Update
- [ ] Community Node Submission
This is a doc file that was missing from PR #4587 . Since that PR was
already merged. I’m pushing it in now.
## What type of PR is this? (check all applicable)
- [X] Feature
## Have you discussed this change with the InvokeAI team?
- [X] No, because it is trivial
## Have you updated all relevant documentation?
- [X] Yes -- added a new page listing all the command-line scripts and
their most useful options.
## Description
InvokeAI version 2.3 had a script called `invokeai-metadata` that
accepted a list of png images and printed out JSON-formatted embedded
metadata. I used to use the script for sorting and tagging images
outside of the InvokeAI Web UI framework, and I think people might still
find it useful.
This script stopped working in 3.0 and I didn't notice that until just
now. This PR restores it to a functional state.
## Related Tickets & Documents
None
## What type of PR is this? (check all applicable)
- [ ] Refactor
- [x] Feature
- [ ] Bug Fix
- [ ] Optimization
- [ ] Documentation Update
- [ ] Community Node Submission
## Have you discussed this change with the InvokeAI team?
- [x] Yes
- [ ] No, because:
## Have you updated all relevant documentation?
- [ ] Yes
- [ ] No
## Description
Adds a new common component `IAIInformationPopover` that composes JSX to
be rendered within a popover as a tooltip. We were not able to use the
`Tooltip` component provided by chakra because you cannot interact with
elements within those (at least not that I could get working).
This just a sample over positive prompt. We need content from
@hipsterusername and @Millu before we can roll this out.
## Related Tickets & Documents
<!--
For pull requests that relate or close an issue, please include them
below.
For example having the text: "closes #1234" would connect the current
pull
request to issue 1234. And when we merge the pull request, Github will
automatically close the issue.
-->
- Related Issue #
- Closes #
## QA Instructions, Screenshots, Recordings
<!--
Please provide steps on how to test changes, any hardware or
software specifications as well as any other pertinent information.
-->
## Added/updated tests?
- [ ] Yes
- [ ] No : _please replace this line with details on why tests
have not been included_
## [optional] Are there any post deployment tasks we need to perform?
## What type of PR is this? (check all applicable)
- [ ] Refactor
- [ ] Feature
- [ ] Bug Fix
- [ ] Optimization
- [ ] Documentation Update
- [ ] Community Node Submission
## Have you discussed this change with the InvokeAI team?
- [ ] Yes
- [ ] No, because:
## Have you updated all relevant documentation?
- [ ] Yes
- [ ] No
## Description
## Related Tickets & Documents
<!--
For pull requests that relate or close an issue, please include them
below.
For example having the text: "closes #1234" would connect the current
pull
request to issue 1234. And when we merge the pull request, Github will
automatically close the issue.
-->
- Related Issue #
- Closes #
## QA Instructions, Screenshots, Recordings
<!--
Please provide steps on how to test changes, any hardware or
software specifications as well as any other pertinent information.
-->
## Added/updated tests?
- [ ] Yes
- [ ] No : _please replace this line with details on why tests
have not been included_
## [optional] Are there any post deployment tasks we need to perform?
## What type of PR is this? (check all applicable)
- [ ] Refactor
- [x] Feature
- [ ] Bug Fix
- [ ] Optimization
- [ ] Documentation Update
- [ ] Community Node Submission
## Have you discussed this change with the InvokeAI team?
- [x] Yes
- [ ] No, because:
## Description
This change enhances the invocation cache logic to delete cache entries
when the resources to which they refer are deleted.
For example, a cached output may refer to "some_image.png". If that
image is deleted, and this particular cache entry is later retrieved by
a node, that node's successors will receive references to the now
non-existent "some_image.png". When they attempt to use that image, they
will fail.
To resolve this, we need to invalidate the cache when the resources to
which it refers are deleted. Two options:
- Invalidate the whole cache on every image/latents/etc delete
- Selectively invalidate cache entries when their resources are deleted
Node outputs can be any shape, with any number of resource references in
arbitrarily nested pydantic models. Traversing that structure to
identify resources is not trivial.
But invalidating the whole cache is a bit heavy-handed. It would be nice
to be more selective.
Simple solution:
- Invocation outputs' resource references are always string identifiers
- like the image's or latents' name
- Invocation outputs can be stringified, which includes said identifiers
- When the invocation is cached, we store the stringified output
alongside the "live" output classes
- When a resource is deleted, pass its identifier to the cache service,
which can then invalidate any cache entries that refer to it
The images and latents storage services have been outfitted with
`on_deleted()` callbacks, and the cache service registers itself to
handle those events. This logic was copied from `ItemStorageABC`.
`on_changed()` callback are also added to the images and latents
services, though these are not currently used. Just following the
existing pattern.
## Related Tickets & Documents
<!--
For pull requests that relate or close an issue, please include them
below.
For example having the text: "closes #1234" would connect the current
pull
request to issue 1234. And when we merge the pull request, Github will
automatically close the issue.
-->
- Related Issue #
- Closes #
## QA Instructions, Screenshots, Recordings
Reproduce the issue on main:
- Create a graph in workflow editor with two connected resize nodes
- Add an image to the first
- Enable cache on both
- Run the graph
- Clear Intermediates (in settings)
- Disable cache on the *second* node
- Run the graph, it should fail
Switch to the PR branch and start over, doing the exact same steps. You
shouldn't get any errors.
Example graph to start with:

## Added/updated tests?
- [~] Yes
- [ ] No : _please replace this line with details on why tests
have not been included_
* feat(ui): tweak queue UI components
* fix(ui): manually dispatch queue status query on queue item status change
RTK Query occasionally aborts the query that occurs when the tag is invalidated, especially if multples of them fire in rapid succession.
This resulted in the queue status and progress bar sometimes not reseting when the queue finishes its last item.
Manually dispatch the query now to get around this. Eventually should probably move this to a socket so we don't need to keep responding to socket with HTTP requests. Just send ti directly via socket
* chore(ui): remove errant console.logs
* fix(ui): do not accumulate node outputs in outputs area
* fix(ui): fix merge issue
---------
Co-authored-by: Kent Keirsey <31807370+hipsterusername@users.noreply.github.com>
Add `batch_id` to outbound events. This necessitates adding it to both `InvocationContext` and `InvocationQueueItem`. This allows the canvas to receive images.
When the user enqueues a batch on the canvas, it is expected that all images from that batch are directed to the canvas.
The simplest, most flexible solution is to add the `batch_id` to the invocation context-y stuff. Then everything knows what batch it came from, and we can have the canvas pick up images associated with its list of canvas `batch_id`s.
This change enhances the invocation cache logic to delete cache entries when the resources to which they refer are deleted.
For example, a cached output may refer to "some_image.png". If that image is deleted, and this particular cache entry is later retrieved by a node, that node's successors will receive references to the now non-existent "some_image.png". When they attempt to use that image, they will fail.
To resolve this, we need to invalidate the cache when the resources to which it refers are deleted. Two options:
- Invalidate the whole cache on every image/latents/etc delete
- Selectively invalidate cache entries when their resources are deleted
Node outputs can be any shape, with any number of resource references in arbitrarily nested pydantic models. Traversing that structure to identify resources is not trivial.
But invalidating the whole cache is a bit heavy-handed. It would be nice to be more selective.
Simple solution:
- Invocation outputs' resource references are always string identifiers - like the image's or latents' name
- Invocation outputs can be stringified, which includes said identifiers
- When the invocation is cached, we store the stringified output alongside the "live" output classes
- When a resource is deleted, pass its identifier to the cache service, which can then invalidate any cache entries that refer to it
The images and latents storage services have been outfitted with `on_deleted()` callbacks, and the cache service registers itself to handle those events. This logic was copied from `ItemStorageABC`.
`on_changed()` callback are also added to the images and latents services, though these are not currently used. Just following the existing pattern.
* fix(config): fix typing issues in `config/`
`config/invokeai_config.py`:
- use `Optional` for things that are optional
- fix typing of `ram_cache_size()` and `vram_cache_size()`
- remove unused and incorrectly typed method `autoconvert_path`
- fix types and logic for `parse_args()`, in which `InvokeAIAppConfig.initconf` *must* be a `DictConfig`, but function would allow it to be set as a `ListConfig`, which presumably would cause issues elsewhere
`config/base.py`:
- use `cls` for first arg of class methods
- use `Optional` for things that are optional
- fix minor type issue related to setting of `env_prefix`
- remove unused `add_subparser()` method, which calls `add_parser()` on an `ArgumentParser` (method only available on the `_SubParsersAction` object, which is returned from ArgumentParser.add_subparsers()`)
* feat: queued generation and batches
Due to a very messy branch with broad addition of `isort` on `main` alongside it, some git surgery was needed to get an agreeable git history. This commit represents all of the work on queued generation. See PR for notes.
* chore: flake8, isort, black
* fix(nodes): fix incorrect service stop() method
* fix(nodes): improve names of a few variables
* fix(tests): fix up tests after changes to batches/queue
* feat(tests): add unit tests for session queue helper functions
* feat(ui): dynamic prompts is always enabled
* feat(queue): add queue_status_changed event
* feat(ui): wip queue graphs
* feat(nodes): move cleanup til after invoker startup
* feat(nodes): add cancel_by_batch_ids
* feat(ui): wip batch graphs & UI
* fix(nodes): remove `Batch.batch_id` from required
* fix(ui): cleanup and use fixedCacheKey for all mutations
* fix(ui): remove orphaned nodes from canvas graphs
* fix(nodes): fix cancel_by_batch_ids result count
* fix(ui): only show cancel batch tooltip when batches were canceled
* chore: isort
* fix(api): return `[""]` when dynamic prompts generates no prompts
Just a simple fallback so we always have a prompt.
* feat(ui): dynamicPrompts.combinatorial is always on
There seems to be little purpose in using the combinatorial generation for dynamic prompts. I've disabled it by hiding it from the UI and defaulting combinatorial to true. If we want to enable it again in the future it's straightforward to do so.
* feat: add queue_id & support logic
* feat(ui): fix upscale button
It prepends the upscale operation to queue
* feat(nodes): return queue item when enqueuing a single graph
This facilitates one-off graph async workflows in the client.
* feat(ui): move controlnet autoprocess to queue
* fix(ui): fix non-serializable DOMRect in redux state
* feat(ui): QueueTable performance tweaks
* feat(ui): update queue list
Queue items expand to show the full queue item. Just as JSON for now.
* wip threaded session_processor
* feat(nodes,ui): fully migrate queue to session_processor
* feat(nodes,ui): add processor events
* feat(ui): ui tweaks
* feat(nodes,ui): consolidate events, reduce network requests
* feat(ui): cleanup & abstract queue hooks
* feat(nodes): optimize batch permutation
Use a generator to do only as much work as is needed.
Previously, though we only ended up creating exactly as many queue items as was needed, there was still some intermediary work that calculated *all* permutations. When that number was very high, the system had a very hard time and used a lot of memory.
The logic has been refactored to use a generator. Additionally, the batch validators are optimized to return early and use less memory.
* feat(ui): add seed behaviour parameter
This dynamic prompts parameter allows the seed to be randomized per prompt or per iteration:
- Per iteration: Use the same seed for all prompts in a single dynamic prompt expansion
- Per prompt: Use a different seed for every single prompt
"Per iteration" is appropriate for exploring a the latents space with a stable starting noise, while "Per prompt" provides more variation.
* fix(ui): remove extraneous random seed nodes from linear graphs
* fix(ui): fix controlnet autoprocess not working when queue is running
* feat(queue): add timestamps to queue status updates
Also show execution time in queue list
* feat(queue): change all execution-related events to use the `queue_id` as the room, also include `queue_item_id` in InvocationQueueItem
This allows for much simpler handling of queue items.
* feat(api): deprecate sessions router
* chore(backend): tidy logging in `dependencies.py`
* fix(backend): respect `use_memory_db`
* feat(backend): add `config.log_sql` (enables sql trace logging)
* feat: add invocation cache
Supersedes #4574
The invocation cache provides simple node memoization functionality. Nodes that use the cache are memoized and not re-executed if their inputs haven't changed. Instead, the stored output is returned.
## Results
This feature provides anywhere some significant to massive performance improvement.
The improvement is most marked on large batches of generations where you only change a couple things (e.g. different seed or prompt for each iteration) and low-VRAM systems, where skipping an extraneous model load is a big deal.
## Overview
A new `invocation_cache` service is added to handle the caching. There's not much to it.
All nodes now inherit a boolean `use_cache` field from `BaseInvocation`. This is a node field and not a class attribute, because specific instances of nodes may want to opt in or out of caching.
The recently-added `invoke_internal()` method on `BaseInvocation` is used as an entrypoint for the cache logic.
To create a cache key, the invocation is first serialized using pydantic's provided `json()` method, skipping the unique `id` field. Then python's very fast builtin `hash()` is used to create an integer key. All implementations of `InvocationCacheBase` must provide a class method `create_key()` which accepts an invocation and outputs a string or integer key.
## In-Memory Implementation
An in-memory implementation is provided. In this implementation, the node outputs are stored in memory as python classes. The in-memory cache does not persist application restarts.
Max node cache size is added as `node_cache_size` under the `Generation` config category.
It defaults to 512 - this number is up for discussion, but given that these are relatively lightweight pydantic models, I think it's safe to up this even higher.
Note that the cache isn't storing the big stuff - tensors and images are store on disk, and outputs include only references to them.
## Node Definition
The default for all nodes is to use the cache. The `@invocation` decorator now accepts an optional `use_cache: bool` argument to override the default of `True`.
Non-deterministic nodes, however, should set this to `False`. Currently, all random-stuff nodes, including `dynamic_prompt`, are set to `False`.
The field name `use_cache` is now effectively a reserved field name and possibly a breaking change if any community nodes use this as a field name. In hindsight, all our reserved field names should have been prefixed with underscores or something.
## One Gotcha
Leaf nodes probably want to opt out of the cache, because if they are not cached, their outputs are not saved again.
If you run the same graph multiple times, you only end up with a single image output, because the image storage side-effects are in the `invoke()` method, which is bypassed if we have a cache hit.
## Linear UI
The linear graphs _almost_ just work, but due to the gotcha, we need to be careful about the final image-outputting node. To resolve this, a `SaveImageInvocation` node is added and used in the linear graphs.
This node is similar to `ImagePrimitive`, except it saves a copy of its input image, and has `use_cache` set to `False` by default.
This is now the leaf node in all linear graphs, and is the only node in those graphs with `use_cache == False` _and_ the only node with `is_intermedate == False`.
## Workflow Editor
All nodes now have a footer with a new `Use Cache [ ]` checkbox. It defaults to the value set by the invocation in its python definition, but can be changed by the user.
The workflow/node validation logic has been updated to migrate old workflows to use the new default values for `use_cache`. Users may still want to review the settings that have been chosen. In the event of catastrophic failure when running this migration, the default value of `True` is applied, as this is correct for most nodes.
Users should consider saving their workflows after loading them in and having them updated.
## Future Enhancements - Callback
A future enhancement would be to provide a callback to the `use_cache` flag that would be run as the node is executed to determine, based on its own internal state, if the cache should be used or not.
This would be useful for `DynamicPromptInvocation`, where the deterministic behaviour is determined by the `combinatorial: bool` field.
## Future Enhancements - Persisted Cache
Similar to how the latents storage is backed by disk, the invocation cache could be persisted to the database or disk. We'd need to be very careful about deserializing outputs, but it's perhaps worth exploring in the future.
* fix(ui): fix queue list item width
* feat(nodes): do not send the whole node on every generator progress
* feat(ui): strip out old logic related to sessions
Things like `isProcessing` are no longer relevant with queue. Removed them all & updated everything be appropriate for queue. May be a few little quirks I've missed...
* feat(ui): fix up param collapse labels
* feat(ui): click queue count to go to queue tab
* tidy(queue): update comment, query format
* feat(ui): fix progress bar when canceling
* fix(ui): fix circular dependency
* feat(nodes): bail on node caching logic if `node_cache_size == 0`
* feat(nodes): handle KeyError on node cache pop
* feat(nodes): bypass cache codepath if caches is disabled
more better no do thing
* fix(ui): reset api cache on connect/disconnect
* feat(ui): prevent enqueue when no prompts generated
* feat(ui): add queue controls to workflow editor
* feat(ui): update floating buttons & other incidental UI tweaks
* fix(ui): fix missing/incorrect translation keys
* fix(tests): add config service to mock invocation services
invoking needs access to `node_cache_size` to occur
* optionally remove pause/resume buttons from queue UI
* option to disable prepending
* chore(ui): remove unused file
* feat(queue): remove `order_id` entirely, `item_id` is now an autoinc pk
---------
Co-authored-by: Mary Hipp <maryhipp@Marys-MacBook-Air.local>
## What type of PR is this? (check all applicable)
- [ ] Refactor
- [x] Feature
- [ ] Bug Fix
- [ ] Optimization
- [ ] Documentation Update
- [ ] Community Node Submission
## Have you discussed this change with the InvokeAI team?
- [x] Yes
- [ ] No, because:
## Have you updated all relevant documentation?
- [ ] Yes
- [ ] No
## Description (edit by @blessedcoolant , @RyanJDick )
This PR adds support for IP-Adapters (a technique for image-based
prompts) in Invoke AI. Currently only available in the Node UI.
IP-Adapter Paper: [IP-Adapter: Text Compatible Image Prompt Adapter for
Text-to-Image Diffusion Models](https://arxiv.org/abs/2308.06721)
IP-Adapter reference code: https://github.com/tencent-ailab/IP-Adapter
On order to test, install the following models via the InvokeAI UI:
Image Encoders:
[InvokeAI/ip_adapter_sd_image_encoder](https://huggingface.co/InvokeAI/ip_adapter_sd_image_encoder)
[InvokeAI/ip_adapter_sdxl_image_encoder](https://huggingface.co/InvokeAI/ip_adapter_sdxl_image_encoder)
IP-Adapters:
[InvokeAI/ip_adapter_sd15](https://huggingface.co/InvokeAI/ip_adapter_sd15)
[InvokeAI/ip_adapter_plus_sd15](https://huggingface.co/InvokeAI/ip_adapter_plus_sd15)
[InvokeAI/ip_adapter_plus_face_sd15](https://huggingface.co/InvokeAI/ip_adapter_plus_face_sd15)
[InvokeAI/ip_adapter_sdxl](https://huggingface.co/InvokeAI/ip_adapter_sdxl)
Old instructions (for reference only):
> In order to test, you need to download and place the following models
in your InvokeAI models directory.
>
> - SD 1.5 - https://huggingface.co/h94/IP-Adapter/tree/main/models -->
Download the models and the `image_encoder` folder to
`models/core/ip_adapters/sd-1`
> - SDXL - https://huggingface.co/h94/IP-Adapter/tree/main/sdxl_models
-Download the models and the `image_encoder` folder to
`models/core/ip_adapaters/sdxl`
>
> This is only temporary. This needs to be handled differently. I
outlined them here.
https://github.com/invoke-ai/InvokeAI/pull/4429#issuecomment-1705776570
## Examples using this PR
### Image variations, no text prompt
Leftmost image in each row is original image used for input to
IP-Adapter. The other rows are example outputs with different seeds,
other parameters identical.

## Related Tickets & Documents
<!--
For pull requests that relate or close an issue, please include them
below.
For example having the text: "closes #1234" would connect the current
pull
request to issue 1234. And when we merge the pull request, Github will
automatically close the issue.
-->
- Related Issue #
- Closes #
## QA Instructions, Screenshots, Recordings
<!--
Please provide steps on how to test changes, any hardware or
software specifications as well as any other pertinent information.
-->
## Added/updated tests?
- [ ] Yes
- [ ] No : _please replace this line with details on why tests
have not been included_
## [optional] Are there any post deployment tasks we need to perform?
## What type of PR is this? (check all applicable)
- [ ] Refactor
- [ ] Feature
- [ ] Bug Fix
- [ ] Optimization
- [ ] Documentation Update
- [ ] Community Node Submission
## Have you discussed this change with the InvokeAI team?
- [ ] Yes
- [ ] No, because:
## Have you updated all relevant documentation?
- [ ] Yes
- [ ] No
## Description
A few Missed Translations From the Translation Update
## Related Tickets & Documents
<!--
For pull requests that relate or close an issue, please include them
below.
For example having the text: "closes #1234" would connect the current
pull
request to issue 1234. And when we merge the pull request, Github will
automatically close the issue.
-->
- Related Issue #
- Closes #
## QA Instructions, Screenshots, Recordings
<!--
Please provide steps on how to test changes, any hardware or
software specifications as well as any other pertinent information.
-->
## Added/updated tests?
- [ ] Yes
- [ ] No : _please replace this line with details on why tests
have not been included_
## [optional] Are there any post deployment tasks we need to perform?
## What type of PR is this? (check all applicable)
- [ ] Refactor
- [ ] Feature
- [ ] Bug Fix
- [ X ] Optimization
- [ ] Documentation Update
- [ ] Community Node Submission
## Have you discussed this change with the InvokeAI team?
- [ X ] Yes
- [ ] No, because:
## Have you updated all relevant documentation?
- [ ] Yes
- [ X ] No
## Description
Mask Edge was set to default, and producing poor results. I've updated
the default back to Unmasked.
Note: The target branch is `feat/ip-adapter`, not `main`. After a
cursory review here, I'll merge for an in-depth review as part of
https://github.com/invoke-ai/InvokeAI/pull/4429.
## Description
This branch adds model management support for IP-Adapter models. There
are a few notable/unusual aspects to how it is implemented:
- We have defined a model format that works better with our model
manager than the 'official' IP-Adapter repo, and will be hosting the
IP-Adapter models ourselves (See `invokeai/backend/ip_adapter/README.md`
for a description of the expected model formats.)
- The CLIP Vision models and IP-Adapter models are handled independently
in the model manager. The IP-Adapter model info has a reference to the
CLIP model that it is intended to be run with.
- The `BaseModelType.Any` field was added for CLIP Vision models, as
they don't have a clear 1-to-1 association with a particular base model.
## QA Instructions, Screenshots, Recordings
Install the following models via the InvokeAI UI:
Image Encoders:
-
[InvokeAI/ip_adapter_sd_image_encoder](https://huggingface.co/InvokeAI/ip_adapter_sd_image_encoder)
-
[InvokeAI/ip_adapter_sdxl_image_encoder](https://huggingface.co/InvokeAI/ip_adapter_sdxl_image_encoder)
IP-Adapters:
-
[InvokeAI/ip_adapter_sd15](https://huggingface.co/InvokeAI/ip_adapter_sd15)
-
[InvokeAI/ip_adapter_plus_sd15](https://huggingface.co/InvokeAI/ip_adapter_plus_sd15)
-
[InvokeAI/ip_adapter_plus_face_sd15](https://huggingface.co/InvokeAI/ip_adapter_plus_face_sd15)
-
[InvokeAI/ip_adapter_sdxl](https://huggingface.co/InvokeAI/ip_adapter_sdxl)
The immutable and serializable checks for redux can cause substantial performance issues. The immutable check in particular is pretty heavy. It's only run in dev mode, but this and really slow down the already-slower performance of dev mode.
The most important one for us is serializable, which has far less of a performance impact.
The immutable check is largely redundant because we use immer-backed RTK for everything and immer gives us confidence there.
Disable the immutable check, leaving serializable in.
A few weeks back, we changed how the canvas scales in response to changes in window/panel size.
This introduced a bug where if we the user hadn't already clicked the canvas tab once to initialize the stage elements, the stage's dimensions were zero, then the calculation of the stage's scale ends up zero, then something is divided by that zero and Konva dies.
This is only a problem on Chromium browsers - somehow Firefox handles it gracefully.
Now, when calculating the stage scale, never return a 0 - if it's a zero, return 1 instead. This is enough to fix the crash, but the image ends up centered on the top-left corner of the stage (the origin of the canvas).
Because the canvas elements are not initialized at this point (we haven't switched tabs yet), the stage dimensions fall back to (0,0). This means the center of the stage is also (0,0) - so the image is centered on (0,0), the top-left corner of the stage.
To fix this, we need to ensure we:
- Change to the canvas tab before actually setting the image, so the stage elements are able to initialize
- Use `flushSync` to flush DOM updates for this tab change so we actually have DOM elements to work with
- Update the stage dimensions once on first load of it (so in the effect that sets up the resize observer, we update the stage dimensions)
The result now is the expected behaviour - images sent to canvas do not crash and end up in the center of the canvas.
JSX is not serializable, so it cannot be in redux. Non-serializable global state may be put into `nanostores`.
- Use `nanostores` for `customStarUI`
- Use `nanostores` for `headerComponent`
- Re-enable the serializable & immutable check redux middlewares
* Update collections.py
RangeOfSizeInvocation was not taking step into account when generating the end point of the range
* - updated the node description to refelect this mod
- added a gt=0 constraint to ensure only a positive size of the range
- moved the + 1 to be on the size. To ensure the range is the requested size in cases where the step is negative
- formatted with Black
* Removed +1 from the range calculation
---------
Co-authored-by: psychedelicious <4822129+psychedelicious@users.noreply.github.com>
* New classes to support the PromptsFromFileInvocation Class
- PromptPosNegOutput
- PromptSplitNegInvocation
- PromptJoinInvocation
- PromptReplaceInvocation
* - Added PromptsToFileInvocation,
- PromptSplitNegInvocation
- now counts the bracket depth so ensures it cout the numbr of open and close brackets match.
- checks for escaped [ ] so ignores them if escaped e.g \[
- PromptReplaceInvocation - now has a user regex. and no regex in made caseinsesitive
* Update prompt.py
created class PromptsToFileInvocationOutput and use it in PromptsToFileInvocation instead of BaseInvocationOutput
* Update prompt.py
* Added schema_extra title and tags for PromptReplaceInvocation, PromptJoinInvocation, PromptSplitNegInvocation and PromptsToFileInvocation
* Added PTFileds Collect and Expand
* update to nodes v1
* added ui_type to file_path for PromptToFile
* update params for the primitive types used, remove the ui_type filepath, promptsToFile now only accepts collections until a fix is available
* updated the parameters for the StringOutput primitive
* moved the prompt tools nodes out of the prompt.py into prompt_tools.py
* more rework for v1
* added github link
* updated to use "@invocation"
* updated tags
* Adde new nodes PromptStrength and PromptStrengthsCombine
* chore: black
* feat(nodes): add version to prompt nodes
* renamed nodes from prompt related to string related. Also moved them into a strings.py file. Also moved and renamed the PromptsFromFileInvocation from prompt.py to strings.py. The PTfileds still remain in the Prompt_tool.py for now.
* added , version="1.0.0" to the invocations
* removed the PTField related nodes and the prompt-tools.py file all new nodes now live in the
* formatted prompt.py and strings.py with Black and fixed silly mistake in the new StringSplitInvocation
* - Revert Prompt.py back to original
- Update strings.py to be only StringJoin, StringJoinThre, StringReplace, StringSplitNeg, StringSplit
* applied isort to imports
* fix(nodes): typos in `strings.py`
---------
Co-authored-by: psychedelicious <4822129+psychedelicious@users.noreply.github.com>
Co-authored-by: Millun Atluri <Millu@users.noreply.github.com>
This maps values to labels for multiple-choice fields.
This allows "enum" fields (i.e. `Literal["val1", "val2", ...]` fields) to use code-friendly string values for choices, but present this to the UI as human-friendly labels.
* Added crop option to ImagePasteInvocation
ImagePasteInvocation extended the image with transparency when pasting outside of the base image's bounds. This introduces a new option to crop the resulting image back to the original base image.
* Updated version for ImagePasteInvocation as 3.1.1 was released.
## What type of PR is this? (check all applicable)
- [x] Refactor
- [ ] Feature
- [ ] Bug Fix
- [ ] Optimization
- [ ] Documentation Update
- [ ] Community Node Submission
## Have you discussed this change with the InvokeAI team?
- [x] Yes
- [ ] No, because:
## Description
**NOTE!!!** This PR is against `feat/ip-adapter`, not `main`. I created
a PR because I made some pretty significant changes that I thought might
spark discussion.
I don't think it makes sense to do a full in-depth review here. If
possible, let's try to agree on the high-level approach and then merge
this and do an in-depth review on the original PR.
High-level changes:
- Split `IPAdapterField` from the `ControlField` and make them separate
inputs on the `DenoiseLatentsInvocation`
- Create context manager that handles patching/un-patching the UNet with
IP-Adapter attention blocks (`IPAdapter.apply_ip_adapter_attention()`)
- Pass IP-Adapter conditioning via `cross_attention_kwargs` rather than
concatenating it to the text embedding. This helps avoid breaking other
features (like long prompts).
- Remove unused blocks of the IP-Adapter implementation and do some
general tidying.
Out of scope:
- I haven't looked at model management yet. I'd like to get this merged
into `feat/ip-adapter` and then look at model management separately.
## What type of PR is this? (check all applicable)
- [ ] Refactor
- [ ] Feature
- [x] Bug Fix
- [ ] Optimization
- [x] Documentation Update
- [ ] Community Node Submission
## Have you discussed this change with the InvokeAI team?
- [x] Yes
- [ ] No, because:
## Have you updated all relevant documentation?
- [x] Yes
- [ ] No
## Description
There was an issue with the responsiveness of the quick links buttons in
the documentation.
## Related Tickets & Documents
- Related Issue #4455
- Closes#4455
## QA Instructions, Screenshots, Recordings
• On the documentation website, go to the Home page, scroll down to the
quick-links section.
[Home - InvokeAI Stable Diffusion Toolkit
Docs.webm](https://github.com/invoke-ai/InvokeAI/assets/92071471/0a7095c1-9d78-47f2-8da7-9c1e796bea3d)
## Added/updated tests?
- [ ] Yes
- [x] No : _It is a minor change in the documentation website._
## [optional] Are there any post deployment tasks we need to perform? No
We need to parse the config before doing anything related to invocations to ensure that the invocations union picks up on denied nodes.
- Move that to the top of api_app and cli_app
- Wrap subsequent imports in `if True:`, as a hack to satisfy flake8 and not have to noqa every line or the whole file
- Add tests to ensure graph validation fails when using a denied node, and that the invocations union does not have denied nodes (this indirectly provides confidence that the generated OpenAPI schema will not include denied nodes)
This simply hides nodes from the workflow editor. The nodes will still work if an API request is made with them. For example, you could hide `iterate` nodes from the workflow editor, but if the Linear UI makes use of those nodes, they will still function.
- Update `AppConfig` with optional property `nodesDenylist: string[]`
- If provided, nodes are filtered out by `type` in the workflow editor
Allow denying and explicitly allowing nodes. When a not-allowed node is used, a pydantic `ValidationError` will be raised.
- When collecting all invocations, check against the allowlist and denylist first. When pydantic constructs any unions related to nodes, the denied nodes will be omitted
- Add `allow_nodes` and `deny_nodes` to `InvokeAIAppConfig`. These are `Union[list[str], None]`, and may be populated with the `type` of invocations.
- When `allow_nodes` is `None`, allow all nodes, else if it is `list[str]`, only allow nodes in the list
- When `deny_nodes` is `None`, deny no nodes, else if it is `list[str]`, deny nodes in the list
- `deny_nodes` overrides `allow_nodes`
## What type of PR is this? (check all applicable)
3.1.1 Release build & updates
## Have you discussed this change with the InvokeAI team?
- [X] Yes
- [ ] No, because:
## Have you updated all relevant documentation?
- [X] Yes
- [ ] No
## Description
## Related Tickets & Documents
<!--
For pull requests that relate or close an issue, please include them
below.
For example having the text: "closes #1234" would connect the current
pull
request to issue 1234. And when we merge the pull request, Github will
automatically close the issue.
-->
- Related Issue #
- Closes #
## QA Instructions, Screenshots, Recordings
<!--
Please provide steps on how to test changes, any hardware or
software specifications as well as any other pertinent information.
-->
## Added/updated tests?
- [ ] Yes
- [ ] No : _please replace this line with details on why tests
have not been included_
## [optional] Are there any post deployment tasks we need to perform?
## What type of PR is this? (check all applicable)
- [ ] Refactor
- [x] Feature
- [ ] Bug Fix
- [ ] Optimization
- [ ] Documentation Update
- [ ] Community Node Submission
## Description
Adds a configuration option to fetch metadata and workflows from api
isntead of the image file. Needed for commercial.
Minor corrections to spell and grammar in the feature request template.
## What type of PR is this? (check all applicable)
- [ ] Refactor
- [ ] Feature
- [ ] Bug Fix
- [ ] Optimization
- [x] Documentation Update
- [ ] Community Node Submission
## Have you discussed this change with the InvokeAI team?
- [ ] Yes
- [x] No, because:
This PR should be self explanatory.
## Have you updated all relevant documentation?
- [x] Yes
- [ ] No
## Description
Minor corrections to spell and grammar in the feature request template.
No code or behavioural changes.
## Related Tickets & Documents
<!--
For pull requests that relate or close an issue, please include them
below.
For example having the text: "closes #1234" would connect the current
pull
request to issue 1234. And when we merge the pull request, Github will
automatically close the issue.
-->
- Related Issue #
- Closes #
## QA Instructions, Screenshots, Recordings
<!--
Please provide steps on how to test changes, any hardware or
software specifications as well as any other pertinent information.
-->
N/A
## Added/updated tests?
- [ ] Yes
- [x] No : _please replace this line with details on why tests
have not been included_
There are no tests for the issue template.
## [optional] Are there any post deployment tasks we need to perform?
I added extra steps to update the Cudnnn DLL found in the Torch package
because it wasn't optimised or didn't use the lastest version. So
manually updating it can speed up iteration but the result might differ
from each card. Exemple i passed from 3 it/s to a steady 20 it/s.
## What type of PR is this? (check all applicable)
- [ ] Refactor
- [ ] Feature
- [ ] Bug Fix
- [ ] Optimization
- [x] Documentation Update
- [ ] Community Node Submission
## Have you discussed this change with the InvokeAI team?
- [x] Yes
- [ ] No, because:
## Have you updated all relevant documentation?
- [x] Yes
- [ ] No
## Description
## Related Tickets & Documents
<!--
For pull requests that relate or close an issue, please include them
below.
For example having the text: "closes #1234" would connect the current
pull
request to issue 1234. And when we merge the pull request, Github will
automatically close the issue.
-->
- Related Issue #
- Closes #
## QA Instructions, Screenshots, Recordings
<!--
Please provide steps on how to test changes, any hardware or
software specifications as well as any other pertinent information.
-->
## Added/updated tests?
- [x] Yes
- [ ] No : _please replace this line with details on why tests
have not been included_
## [optional] Are there any post deployment tasks we need to perform?
I added extra steps to update the Cudnnn DLL found in the Torch package because it wasn't optimised or didn't use the lastest version. So manually updating it can speed up iteration but the result might differ from each card. Exemple i passed from 3 it/s to a steady 20 it/s.
Copied into InvokeAI since IP-Adapter repo is not a package. Is there a better way to do this for non-packaged Python code while still keeping InvokeAI install easy?
Copied into InvokeAI since IP-Adapter repo is not a package. Is there a better way to do this for non-packaged Python code while still keeping InvokeAI install easy?
label:Is there an existing issue for this problem?
description:|
Please use the [search function](https://github.com/invoke-ai/InvokeAI/issues?q=is%3Aissue+is%3Aopen+label%3Abug)
irst to see if an issue already exists for the bug you encountered.
Please [search](https://github.com/invoke-ai/InvokeAI/issues) first to see if an issue already exists for the problem.
options:
- label:I have searched the existing issues
required:true
@ -33,80 +28,119 @@ body:
- type:dropdown
id:os_dropdown
attributes:
label:OS
description:Which operating System did you use when the bug occured
label:Operating system
description:Your computer's operating system.
multiple:false
options:
- 'Linux'
- 'Windows'
- 'macOS'
- 'other'
validations:
required:true
- type:dropdown
id:gpu_dropdown
attributes:
label:GPU
description:Which kind of Graphic-Adapter is your System using
label:GPU vendor
description:Your GPU's vendor.
multiple:false
options:
- 'cuda'
- 'amd'
- 'mps'
- 'cpu'
- 'Nvidia (CUDA)'
- 'AMD (ROCm)'
- 'Apple Silicon (MPS)'
- 'None (CPU)'
validations:
required:true
- type:input
id:gpu_model
attributes:
label:GPU model
description:Your GPU's model. If on Apple Silicon, this is your Mac's chip. Leave blank if on CPU.
placeholder:ex. RTX 2080 Ti, Mac M1 Pro
validations:
required:false
- type:input
id:vram
attributes:
label:VRAM
description:Size of the VRAM if known
label:GPU VRAM
description:Your GPU's VRAM. If on Apple Silicon, this is your Mac's unified memory. Leave blank if on CPU.
placeholder:8GB
validations:
required:false
- type:input
id:version-number
attributes:
label:What version did you experience this issue on?
label:Version number
description:|
Please share the version of Invoke AI that you experienced the issue on. If this is not the latest version, please update first to confirm the issue still exists. If you are testing main, please include the commit hash instead.
placeholder:X.X.X
The version of Invoke you have installed. If it is not the latest version, please update and try again to confirm the issue still exists. If you are testing main, please include the commit hash instead.
placeholder:ex. 3.6.1
validations:
required:true
- type:input
id:browser-version
attributes:
label:Browser
description:Your web browser and version.
placeholder:ex. Firefox 123.0b3
validations:
required:true
- type:textarea
id:python-deps
attributes:
label:Python dependencies
description:|
If the problem occurred during image generation, click the gear icon at the bottom left corner, click "About", click the copy button and then paste here.
validations:
required:false
- type:textarea
id:what-happened
attributes:
label:What happened?
label:What happened
description:|
Briefly describe what happened, what you expected to happen and how to reproduce this bug.
placeholder:When using the webinterface and right-clicking on button X instead of the popup-menu there error Y appears
Describe what happened. Include any relevant error messages, stack traces and screenshots here.
placeholder:I clicked button X and then Y happened.
validations:
required:true
- type:textarea
id:what-you-expected
attributes:
label:Screenshots
description:If applicable, add screenshots to help explain your problem
placeholder:this is what the result looked like <screenshot>
label:What you expected to happen
description:Describe what you expected to happen.
placeholder:I expected Z to happen.
validations:
required:true
- type:textarea
id:how-to-repro
attributes:
label:How to reproduce the problem
description:List steps to reproduce the problem.
placeholder:Start the app, generate an image with these settings, then click button X.
validations:
required:false
- type:textarea
id:additional-context
attributes:
label:Additional context
description:Add any other context about the problem here
description:Any other context that might help us to understand the problem.
placeholder:Only happens when there is full moon and Friday the 13th on Christmas Eve 🎅🏻
validations:
required:false
- type:input
id:contact
id:discord-username
attributes:
label:Contact Details
description:__OPTIONAL__ How can we get in touch with you if we need more info (besides this issue)?
description:Commit a idea or Request a new feature
description:Contribute a idea or request a new feature
title: '[enhancement]:'
labels: ['enhancement']
# assignees:
@ -9,14 +9,14 @@ body:
- type:markdown
attributes:
value:|
Thanks for taking the time to fill out this Feature request!
Thanks for taking the time to fill out this feature request!
- type:checkboxes
attributes:
label:Is there an existing issue for this?
description:|
Please make use of the [search function](https://github.com/invoke-ai/InvokeAI/labels/enhancement)
to see if a simmilar issue already exists for the feature you want to request
to see if a similar issue already exists for the feature you want to request
options:
- label:I have searched the existing issues
required:true
@ -34,12 +34,9 @@ body:
id:whatisexpected
attributes:
label:What should this feature add?
description:Please try to explain the functionality this feature should add
description:Explain the functionality this feature should add. Feature requests should be for single features. Please create multiple requests if you want to request multiple features.
placeholder:|
Instead of one huge textfield, it would be nice to have forms for bug-reports, feature-requests, ...
Great benefits with automatic labeling, assigning and other functionalitys not available in that form
via old-fashioned markdown-templates. I would also love to see the use of a moderator bot 🤖 like
https://github.com/marketplace/actions/issue-moderator-with-commands to auto close old issues and other things
I'd like a button that creates an image of banana sushi every time I press it. Each image should be different. There should be a toggle next to the button that enables strawberry mode, in which the images are of strawberry sushi instead.
validations:
required:true
@ -51,6 +48,6 @@ body:
- type:textarea
attributes:
label:Aditional Content
label:Additional Content
description:Add any other context or screenshots about the feature request here.
placeholder:This is a Mockup of the design how I imagine it <screenshot>
placeholder:This is a mockup of the design how I imagine it <screenshot>
@ -270,7 +272,7 @@ upgrade script.** See the next section for a Windows recipe.
3. Select option [1] to upgrade to the latest release.
4. Once the upgrade is finished you will be returned to the launcher
menu. Select option [7] "Re-run the configure script to fix a broken
menu. Select option [6] "Re-run the configure script to fix a broken
install or to complete a major upgrade".
This will run the configure script against the v2.3 directory and
@ -368,9 +370,9 @@ InvokeAI offers a locally hosted Web Server & React Frontend, with an industry l
The Unified Canvas is a fully integrated canvas implementation with support for all core generation capabilities, in/outpainting, brush tools, and more. This creative tool unlocks the capability for artists to create with AI as a creative collaborator, and can be used to augment AI-generated imagery, sketches, photography, renders, and more.
### *Node Architecture & Editor (Beta)*
### *Workflows & Nodes*
InvokeAI's backend is built on a graph-based execution architecture. This allows for customizable generation pipelines to be developed by professional users looking to create specific workflows to support their production use-cases, and will be extended in the future with additional capabilities.
InvokeAI offers a fully featured workflow management solution, enabling users to combine the power of nodes based workflows with the easy of a UI. This allows for customizable generation pipelines to be developed and shared by users looking to create specific workflows to support their production use-cases.
### *Board & Gallery Management*
@ -383,8 +385,9 @@ Invoke AI provides an organized gallery system for easily storing, accessing, an
- *Upscaling Tools*
- *Embedding Manager & Support*
- *Model Manager & Support*
- *Workflow creation & management*
- *Node-Based Architecture*
- *Node-Based Plug-&-Play UI (Beta)*
### Latest Changes
@ -394,21 +397,19 @@ Notes](https://github.com/invoke-ai/InvokeAI/releases) and the
### Troubleshooting
Please check out our **[Q&A](https://invoke-ai.github.io/InvokeAI/help/TROUBLESHOOT/#faq)** to get solutions for common installation
problems and other issues.
Please check out our **[Troubleshooting Guide](https://invoke-ai.github.io/InvokeAI/installation/010_INSTALL_AUTOMATED/#troubleshooting)** to get solutions for common installation
problems and other issues. For more help, please join our [Discord][discord link]
## Contributing
Anyone who wishes to contribute to this project, whether documentation, features, bug fixes, code
cleanup, testing, or code reviews, is very much encouraged to do so.
To join, just raise your hand on the InvokeAI Discord server (#dev-chat) or the GitHub discussion board.
If you'd like to help with translation, please see our [translation guide](docs/other/TRANSLATION.md).
Get started with contributing by reading our [Contribution documentation](https://invoke-ai.github.io/InvokeAI/contributing/CONTRIBUTING/), joining the [#dev-chat](https://discord.com/channels/1020123559063990373/1049495067846524939) or the GitHub discussion board.
If you are unfamiliar with how
to contribute to GitHub projects, here is a
[Getting Started Guide](https://opensource.com/article/19/7/create-pull-request-github). A full set of contributionguidelines, along with templates, are in progress. You can **make your pull request against the "main" branch**.
to contribute to GitHub projects, we have a new contributor checklist you can follow to get started contributing:
All commands are to be run from the `docker` directory: `cd docker`
All commands should be run within the `docker` directory: `cd docker`
## Quickstart :rocket:
On a known working Linux+Docker+CUDA (Nvidia) system, execute `./run.sh` in this directory. It will take a few minutes - depending on your internet speed - to install the core models. Once the application starts up, open `http://localhost:9090` in your browser to Invoke!
For more configuration options (using an AMD GPU, custom root directory location, etc): read on.
## Detailed setup
#### Linux
1. Ensure builkit is enabled in the Docker daemon settings (`/etc/docker/daemon.json`)
2. Install the `docker compose` plugin using your package manager, or follow a [tutorial](https://www.digitalocean.com/community/tutorials/how-to-install-and-use-docker-compose-on-ubuntu-22-04).
2. Install the `docker compose` plugin using your package manager, or follow a [tutorial](https://docs.docker.com/compose/install/linux/#install-using-the-repository).
- The deprecated `docker-compose` (hyphenated) CLI continues to work for now.
3. Ensure docker daemon is able to access the GPU.
- You may need to install [nvidia-container-toolkit](https://docs.nvidia.com/datacenter/cloud-native/container-toolkit/latest/install-guide.html)
@ -18,13 +26,12 @@ All commands are to be run from the `docker` directory: `cd docker`
This is done via Docker Desktop preferences
## Quickstart
### Configure Invoke environment
1. Make a copy of `env.sample` and name it `.env` (`cp env.sample .env` (Mac/Linux) or `copy example.env .env` (Windows)). Make changes as necessary. Set `INVOKEAI_ROOT` to an absolute path to:
1. Make a copy of `.env.sample` and name it `.env` (`cp .env.sample .env` (Mac/Linux) or `copy example.env .env` (Windows)). Make changes as necessary. Set `INVOKEAI_ROOT` to an absolute path to:
a. the desired location of the InvokeAI runtime directory, or
b. an existing, v3.0.0 compatible runtime directory.
1.`docker compose up`
1.Execute `run.sh`
The image will be built automatically if needed.
@ -38,24 +45,28 @@ The runtime directory (holding models and outputs) will be created in the locati
The Docker daemon on the system must be already set up to use the GPU. In case of Linux, this involves installing `nvidia-docker-runtime` and configuring the `nvidia` runtime as default. Steps will be different for AMD. Please see Docker documentation for the most up-to-date instructions for using your GPU with Docker.
To use an AMD GPU, set `GPU_DRIVER=rocm` in your `.env` file.
## Customize
Check the `.env.sample` file. It contains some environment variables for running in Docker. Copy it, name it `.env`, and fill it in with your own values. Next time you run `docker compose up`, your custom values will be used.
Check the `.env.sample` file. It contains some environment variables for running in Docker. Copy it, name it `.env`, and fill it in with your own values. Next time you run `run.sh`, your custom values will be used.
You can also set these values in `dockercompose.yml` directly, but `.env` will help avoid conflicts when code is updated.
You can also set these values in `docker-compose.yml` directly, but `.env` will help avoid conflicts when code is updated.
Example (most values are optional):
Values are optional, but setting `INVOKEAI_ROOT` is highly recommended. The default is `~/invokeai`. Example:
```
```bash
INVOKEAI_ROOT=/Volumes/WorkDrive/invokeai
HUGGINGFACE_TOKEN=the_actual_token
CONTAINER_UID=1000
GPU_DRIVER=cuda
GPU_DRIVER=nvidia
```
Any environment variables supported by InvokeAI can be set here - please see the [Configuration docs](https://invoke-ai.github.io/InvokeAI/features/CONFIGURATION/) for further detail.
## Even Moar Customizing!
See the `dockercompose.yaml` file. The `command` instruction can be uncommented and used to run arbitrary startup commands. Some examples below.
See the `docker-compose.yml` file. The `command` instruction can be uncommented and used to run arbitrary startup commands. Some examples below.
### Reconfigure the runtime directory
@ -63,7 +74,7 @@ Can be used to download additional models from the supported model list
In conjunction with `INVOKEAI_ROOT` can be also used to initialize a runtime directory
The app is published in twice, in different build formats.
- A [PyPI] distribution. This includes both a source distribution and built distribution (a wheel). Users install with `pip install invokeai`. The updater uses this build.
- An installer on the [InvokeAI Releases Page]. This is a zip file with install scripts and a wheel. This is only used for new installs.
## General Prep
Make a developer call-out for PRs to merge. Merge and test things out.
While the release workflow does not include end-to-end tests, it does pause before publishing so you can download and test the final build.
## Release Workflow
The `release.yml` workflow runs a number of jobs to handle code checks, tests, build and publish on PyPI.
It is triggered on **tag push**, when the tag matches `v*`. It doesn't matter if you've prepped a release branch like `release/v3.5.0` or are releasing from `main` - it works the same.
> Because commits are reference-counted, it is safe to create a release branch, tag it, let the workflow run, then delete the branch. So long as the tag exists, that commit will exist.
### Triggering the Workflow
Run `make tag-release` to tag the current commit and kick off the workflow.
The release may also be dispatched [manually].
### Workflow Jobs and Process
The workflow consists of a number of concurrently-run jobs, and two final publish jobs.
The publish jobs require manual approval and are only run if the other jobs succeed.
#### `check-version` Job
This job checks that the git ref matches the app version. It matches the ref against the `__version__` variable in `invokeai/version/invokeai_version.py`.
When the workflow is triggered by tag push, the ref is the tag. If the workflow is run manually, the ref is the target selected from the **Use workflow from** dropdown.
This job uses [samuelcolvin/check-python-version].
> Any valid [version specifier] works, so long as the tag matches the version. The release workflow works exactly the same for `RC`, `post`, `dev`, etc.
#### Check and Test Jobs
- **`python-tests`**: runs `pytest` on matrix of platforms
- **`python-checks`**: runs `ruff` (format and lint)
- **`frontend-tests`**: runs `vitest`
- **`frontend-checks`**: runs `prettier` (format), `eslint` (lint), `dpdm` (circular refs), `tsc` (static type check) and `knip` (unused imports)
> **TODO** We should add `mypy` or `pyright` to the **`check-python`** job.
> **TODO** We should add an end-to-end test job that generates an image.
#### `build-installer` Job
This sets up both python and frontend dependencies and builds the python package. Internally, this runs `installer/create_installer.sh` and uploads two artifacts:
- **`dist`**: the python distribution, to be published on PyPI
- **`InvokeAI-installer-${VERSION}.zip`**: the installer to be included in the GitHub release
#### Sanity Check & Smoke Test
At this point, the release workflow pauses as the remaining publish jobs require approval.
A maintainer should go to the **Summary** tab of the workflow, download the installer and test it. Ensure the app loads and generates.
> The same wheel file is bundled in the installer and in the `dist` artifact, which is uploaded to PyPI. You should end up with the exactly the same installation of the `invokeai` package from any of these methods.
#### PyPI Publish Jobs
The publish jobs will run if any of the previous jobs fail.
They use [GitHub environments], which are configured as [trusted publishers] on PyPI.
Both jobs require a maintainer to approve them from the workflow's **Summary** tab.
- Click the **Review deployments** button
- Select the environment (either `testpypi` or `pypi`)
- Click **Approve and deploy**
> **If the version already exists on PyPI, the publish jobs will fail.** PyPI only allows a given version to be published once - you cannot change it. If version published on PyPI has a problem, you'll need to "fail forward" by bumping the app version and publishing a followup release.
#### `publish-testpypi` Job
Publishes the distribution on the [Test PyPI] index, using the `testpypi` GitHub environment.
This job is not required for the production PyPI publish, but included just in case you want to test the PyPI release.
If approved and successful, you could try out the test release like this:
Publishes the distribution on the production PyPI index, using the `pypi` GitHub environment.
## Publish the GitHub Release with installer
Once the release is published to PyPI, it's time to publish the GitHub release.
1. [Draft a new release] on GitHub, choosing the tag that triggered the release.
2. Write the release notes, describing important changes. The **Generate release notes** button automatically inserts the changelog and new contributors, and you can copy/paste the intro from previous releases.
3. Upload the zip file created in **`build`** job into the Assets section of the release notes. You can also upload the zip into the body of the release notes, since it can be hard for users to find the Assets section.
4. Check the **Set as a pre-release** and **Create a discussion for this release** checkboxes at the bottom of the release page.
5. Publish the pre-release.
6. Announce the pre-release in Discord.
> **TODO** Workflows can create a GitHub release from a template and upload release assets. One popular action to handle this is [ncipollo/release-action]. A future enhancement to the release process could set this up.
## Manual Build
The `build installer` workflow can be dispatched manually. This is useful to test the installer for a given branch or tag.
No checks are run, it just builds.
## Manual Release
The `release` workflow can be dispatched manually. You must dispatch the workflow from the right tag, else it will fail the version check.
This functionality is available as a fallback in case something goes wonky. Typically, releases should be triggered via tag push as described above.
Invoke AI originated as a project built by the community, and that vision carries forward today as we aim to build the best pro-grade tools available. We work together to incorporate the latest in AI/ML research, making these tools available in over 20 languages to artists and creatives around the world as part of our fully permissive OSS project designed for individual users to self-host and use.
## Contributing to Invoke AI
# Methods of Contributing to Invoke AI
Anyone who wishes to contribute to InvokeAI, whether features, bug fixes, code cleanup, testing, code reviews, documentation or translation is very much encouraged to do so.
To join, just raise your hand on the InvokeAI Discord server (#dev-chat) or the GitHub discussion board.
## Development
If you’d like to help with development, please see our [development guide](contribution_guides/development.md).
### Areas of contribution:
**New Contributors:** If you’re unfamiliar with contributing to open source projects, take a look at our [new contributor guide](contribution_guides/newContributorChecklist.md).
#### Development
If you’d like to help with development, please see our [development guide](contribution_guides/development.md). If you’re unfamiliar with contributing to open source projects, there is a tutorial contained within the development guide.
## Nodes
If you’d like to add a Node, please see our [nodes contributionguide](../nodes/contributingNodes.md).
#### Nodes
If you’d like to help with development, please see our [nodes contribution guide](/nodes/contributingNodes). If you’re unfamiliar with contributing to open source projects, there is a tutorial contained within the development guide.
## Support and Triaging
Helping support other users in [Discord](https://discord.gg/ZmtBAhwWhy) and on Github are valuable forms of contribution that we greatly appreciate.
#### Documentation
We receive many issues and requests for help from users. We're limited in bandwidth relative to our the user base, so providing answers to questions or helping identify causes of issues is very helpful. By doing this, you enable us to spend time on the highest priority work.
## Documentation
If you’d like to help with documentation, please see our [documentation guide](contribution_guides/documentation.md).
#### Translation
## Translation
If you'd like to help with translation, please see our[translation guide](contribution_guides/translation.md).
#### Tutorials
## Tutorials
Please reach out to @imic or @hipsterusername on [Discord](https://discord.gg/ZmtBAhwWhy) to help create tutorials for InvokeAI.
We hope you enjoy using our software as much as we enjoy creating it, and we hope that some of those of you who are reading this will elect to become part of our contributor community.
### Contributors
# Contributors
This project is a combined effort of dedicated people from across the world.[Check out the list of all these amazing people](https://invoke-ai.github.io/InvokeAI/other/CONTRIBUTORS/). We thank them for their time, hard work and effort.
### Code of Conduct
# Code of Conduct
The InvokeAI community is a welcoming place, and we want your help in maintaining that. Please review our [Code of Conduct](https://github.com/invoke-ai/InvokeAI/blob/main/CODE_OF_CONDUCT.md) to learn more - it's essential to maintaining a respectful and inclusive environment.
@ -47,8 +49,7 @@ By making a contribution to this project, you certify that:
This disclaimer is not a license and does not grant any rights or permissions. You must obtain necessary permissions and licenses, including from third parties, before contributing to this project.
This disclaimer is provided "as is" without warranty of any kind, whether expressed or implied, including but not limited to the warranties of merchantability, fitness for a particular purpose, or non-infringement. In no event shall the authors or copyright holders be liable for any claim, damages, or other liability, whether in an action of contract, tort, or otherwise, arising from, out of, or in connection with the contribution or the use or other dealings in the contribution.
### Support
# Support
For support, please use this repository's [GitHub Issues](https://github.com/invoke-ai/InvokeAI/issues), or join the [Discord](https://discord.gg/ZmtBAhwWhy).
"error": "Traceback (most recent call last):\n File \"/home/lstein/Projects/InvokeAI/invokeai/app/services/download/download_default.py\", line 182, in _download_next_item\n self._do_download(job)\n File \"/home/lstein/Projects/InvokeAI/invokeai/app/services/download/download_default.py\", line 206, in _do_download\n raise HTTPError(resp.reason)\nrequests.exceptions.HTTPError: Not Found\n"
See the [tests documentation](./TESTS.md) for information about running and writing tests.
### Reloading Changes
Experimenting with changes to the Python source code is a drag if you have to re-start the server —
@ -167,6 +142,23 @@ and so you'll have access to the same python environment as the InvokeAI app.
This is _super_ handy.
#### Enabling Type-Checking with Pylance
We use python's typing system in InvokeAI. PR reviews will include checking that types are present and correct. We don't enforce types with `mypy` at this time, but that is on the horizon.
Using a code analysis tool to automatically type check your code (and types) is very important when writing with types. These tools provide immediate feedback in your editor when types are incorrect, and following their suggestions lead to fewer runtime bugs.
Pylance, installed at the beginning of this guide, is the de-facto python LSP (language server protocol). It provides type checking in the editor (among many other features). Once installed, you do need to enable type checking manually:
- Open a python file
- Look along the status bar in VSCode for `{ } Python`
- Click the `{ }`
- Turn type checking on - basic is fine
You'll now see red squiggly lines where type issues are detected. Hover your cursor over the indicated symbols to see what's wrong.
In 99% of cases when the type checker says there is a problem, there really is a problem, and you should take some time to understand and resolve what it is pointing out.
#### Debugging configs with `launch.json`
Debugging configs are managed in a `launch.json` file. Like most VSCode configs,
We use `pytest` to run the backend python tests. (See [pyproject.toml](/pyproject.toml) for the default `pytest` options.)
## Fast vs. Slow
All tests are categorized as either 'fast' (no test annotation) or 'slow' (annotated with the `@pytest.mark.slow` decorator).
'Fast' tests are run to validate every PR, and are fast enough that they can be run routinely during development.
'Slow' tests are currently only run manually on an ad-hoc basis. In the future, they may be automated to run nightly. Most developers are only expected to run the 'slow' tests that directly relate to the feature(s) that they are working on.
As a rule of thumb, tests should be marked as 'slow' if there is a chance that they take >1s (e.g. on a CPU-only machine with slow internet connection). Common examples of slow tests are tests that depend on downloading a model, or running model inference.
## Running Tests
Below are some common test commands:
```bash
# Run the fast tests. (This implicitly uses the configured default option: `-m "not slow"`.)
pytest tests/
# Equivalent command to run the fast tests.
pytest tests/ -m "not slow"
# Run the slow tests.
pytest tests/ -m "slow"
# Run the slow tests from a specific file.
pytest tests/path/to/slow_test.py -m "slow"
# Run all tests (fast and slow).
pytest tests -m ""
```
## Test Organization
All backend tests are in the [`tests/`](/tests/) directory. This directory mirrors the organization of the `invokeai/` directory. For example, tests for `invokeai/model_management/model_manager.py` would be found in `tests/model_management/test_model_manager.py`.
TODO: The above statement is aspirational. A re-organization of legacy tests is required to make it true.
## Tests that depend on models
There are a few things to keep in mind when adding tests that depend on models.
1. If a required model is not already present, it should automatically be downloaded as part of the test setup.
2. If a model is already downloaded, it should not be re-downloaded unnecessarily.
3. Take reasonable care to keep the total number of models required for the tests low. Whenever possible, re-use models that are already required for other tests. If you are adding a new model, consider including a comment to explain why it is required/unique.
There are several utilities to help with model setup for tests. Here is a sample test that depends on a model:
To review test coverage, append `--cov` to your pytest command:
```bash
pytest tests/ --cov
```
Test outcomes and coverage will be reported in the terminal. In addition, a more detailed report is created in both XML and HTML format in the `./coverage` folder. The HTML output is particularly helpful in identifying untested statements where coverage should be improved. The HTML report can be viewed by opening `./coverage/html/index.html`.
If you are looking to help to with a code contribution, InvokeAI uses several different technologies under the hood: Python (Pydantic, FastAPI, diffusers) and Typescript (React, Redux Toolkit, ChakraUI, Mantine, Konva). Familiarity with StableDiffusion and image generation concepts is helpful, but not essential.
For more information, please review our area specific documentation:
## **Get Started**
To get started, take a look at our [new contributors checklist](newContributorChecklist.md)
Once you're setup, for more information, you can review the documentation specific to your area of interest:
If you don't feel ready to make a code contribution yet, no problem! You can also help out in other ways, such as [documentation](documentation.md) or [translation](translation.md).
If you don't feel ready to make a code contribution yet, no problem! You can also help out in other ways, such as [documentation](documentation.md), [translation](translation.md) or helping support other users and triage issues as they're reported in GitHub.
There are two paths to making a development contribution:
@ -23,69 +30,20 @@ There are two paths to making a development contribution:
## Best Practices:
* Keep your pull requests small. Smaller pull requests are more likely to be accepted and merged
* Comments! Commenting your code helps reviwers easily understand your contribution
* Comments! Commenting your code helps reviewers easily understand your contribution
* Use Python and Typescript’s typing systems, and consider using an editor with [LSP](https://microsoft.github.io/language-server-protocol/) support to streamline development
* Make all communications public. This ensure knowledge is shared with the whole community
## **How do I make a contribution?**
Never made an open source contribution before? Wondering how contributions work in our project? Here's a quick rundown!
Before starting these steps, ensure you have your local environment [configured for development](../LOCAL_DEVELOPMENT.md).
1. Find a [good first issue](https://github.com/invoke-ai/InvokeAI/contribute) that you are interested in addressing or a feature that you would like to add. Then, reach out to our team in the [#dev-chat](https://discord.com/channels/1020123559063990373/1049495067846524939) channel of the Discord to ensure you are setup for success.
2. Fork the [InvokeAI](https://github.com/invoke-ai/InvokeAI) repository to your GitHub profile. This means that you will have a copy of the repository under**your-GitHub-username/InvokeAI**.
3. Clone the repository to your local machine using:
If you're unfamiliar with using Git through the commandline, [GitHub Desktop](https://desktop.github.com) is a easy-to-use alternative with a UI. You can do all the same steps listed here, but through the interface.
4. Create a new branch for your fix using:
```bash
git checkout -b branch-name-here
```
5. Make the appropriate changes for the issue you are trying to address or the feature that you want to add.
6. Add the file contents of the changed files to the "snapshot" git uses to manage the state of the project, also known as the index:
```bash
git add insert-paths-of-changed-files-here
```
7. Store the contents of the index with a descriptive message.
```bash
git commit -m "Insert a short message of the changes made here"
```
8. Push the changes to the remote repository using
```markdown
git push origin branch-name-here
```
9. Submit a pull request to the **main** branch of the InvokeAI repository.
10. Title the pull request with a short description of the changes made and the issue or bug number associated with your change. For example, you can title an issue like so "Added more log outputting to resolve #1234".
11. In the description of the pull request, explain the changes that you made, any issues you think exist with the pull request you made, and any questions you have for the maintainer. It's OK if your pull request is not perfect (no pull request is), the reviewer will be able to help you fix any problems and improve it!
12. Wait for the pull request to be reviewed by other collaborators.
13. Make changes to the pull request if the reviewer(s) recommend them.
14. Celebrate your success after your pull request is merged!
If you’d like to learn more about contributing to Open Source projects, here is a[Getting Started Guide](https://opensource.com/article/19/7/create-pull-request-github).
## **Where can I go for help?**
If you need help, you can ask questions in the [#dev-chat](https://discord.com/channels/1020123559063990373/1049495067846524939) channel of the Discord.
For frontend related work, **@pyschedelicious** is the best person to reach out to.
For frontend related work, **@psychedelicious** is the best person to reach out to.
For backend related work, please reach out to **@blessedcoolant**, **@lstein**, **@StAlKeR7779** or **@psychedelicious**.
For backend related work, please reach out to **@blessedcoolant**, **@lstein**, **@StAlKeR7779** or **@pyschedelicious**.
## **What does the Code of Conduct mean for me?**
Our [Code of Conduct](CODE_OF_CONDUCT.md) means that you are responsible for treating everyone on the project with respect and courtesy regardless of their identity. If you are the victim of any inappropriate behavior or comments as described in our Code of Conduct, we are here for you and will do the best to ensure that the abuser is reprimanded appropriately, per our code.
Our [Code of Conduct](../../CODE_OF_CONDUCT.md) means that you are responsible for treating everyone on the project with respect and courtesy regardless of their identity. If you are the victim of any inappropriate behavior or comments as described in our Code of Conduct, we are here for you and will do the best to ensure that the abuser is reprimanded appropriately, per our code.
The UI is a fairly straightforward Typescript React app, with the Unified Canvas being more complex.
Code is located in`invokeai/frontend/web/`for review.
## Stack
State management is Redux via[Redux Toolkit](https://github.com/reduxjs/redux-toolkit). We lean heavily on RTK:
-`createAsyncThunk`for HTTP requests
-`createEntityAdapter`for fetching images and models
-`createListenerMiddleware`for workflows
The API client and associated types are generated from the OpenAPI schema. See API_CLIENT.md.
Communication with server is a mix of HTTP and[socket.io](https://github.com/socketio/socket.io-client)(with a simple socket.io redux middleware to help).
[Chakra-UI](https://github.com/chakra-ui/chakra-ui)& [Mantine](https://github.com/mantinedev/mantine) for components and styling.
[Konva](https://github.com/konvajs/react-konva)for the canvas, but we are pushing the limits of what is feasible with it (and HTML canvas in general). We plan to rebuild it with[PixiJS](https://github.com/pixijs/pixijs)to take advantage of WebGL's improved raster handling.
[Vite](https://vitejs.dev/)for bundling.
Localisation is via[i18next](https://github.com/i18next/react-i18next), but translation happens on our[Weblate](https://hosted.weblate.org/engage/invokeai/)project. Only the English source strings should be changed on this repo.
## Contributing
Thanks for your interest in contributing to the InvokeAI Web UI!
We encourage you to ping @psychedelicious and @blessedcoolant on[Discord](https://discord.gg/ZmtBAhwWhy)if you want to contribute, just to touch base and ensure your work doesn't conflict with anything else going on. The project is very active.
### Dev Environment
**Setup**
1. Install[node](https://nodejs.org/en/download/). You can confirm node is installed with:
```bash
node --version
```
2. Install [yarn classic](https://classic.yarnpkg.com/lang/en/) and confirm it is installed by running this:
```bash
npm install --global yarn
yarn --version
```
From`invokeai/frontend/web/`run`yarn install`to get everything set up.
Start everything in dev mode:
1. Ensure your virtual environment is running
2. Start the dev server:`yarn dev`
3. Start the InvokeAI Nodes backend:`python scripts/invokeai-web.py # run from the repo root`
4. Point your browser to the dev server address e.g.[http://localhost:5173/](http://localhost:5173/)
### VSCode Remote Dev
We've noticed an intermittent issue with the VSCode Remote Dev port forwarding. If you use this feature of VSCode, you may intermittently click the Invoke button and then get nothing until the request times out. Suggest disabling the IDE's port forwarding feature and doing it manually via SSH:
@ -10,4 +10,4 @@ When updating or creating documentation, please keep in mind InvokeAI is a tool
## Help & Questions
Please ping @imic1 or @hipsterusername in the [Discord](https://discord.com/channels/1020123559063990373/1049495067846524939) if you have any questions.
Please ping @imic or @hipsterusername in the [Discord](https://discord.com/channels/1020123559063990373/1049495067846524939) if you have any questions.
If you're a new contributor to InvokeAI or Open Source Projects, this is the guide for you.
## New Contributor Checklist
- [x] Set up your local development environment & fork of InvokAI by following [the steps outlined here](../../installation/020_INSTALL_MANUAL.md#developer-install)
- [x] Set up your local tooling with [this guide](InvokeAI/contributing/LOCAL_DEVELOPMENT/#developing-invokeai-in-vscode). Feel free to skip this step if you already have tooling you're comfortable with.
- [x] Familiarize yourself with [Git](https://www.atlassian.com/git) & our project structure by reading through the [development documentation](development.md)
- [x] Join the [#dev-chat](https://discord.com/channels/1020123559063990373/1049495067846524939) channel of the Discord
- [x] Choose an issue to work on! This can be achieved by asking in the #dev-chat channel, tackling a [good first issue](https://github.com/invoke-ai/InvokeAI/contribute) or finding an item on the [roadmap](https://github.com/orgs/invoke-ai/projects/7). If nothing in any of those places catches your eye, feel free to work on something of interest to you!
- [x] Make your first Pull Request with the guide below
- [x] Happy development! Don't be afraid to ask for help - we're happy to help you contribute!
## How do I make a contribution?
Never made an open source contribution before? Wondering how contributions work in our project? Here's a quick rundown!
Before starting these steps, ensure you have your local environment [configured for development](../LOCAL_DEVELOPMENT.md).
1. Find a [good first issue](https://github.com/invoke-ai/InvokeAI/contribute) that you are interested in addressing or a feature that you would like to add. Then, reach out to our team in the [#dev-chat](https://discord.com/channels/1020123559063990373/1049495067846524939) channel of the Discord to ensure you are setup for success.
2. Fork the [InvokeAI](https://github.com/invoke-ai/InvokeAI) repository to your GitHub profile. This means that you will have a copy of the repository under**your-GitHub-username/InvokeAI**.
3. Clone the repository to your local machine using:
If you're unfamiliar with using Git through the commandline, [GitHub Desktop](https://desktop.github.com) is a easy-to-use alternative with a UI. You can do all the same steps listed here, but through the interface.
4. Create a new branch for your fix using:
```bash
git checkout -b branch-name-here
```
5. Make the appropriate changes for the issue you are trying to address or the feature that you want to add.
6. Add the file contents of the changed files to the "snapshot" git uses to manage the state of the project, also known as the index:
```bash
git add -A
```
7. Store the contents of the index with a descriptive message.
```bash
git commit -m "Insert a short message of the changes made here"
```
8. Push the changes to the remote repository using
```bash
git push origin branch-name-here
```
9. Submit a pull request to the **main** branch of the InvokeAI repository. If you're not sure how to, [follow this guide](https://docs.github.com/en/pull-requests/collaborating-with-pull-requests/proposing-changes-to-your-work-with-pull-requests/creating-a-pull-request)
10. Title the pull request with a short description of the changes made and the issue or bug number associated with your change. For example, you can title an issue like so "Added more log outputting to resolve #1234".
11. In the description of the pull request, explain the changes that you made, any issues you think exist with the pull request you made, and any questions you have for the maintainer. It's OK if your pull request is not perfect (no pull request is), the reviewer will be able to help you fix any problems and improve it!
12. Wait for the pull request to be reviewed by other collaborators.
13. Make changes to the pull request if the reviewer(s) recommend them.
14. Celebrate your success after your pull request is merged!
If you’d like to learn more about contributing to Open Source projects, here is a[Getting Started Guide](https://opensource.com/article/19/7/create-pull-request-github).
## Best Practices:
* Keep your pull requests small. Smaller pull requests are more likely to be accepted and merged
* Comments! Commenting your code helps reviewers easily understand your contribution
* Use Python and Typescript’s typing systems, and consider using an editor with [LSP](https://microsoft.github.io/language-server-protocol/) support to streamline development
* Make all communications public. This ensure knowledge is shared with the whole community
## **Where can I go for help?**
If you need help, you can ask questions in the [#dev-chat](https://discord.com/channels/1020123559063990373/1049495067846524939) channel of the Discord.
For frontend related work, **@pyschedelicious** is the best person to reach out to.
For backend related work, please reach out to **@blessedcoolant**, **@lstein**, **@StAlKeR7779** or **@pyschedelicious**.
@ -211,8 +211,8 @@ Here are the invoke> command that apply to txt2img:
| `--facetool <name>` | `-ft <name>` | `-ft gfpgan` | Select face restoration algorithm to use: gfpgan, codeformer |
| `--codeformer_fidelity` | `-cf <float>` | `0.75` | Used along with CodeFormer. Takes values between 0 and 1. 0 produces high quality but low accuracy. 1 produces high accuracy but low quality |
| `--save_original` | `-save_orig` | `False` | When upscaling or fixing faces, this will cause the original image to be saved rather than replaced. |
| `--variation <float>` | `-v<float>` | `0.0` | Add a bit of noise (0.0=none, 1.0=high) to the image in order to generate a series of variations. Usually used in combination with `-S<seed>` and `-n<int>` to generate a series a riffs on a starting image. See [Variations](../features/VARIATIONS.md). |
| `--with_variations <pattern>` | | `None` | Combine two or more variations. See [Variations](../features/VARIATIONS.md) for now to use this. |
| `--variation <float>` | `-v<float>` | `0.0` | Add a bit of noise (0.0=none, 1.0=high) to the image in order to generate a series of variations. Usually used in combination with `-S<seed>` and `-n<int>` to generate a series a riffs on a starting image. See [Variations](VARIATIONS.md). |
| `--with_variations <pattern>` | | `None` | Combine two or more variations. See [Variations](VARIATIONS.md) for now to use this. |
| `--save_intermediates <n>` | | `None` | Save the image from every nth step into an "intermediates" folder inside the output directory |
| `--h_symmetry_time_pct <float>` | | `None` | Create symmetry along the X axis at the desired percent complete of the generation process. (Must be between 0.0 and 1.0; set to a very small number like 0.0001 for just after the first step of generation.) |
| `--v_symmetry_time_pct <float>` | | `None` | Create symmetry along the Y axis at the desired percent complete of the generation process. (Must be between 0.0 and 1.0; set to a very small number like 0.0001 for just after the first step of generation.) |
# :material-library-shelves: Textual Inversions and LoRAs
With the advances in research, many new capabilities are available to customize the knowledge and understanding of novel concepts not originally contained in the base model.
## Using Textual Inversion Files
Textual inversion (TI) files are small models that customize the output of
Stable Diffusion image generation. They can augment SD with specialized subjects
and artistic styles. They are also known as "embeds" in the machine learning
world.
Each TI file introduces one or more vocabulary terms to the SD model. These are
known in InvokeAI as "triggers." Triggers are denoted using angle brackets
as in "<trigger-phrase>". The two most common type of
TI files that you'll encounter are `.pt` and `.bin` files, which are produced by
different TI training packages. InvokeAI supports both formats, but its
[built-in TI training system](TRAINING.md) produces `.pt`.
The [Hugging Face company](https://huggingface.co/sd-concepts-library) has
amassed a large ligrary of >800 community-contributed TI files covering a
broad range of subjects and styles. You can also install your own or others' TI files
by placing them in the designated directory for the compatible model type
### An Example
Here are a few examples to illustrate how it works. All these images were
generated using the command-line client and the Stable Diffusion 1.5 model:
| Japanese gardener | Japanese gardener <ghibli-face> | Japanese gardener <hoi4-leaders> | Japanese gardener <cartoona-animals> |
You can fix a broken `invokeai.yaml` by deleting it and running the
configuration script again -- option [7] in the launcher, "Re-run the
configuration script again -- option [6] in the launcher, "Re-run the
configure script".
#### Reading Environment Variables
@ -154,14 +154,16 @@ groups in `invokeia.yaml`:
### Web Server
| Setting | Default Value | Description |
|----------|----------------|--------------|
| `host` | `localhost` | Name or IP address of the network interface that the web server will listen on |
| `port` | `9090` | Network port number that the web server will listen on |
| `allow_origins` | `[]` | A list of host names or IP addresses that are allowed to connect to the InvokeAI API in the format `['host1','host2',...]` |
| `allow_credentials | `true` | Require credentials for a foreign host to access the InvokeAI API (don't change this) |
| `allow_methods` | `*` | List of HTTP methods ("GET", "POST") that the web server is allowed to use when accessing the API |
| `allow_headers` | `*` | List of HTTP headers that the web server will accept when accessing the API |
| `host` | `localhost` | Name or IP address of the network interface that the web server will listen on |
| `port` | `9090` | Network port number that the web server will listen on |
| `allow_origins` | `[]` | A list of host names or IP addresses that are allowed to connect to the InvokeAI API in the format `['host1','host2',...]` |
| `allow_credentials` | `true` | Require credentials for a foreign host to access the InvokeAI API (don't change this) |
| `allow_methods` | `*` | List of HTTP methods ("GET", "POST") that the web server is allowed to use when accessing the API |
| `allow_headers` | `*` | List of HTTP headers that the web server will accept when accessing the API |
| `ssl_certfile` | null | Path to an SSL certificate file, used to enable HTTPS. |
| `ssl_keyfile` | null | Path to an SSL keyfile, if the key is not included in the certificate file. |
The documentation for InvokeAI's API can be accessed by browsing to the following URL: [http://localhost:9090/docs].
Command-line users can launch the model installer using the command
`invokeai-model-install`.
_Be aware that some ControlNet models require additional code
functionality in order to work properly, so just installing a
@ -65,6 +46,17 @@ third-party ControlNet model may not have the desired effect._ Please
read and follow the documentation for installing a third party model
not currently included among InvokeAI's default list.
Currently InvokeAI **only** supports 🤗 Diffusers-format ControlNet models. These are
folders that contain the files `config.json` and/or
`diffusion_pytorch_model.safetensors` and
`diffusion_pytorch_model.fp16.safetensors`. The name of the folder is
the name of the model.
🤗 Diffusers-format ControlNet models are available at HuggingFace
(http://huggingface.co) and accessed via their repo IDs (identifiers
in the format "author/modelname").
#### ControlNet Models
The models currently supported include:
**Canny**:
@ -96,15 +88,19 @@ A model that generates normal maps from input images, allowing for more realisti
**Image Segmentation**:
A model that divides input images into segments or regions, each of which corresponds to a different object or part of the image. (More details coming soon)
**QR Code Monster**:
A model that helps generate creative QR codes that still scan. Can also be used to create images with text, logos or shapes within them.
**Openpose**:
The OpenPose control model allows for the identification of the general pose of a character by pre-processing an existing image with a clear human structure. With advanced options, Openpose can also detect the face or hands in the image.
*Note:* The DWPose Processor has replaced the OpenPose processor in Invoke. Workflows and generations that relied on the OpenPose Processor will need to be updated to use the DWPose Processor instead.
**Mediapipe Face**:
The MediaPipe Face identification processor is able to clearly identify facial features in order to capture vivid expressions of human faces.
**Tile (experimental)**:
**Tile**:
The Tile model fills out details in the image to match the image, rather than the prompt. The Tile Model is a versatile tool that offers a range of functionalities. Its primary capabilities can be boiled down to two main behaviors:
@ -117,12 +113,10 @@ The Tile Model can be a powerful tool in your arsenal for enhancing image qualit
With Pix2Pix, you can input an image into the controlnet, and then "instruct" the model to change it using your prompt. For example, you can say "Make it winter" to add more wintry elements to a scene.
**Inpaint**: Coming Soon - Currently this model is available but not functional on the Canvas. An upcoming release will provide additional capabilities for using this model when inpainting.
Each of these models can be adjusted and combined with other ControlNet models to achieve different results, giving you even more control over your image generation process.
## Using ControlNet
### Using ControlNet
To use ControlNet, you can simply select the desired model and adjust both the ControlNet and Pre-processor settings to achieve the desired result. You can also use multiple ControlNet models at the same time, allowing you to achieve even more complex effects or styles in your generated images.
@ -134,3 +128,54 @@ Weight - Strength of the Controlnet model applied to the generation for the sect
Start/End - 0 represents the start of the generation, 1 represents the end. The Start/end setting controls what steps during the generation process have the ControlNet applied.
Additionally, each ControlNet section can be expanded in order to manipulate settings for the image pre-processor that adjusts your uploaded image before using it in when you Invoke.
## T2I-Adapter
[T2I-Adapter](https://github.com/TencentARC/T2I-Adapter) is a tool similar to ControlNet that allows for control over the generation process by providing control information during the generation process. T2I-Adapter models tend to be smaller and more efficient than ControlNets.
##### Installation
To install T2I-Adapter Models:
1. The easiest way to install models is
to use the InvokeAI model installer application. Use the
`invoke.sh`/`invoke.bat` launcher to select item [5] and then navigate
to the T2I-Adapters section. Select the models you wish to install and
press "APPLY CHANGES". You may also enter additional HuggingFace
repo_ids in the "Additional models" textbox.
2. Using the "Add Model" function of the model manager, enter the HuggingFace Repo ID of the T2I-Adapter. The ID is in the format "author/repoName"
#### Usage
Each T2I Adapter has two settings that are applied.
Weight - Strength of the model applied to the generation for the section, defined by start/end.
Start/End - 0 represents the start of the generation, 1 represents the end. The Start/end setting controls what steps during the generation process have the ControlNet applied.
Additionally, each section can be expanded with the "Show Advanced" button in order to manipulate settings for the image pre-processor that adjusts your uploaded image before using it in during the generation process.
## IP-Adapter
[IP-Adapter](https://ip-adapter.github.io) is a tooling that allows for image prompt capabilities with text-to-image diffusion models. IP-Adapter works by analyzing the given image prompt to extract features, then passing those features to the UNet along with any other conditioning provided.
There are several ways to install IP-Adapter models with an existing InvokeAI installation:
1. Through the command line interface launched from the invoke.sh / invoke.bat scripts, option [4] to download models.
2. Through the Model Manager UI with models from the *Tools* section of [www.models.invoke.ai](https://www.models.invoke.ai). To do this, copy the repo ID from the desired model page, and paste it in the Add Model field of the model manager. **Note** Both the IP-Adapter and the Image Encoder must be installed for IP-Adapter to work. For example, the [SD 1.5 IP-Adapter](https://models.invoke.ai/InvokeAI/ip_adapter_plus_sd15) and [SD1.5 Image Encoder](https://models.invoke.ai/InvokeAI/ip_adapter_sd_image_encoder) must be installed to use IP-Adapter with SD1.5 based models.
3.**Advanced -- Not recommended ** Manually downloading the IP-Adapter and Image Encoder files - Image Encoder folders shouid be placed in the `models\any\clip_vision` folders. IP Adapter Model folders should be placed in the relevant `ip-adapter` folder of relevant base model folder of Invoke root directory. For example, for the SDXL IP-Adapter, files should be added to the `model/sdxl/ip_adapter/` folder.
#### Using IP-Adapter
IP-Adapter can be used by navigating to the *Control Adapters* options and enabling IP-Adapter.
IP-Adapter requires an image to be used as the Image Prompt. It can also be used in conjunction with text prompts, Image-to-Image, Inpainting, Outpainting, ControlNets and LoRAs.
Each IP-Adapter has two settings that are applied to the IP-Adapter:
* Weight - Strength of the IP-Adapter model applied to the generation for the section, defined by start/end
* Start/End - 0 represents the start of the generation, 1 represents the end. The Start/end setting controls what steps during the generation process have the IP-Adapter applied.
With the advances in research, many new capabilities are available to customize the knowledge and understanding of novel concepts not originally contained in the base model.
## LoRAs
Low-Rank Adaptation (LoRA) files are models that customize the output of Stable Diffusion
image generation. Larger than embeddings, but much smaller than full
models, they augment SD with improved understanding of subjects and
artistic styles.
Unlike TI files, LoRAs do not introduce novel vocabulary into the
model's known tokens. Instead, LoRAs augment the model's weights that
are applied to generate imagery. LoRAs may be supplied with a
"trigger" word that they have been explicitly trained on, or may
simply apply their effect without being triggered.
LoRAs are typically stored in .safetensors files, which are the most
secure way to store and transmit these types of weights. You may
install any number of `.safetensors` LoRA files simply by copying them
into the `autoimport/lora` directory of the corresponding InvokeAI models
directory (usually `invokeai` in your home directory).
To use these when generating, open the LoRA menu item in the options
panel, select the LoRAs you want to apply and ensure that they have
the appropriate weight recommended by the model provider. Typically,
most LoRAs perform best at a weight of .75-1.
## LCM-LoRAs
Latent Consistency Models (LCMs) allowed a reduced number of steps to be used to generate images with Stable Diffusion. These are created by distilling base models, creating models that only require a small number of steps to generate images. However, LCMs require that any fine-tune of a base model be distilled to be used as an LCM.
LCM-LoRAs are models that provide the benefit of LCMs but are able to be used as LoRAs and applied to any fine tune of a base model. LCM-LoRAs are created by training a small number of adapters, rather than distilling the entire fine-tuned base model. The resulting LoRA can be used the same way as a standard LoRA, but with a greatly reduced step count. This enables SDXL images to be generated up to 10x faster than without the use of LCM-LoRAs.
**Using LCM-LoRAs**
LCM-LoRAs are natively supported in InvokeAI throughout the application. To get started, install any diffusers format LCM-LoRAs using the model manager and select it in the LoRA field.
There are a number parameter differences when using LCM-LoRAs and standard generation:
- When using LCM-LoRAs, the LoRA strength should be lower than if using a standard LoRA, with 0.35 recommended as a starting point.
- The LCM scheduler should be used for generation
- CFG-Scale should be reduced to ~1
- Steps should be reduced in the range of 4-8
Standard LoRAs can also be used alongside LCM-LoRAs, but will also require a lower strength, with 0.45 being recommended as a starting point.
More information can be found here: https://huggingface.co/blog/lcm_lora#fast-inference-with-sdxl-lcm-loras
As of version 2.3, InvokeAI comes with a script that allows you to
merge two or three diffusers-type models into a new merged model. The
InvokeAI provides the ability to merge two or three diffusers-type models into a new merged model. The
resulting model will combine characteristics of the original, and can
be used to teach an old model new tricks.
## How to Merge Models
Model Merging can be be done by navigating to the Model Manager and clicking the "Merge Models" tab. From there, you can select the models and settings you want to use to merge th models.
## Settings
* Model Selection: there are three multiple choice fields that
display all the diffusers-style models that InvokeAI knows about.
If you do not see the model you are looking for, then it is probably
a legacy checkpoint model and needs to be converted using the
"Convert" option in the Web-based Model Manager tab.
You must select at least two models to merge. The third can be left
at "None" if you desire.
* Alpha: This is the ratio to use when combining models. It ranges
from 0 to 1. The higher the value, the more weight is given to the
2d and (optionally) 3d models. So if you have two models named "A"
and "B", an alpha value of 0.25 will give you a merged model that is
25% A and 75% B.
* Interpolation Method: This is the method used to combine
weights. The options are "weighted_sum" (the default), "sigmoid",
"inv_sigmoid" and "add_difference". Each produces slightly different
results. When three models are in use, only "add_difference" is
available.
* Save Location: The location you want the merged model to be saved in. Default is in the InvokeAI root folder
* Name for merged model: This is the name for the new model. Please
use InvokeAI conventions - only alphanumeric letters and the
characters ".+-".
* Ignore Mismatches / Force: Not all models are compatible with each other. The merge
script will check for compatibility and refuse to merge ones that
are incompatible. Set this checkbox to try merging anyway.
You may run the merge script by starting the invoke launcher
(`invoke.sh` or `invoke.bat`) and choosing the option for _merge
(`invoke.sh` or `invoke.bat`) and choosing the option (4) for _merge
models_. This will launch a text-based interactive user interface that
prompts you to select the models to merge, how to merge them, and the
merged model name.
@ -40,34 +74,4 @@ this to get back.
If the merge runs successfully, it will create a new diffusers model
under the selected name and register it with InvokeAI.
## The Settings
* Model Selection -- there are three multiple choice fields that
display all the diffusers-style models that InvokeAI knows about.
If you do not see the model you are looking for, then it is probably
a legacy checkpoint model and needs to be converted using the
`invoke` command-line client and its `!optimize` command. You
must select at least two models to merge. The third can be left at
"None" if you desire.
* Alpha -- This is the ratio to use when combining models. It ranges
from 0 to 1. The higher the value, the more weight is given to the
2d and (optionally) 3d models. So if you have two models named "A"
and "B", an alpha value of 0.25 will give you a merged model that is
25% A and 75% B.
* Interpolation Method -- This is the method used to combine
weights. The options are "weighted_sum" (the default), "sigmoid",
"inv_sigmoid" and "add_difference". Each produces slightly different
results. When three models are in use, only "add_difference" is
available. (TODO: cite a reference that describes what these
interpolation methods actually do and how to decide among them).
* Force -- Not all models are compatible with each other. The merge
script will check for compatibility and refuse to merge ones that
are incompatible. Set this checkbox to try merging anyway.
* Name for merged model - This is the name for the new model. Please
use InvokeAI conventions - only alphanumeric letters and the
@ -120,7 +120,7 @@ Generate an image with a given prompt, record the seed of the image, and then
use the `prompt2prompt` syntax to substitute words in the original prompt for
words in a new prompt. This works for `img2img` as well.
For example, consider the prompt `a cat.swap(dog) playing with a ball in the forest`. Normally, because of the word words interact with each other when doing a stable diffusion image generation, these two prompts would generate different compositions:
For example, consider the prompt `a cat.swap(dog) playing with a ball in the forest`. Normally, because the words interact with each other when doing a stable diffusion image generation, these two prompts would generate different compositions:
-`a cat playing with a ball in the forest`
-`a dog playing with a ball in the forest`
@ -142,7 +142,7 @@ Prompt2prompt `.swap()` is not compatible with xformers, which will be temporari
If the model you are using has parentheses () or speech marks "" as part of its
syntax, you will need to "escape" these using a backslash, so that`(my_keyword)`
@ -246,7 +246,7 @@ To create a Dynamic Prompt, follow these steps:
Within the braces, separate each option using a vertical bar |.
If you want to include multiple options from a single group, prefix with the desired number and $$.
For instance: A {house|apartment|lodge|cottage} in {summer|winter|autumn|spring} designed in {2$$style1|style2|style3}.
For instance: A {house|apartment|lodge|cottage} in {summer|winter|autumn|spring} designed in {style1|style2|style3}.
### How Dynamic Prompts Work
Once a Dynamic Prompt is configured, the system generates an array of combinations using the options provided. Each group of options in curly braces is treated independently, with the system selecting one option from each group. For a prefixed set (e.g., 2$$), the system will select two distinct options.
@ -273,3 +273,36 @@ Below are some useful strategies for creating Dynamic Prompts:
Experiment with different quantities for the prefix. For example, 3$$ will select three distinct options.
Be aware of coherence in your prompts. Although the system can generate all possible combinations, not all may semantically make sense. Therefore, carefully choose the options for each group.
Always review and fine-tune the generated prompts as needed. While Dynamic Prompts can help you generate a multitude of combinations, the final polishing and refining remain in your hands.
## SDXL Prompting
Prompting with SDXL is slightly different than prompting with SD1.5 or SD2.1 models - SDXL expects a prompt _and_ a style.
### Prompting
<figuremarkdown>

</figure>
In the prompt box, enter a positive or negative prompt as you normally would.
For the style box you can enter a style that you want the image to be generated in. You can use styles from this example list, or any other style you wish: anime, photographic, digital art, comic book, fantasy art, analog film, neon punk, isometric, low poly, origami, line art, cinematic, 3d model, pixel art, etc.
### Concatenated Prompts
InvokeAI also has the option to concatenate the prompt and style inputs, by pressing the "link" button in the Positive Prompt box.
This concatenates the prompt & style inputs, and passes the joined prompt and style to the SDXL model.

@ -229,29 +229,28 @@ clarity on the intent and common use cases we expect for utilizing them.
currently being rendered by your browser into a merged copy of the image. This
lowers the resource requirements and should improve performance.
### Seam Correction
### Compositing / Seam Correction
When doing Inpainting or Outpainting, Invoke needs to merge the pixels generated
by Stable Diffusion into your existing image. To do this, the area around the
`seam` at the boundary between your image and the new generation is
by Stable Diffusion into your existing image. This is achieved through compositing - the area around the the boundary between your image and the new generation is
automatically blended to produce a seamless output. In a fully automatic
process, a mask is generated to cover the seam, and then the area of the seam is
process, a mask is generated to cover the boundary, and then the area of the boundary is
Inpainted.
Although the default options should work well most of the time, sometimes it can
help to alter the parameters that control the seam Inpainting. A wider seam and
a blur setting of about 1/3 of the seam have been noted as producing
consistently strong results (e.g. 96 wide and 16 blur - adds up to 32 blur with
both sides). Seam strength of 0.7 is best for reducing hard seams.
help to alter the parameters that control the Compositing. A larger blur and
a blur setting have been noted as producing
consistently strong results . Strength of 0.7 is best for reducing hard seams.
- **Mode** - What part of the image will have the the Compositing applied to it.
- **Mask edge** will apply Compositing to the edge of the masked area
- **Mask** will apply Compositing to the entire masked area
- **Unmasked** will apply Compositing to the entire image
- **Steps** - Number of generation steps that will occur during the Coherence Pass, similar to Denoising Steps. Higher step counts will generally have better results.
- **Strength** - How much noise is added for the Coherence Pass, similar to Denoising Strength. A strength of 0 will result in an unchanged image, while a strength of 1 will result in an image with a completely new area as defined by the Mode setting.
- **Blur** - Adjusts the pixel radius of the the mask. A larger blur radius will cause the mask to extend past the visibly masked area, while too small of a blur radius will result in a mask that is smaller than the visibly masked area.
- **Blur Method** - The method of blur applied to the masked area.
- **Seam Size** - The size of the seam masked area. Set higher to make a larger
mask around the seam.
- **Seam Blur** - The size of the blur that is applied on _each_ side of the
masked area.
- **Seam Strength** - The Image To Image Strength parameter used for the
Inpainting generation that is applied to the seam area.
- **Seam Steps** - The number of generation steps that should be used to Inpaint
**Where do I get started? How can I install Invoke?**
- You can download the latest installers [here](https://github.com/invoke-ai/InvokeAI/releases) - Note that any releases marked as *pre-release* are in a beta state. You may experience some issues, but we appreciate your help testing those! For stable/reliable installations, please install the **[Latest Release](https://github.com/invoke-ai/InvokeAI/releases/latest)**
**How can I download models? Can I use models I already have downloaded?**
- Models can be downloaded through the model manager, or through option [4] in the invoke.bat/invoke.sh launcher script. To download a model through the Model Manager, use the HuggingFace Repo ID by pressing the “Copy” button next to the repository name. Alternatively, to download a model from CivitAi, use the download link in the Model Manager.
- Models that are already downloaded can be used by creating a symlink to the model location in the `autoimport` folder or by using the Model Manger’s “Scan for Models” function.
**My images are taking a long time to generate. How can I speed up generation?**
- A common solution is to reduce the size of your RAM & VRAM cache to 0.25. This ensures your system has enough memory to generate images.
- Additionally, check the [hardware requirements](https://invoke-ai.github.io/InvokeAI/#hardware-requirements) to ensure that your system is capable of generating images.
- Lastly, double check your generations are happening on your GPU (if you have one). InvokeAI will log what is being used for generation upon startup.
**I’ve installed Python on Windows but the installer says it can’t find it?**
- Then ensure that you checked **'Add python.exe to PATH'** when installing Python. This can be found at the bottom of the Python Installer window. If you already have Python installed, this can be done with the modify / repair feature of the installer.
**I’ve installed everything successfully but I still get an error about Triton when starting Invoke?**
- This can be safely ignored. InvokeAI doesn't use Triton, but if you are on Linux and wish to dismiss the error, you can install Triton.
**I updated to 3.4.0 and now xFormers can’t load C++/CUDA?**
- An issue occurred with your PyTorch update. Follow these steps to fix :
1. Launch your invoke.bat / invoke.sh and select the option to open the developer console
- If you run into an error with `typing_extensions`, re-open the developer console and run: `pip install -U typing-extensions`
**It says my pip is out of date - is that why my install isn't working?**
- An out of date won't cause an installation to fail. The cause of the error can likely be found above the message that says pip is out of date.
- If you saw that warning but the install went well, don't worry about it (but you can update pip afterwards if you'd like).
**How can I generate the exact same that I found on the internet?**
Most example images with prompts that you'll find on the internet have been generated using different software, so you can't expect to get identical results. In order to reproduce an image, you need to replicate the exact settings and processing steps, including (but not limited to) the model, the positive and negative prompts, the seed, the sampler, the exact image size, any upscaling steps, etc.
**Where can I get more help?**
- Create an issue on [GitHub](https://github.com/invoke-ai/InvokeAI/issues) or post in the [#help channel](https://discord.com/channels/1020123559063990373/1149510134058471514) of the InvokeAI Discord
@ -57,7 +57,9 @@ Prompts provide the models directions on what to generate. As a general rule of
Models are the magic that power InvokeAI. These files represent the output of training a machine on understanding massive amounts of images - providing them with the capability to generate new images using just a text description of what you’d like to see. (Like Stable Diffusion!)
Invoke offers a simple way to download several different models upon installation, but many more can be discovered online, including at ****. Each model can produce a unique style of output, based on the images it was trained on - Try out different models to see which best fits your creative vision!
Invoke offers a simple way to download several different models upon installation, but many more can be discovered online, including at https://models.invoke.ai
Each model can produce a unique style of output, based on the images it was trained on - Try out different models to see which best fits your creative vision!
- *Models that contain “inpainting” in the name are designed for use with the inpainting feature of the Unified Canvas*
This project is rapidly evolving. Please use the [Issues tab](https://github.com/invoke-ai/InvokeAI/issues) to report bugs and make feature requests. Be sure to use the provided templates as it will help aid response time.
@ -230,13 +230,13 @@ manager, please follow these steps:
=== "local Webserver"
```bash
invokeai --web
invokeai-web
```
=== "Public Webserver"
```bash
invokeai --web --host 0.0.0.0
invokeai-web --host 0.0.0.0
```
=== "CLI"
@ -256,6 +256,10 @@ manager, please follow these steps:
*highly recommended** if your virtual environment is located outside of
your runtime directory.
!!! tip
On linux, it is recommended to run invokeai with the following env var: `MALLOC_MMAP_THRESHOLD_=1048576`. For example: `MALLOC_MMAP_THRESHOLD_=1048576 invokeai --web`. This helps to prevent memory fragmentation that can lead to memory accumulation over time. This env var is set automatically when running via `invoke.sh`.
10. Render away!
Browse the [features](../features/index.md) section to learn about all the
@ -287,7 +291,20 @@ manager, please follow these steps:
Leave off the `--gui` option to run the script using command-line arguments. Pass the `--help` argument
to get usage instructions.
### Developer Install
## Developer Install
!!! warning
InvokeAI uses a SQLite database. By running on `main`, you accept responsibility for your database. This
means making regular backups (especially before pulling) and/or fixing it yourself in the event that a
PR introduces a schema change.
If you don't need persistent backend storage, you can use an ephemeral in-memory database by setting
`use_memory_db: true` under `Path:` in your `invokeai.yaml` file.
If this is untenable, you should run the application via the official installer or a manual install of the
python package from pypi. These releases will not break your database.
If you have an interest in how InvokeAI works, or you would like to
add features or bugfixes, you are encouraged to install the source
@ -296,28 +313,39 @@ code for InvokeAI. For this to work, you will need to install the
on your system, please see the [Git Installation
Guide](https://github.com/git-guides/install-git)
1. From the command line, run this command:
You will also need to install the [frontend development toolchain](https://github.com/invoke-ai/InvokeAI/blob/main/invokeai/frontend/web/README.md).
If you have a "normal" installation, you should create a totally separate virtual environment for the git-based installation, else the two may interfere.
> **Why do I need the frontend toolchain**?
>
> The InvokeAI project uses trunk-based development. That means our `main` branch is the development branch, and releases are tags on that branch. Because development is very active, we don't keep an updated build of the UI in `main` - we only build it for production releases.
>
> That means that between releases, to have a functioning application when running directly from the repo, you will need to run the UI in dev mode or build it regularly (any time the UI code changes).
1. Create a fork of the InvokeAI repository through the GitHub UI or [this link](https://github.com/invoke-ai/InvokeAI/fork)
Be sure to pass `-e` (for an editable install) and don't forget the
dot ("."). It is part of the command.
You can now run `invokeai` and its related commands. The code will be
5. Install the [frontend toolchain](https://github.com/invoke-ai/InvokeAI/blob/main/invokeai/frontend/web/README.md) and do a production build of the UI as described.
6. You can now run `invokeai` and its related commands. The code will be
read from the repository, so that you can edit the .py source files
and watch the code's behavior change.
4. If you wish to contribute to the InvokeAI project, you are
When you pull in new changes to the repo, be sure to re-build the UI.
7. If you wish to contribute to the InvokeAI project, you are
encouraged to establish a GitHub account and "fork"
https://github.com/invoke-ai/InvokeAI into your own copy of the
repository. You can then use GitHub functions to create and submit
@ -356,7 +388,7 @@ you can do so using this unsupported recipe:
### cuDNN Installation for 40/30 Series Optimization* (Optional)
1. Find the InvokeAI folder
2. Click on .venv folder - e.g., YourInvokeFolderHere\\.venv
3. Click on Lib folder - e.g., YourInvokeFolderHere\\.venv\Lib
4. Click on site-packages folder - e.g., YourInvokeFolderHere\\.venv\Lib\site-packages
5. Click on Torch directory - e.g., YourInvokeFolderHere\InvokeAI\\.venv\Lib\site-packages\torch
6. Click on the lib folder - e.g., YourInvokeFolderHere\\.venv\Lib\site-packages\torch\lib
7. Copy everything inside the folder and save it elsewhere as a backup.
8. Go to __https://developer.nvidia.com/cudnn__
9. Login or create an Account.
10. Choose the newer version of cuDNN. **Note:**
There are two versions, 11.x or 12.x for the differents architectures(Turing,Maxwell Etc...) of GPUs.
You can find which version you should download from [this link](https://docs.nvidia.com/deeplearning/cudnn/support-matrix/index.html).
13. Download the latest version and extract it from the download location
14. Find the bin folder E\cudnn-windows-x86_64-__Whatever Version__\bin
15. Copy and paste the .dll files into YourInvokeFolderHere\\.venv\Lib\site-packages\torch\lib **Make sure to copy, and not move the files**
16. If prompted, replace any existing files
**Notes:**
* If no change is seen or any issues are encountered, follow the same steps as above and paste the torch/lib backup folder you made earlier and replace it. If you didn't make a backup, you can also uninstall and reinstall torch through the command line to repair this folder.
* This optimization is intended for the newer version of graphics card (40/30 series) but results have been seen with older graphics card.
### Torch Installation
When installing torch and torchvision manually with `pip`, remember to provide
the argument `--extra-index-url
https://download.pytorch.org/whl/cu118` as described in the [Manual
https://download.pytorch.org/whl/cu121` as described in the [Manual
Installation Guide](020_INSTALL_MANUAL.md).
## :simple-amd: ROCm
@ -110,7 +134,7 @@ recipes are available
When installing torch and torchvision manually with `pip`, remember to provide
the argument `--extra-index-url
https://download.pytorch.org/whl/rocm5.4.2` as described in the [Manual
https://download.pytorch.org/whl/rocm5.6` as described in the [Manual
Installation Guide](020_INSTALL_MANUAL.md).
This will be done automatically for you if you use the installer
We highly recommend to Install InvokeAI locally using [these instructions](INSTALLATION.md)
We highly recommend to Install InvokeAI locally using [these instructions](INSTALLATION.md),
because Docker containers can not access the GPU on macOS.
!!! tip "For developers"
!!! warning "AMD GPU Users"
For container-related development tasks or for enabling easy
deployment to other environments (on-premises or cloud), follow these
instructions.
Container support for AMD GPUs has been reported to work by the community, but has not received
extensive testing. Please make sure to set the `GPU_DRIVER=rocm` environment variable (see below), and
use the `build.sh` script to build the image for this to take effect at build time.
For general use, install locally to leverage your machine's GPU.
!!! tip "Linux and Windows Users"
For optimal performance, configure your Docker daemon to access your machine's GPU.
Docker Desktop on Windows [includes GPU support](https://www.docker.com/blog/wsl-2-gpu-support-for-docker-desktop-on-nvidia-gpus/).
Linux users should install and configure the [NVIDIA Container Toolkit](https://docs.nvidia.com/datacenter/cloud-native/container-toolkit/latest/install-guide.html)
## Why containers?
They provide a flexible, reliable way to build and deploy InvokeAI. You'll also
use a Docker volume to store the largest model files and image outputs as a
first step in decoupling storage and compute. Future enhancements can do this
for other assets. See [Processes](https://12factor.net/processes) under the
Twelve-Factor App methodology for details on why running applications in such a
stateless fashion is important.
They provide a flexible, reliable way to build and deploy InvokeAI.
See [Processes](https://12factor.net/processes) under the Twelve-Factor App
methodology for details on why running applications in such a stateless fashion is important.
You can specify the target platform when building the image and running the
container. You'll also need to specify the InvokeAI requirements file that
matches the container's OS and the architecture it will run on.
The container is configured for CUDA by default, but can be built to support AMD GPUs
by setting the `GPU_DRIVER=rocm` environment variable at Docker image build time.
Developers on Apple silicon (M1/M2): You
Developers on Apple silicon (M1/M2/M3): You
[can't access your GPU cores from Docker containers](https://github.com/pytorch/pytorch/issues/81224)
and performance is reduced compared with running it directly on macOS but for
development purposes it's fine. Once you're done with development tasks on your
laptop you can build for the target platform and architecture and deploy to
another environment with NVIDIA GPUs on-premises or in the cloud.
## TL;DR
This assumes properly configured Docker on Linux or Windows/WSL2. Read on for detailed customization options.
```bash
# docker compose commands should be run from the `docker` directory
cd docker
docker compose up
```
## Installation in a Linux container (desktop)
### Prerequisites
@ -58,222 +69,44 @@ a token and copy it, since you will need in for the next step.
### Setup
Set the fork you want to use and other variables.
Set up your environmnent variables. In the `docker` directory, make a copy of `.env.sample` and name it `.env`. Make changes as necessary.
!!! tip
Any environment variables supported by InvokeAI can be set here - please see the [CONFIGURATION](../features/CONFIGURATION.md) for further detail.
I preffer to save my env vars
in the repository root in a `.env` (or `.envrc`) file to automatically re-apply
them when I come back.
The build- and run- scripts contain default values for almost everything,
besides the [Hugging Face Token](https://huggingface.co/settings/tokens) you
created in the last step.
Some Suggestions of variables you may want to change besides the Token:
At a minimum, you might want to set the `INVOKEAI_ROOT` environment variable
to point to the location where you wish to store your InvokeAI models, configuration, and outputs.
| `HUGGING_FACE_HUB_TOKEN` | No default, but **required**! | This is the only **required** variable, without it you can't download the huggingface models |
| `REPOSITORY_NAME` | The Basename of the Repo folder | This name will used as the container repository/image name |
| `VOLUMENAME` | `${REPOSITORY_NAME,,}_data` | Name of the Docker Volume where model files will be stored |
| `ARCH` | arch of the build machine | Can be changed if you want to build the image for another arch |
| `CONTAINER_REGISTRY` | ghcr.io | Name of the Container Registry to use for the full tag |
| `CONTAINER_REPOSITORY` | `$(whoami)/${REPOSITORY_NAME}` | Name of the Container Repository |
| `CONTAINER_FLAVOR` | `cuda` | The flavor of the image to built, available options are `cuda`, `rocm` and `cpu`. If you choose `rocm` or `cpu`, the extra-index-url will be selected automatically, unless you set one yourself. |
| `CONTAINER_TAG` | `${INVOKEAI_BRANCH##*/}-${CONTAINER_FLAVOR}` | The Container Repository / Tag which will be used |
| `INVOKE_DOCKERFILE` | `Dockerfile` | The Dockerfile which should be built, handy for development |
| `PIP_EXTRA_INDEX_URL` | | If you want to use a custom pip-extra-index-url |
| `INVOKEAI_ROOT` | `~/invokeai` | **Required** - the location of your InvokeAI root directory. It will be created if it does not exist.
| `HUGGING_FACE_HUB_TOKEN` | | InvokeAI will work without it, but some of the integrations with HuggingFace (like downloading from models from private repositories) may not work|
| `GPU_DRIVER` | `cuda` | Optionally change this to `rocm` to build the image for AMD GPUs. NOTE: Use the `build.sh` script to build the image for this to take effect.
</figure>
#### Build the Image
I provided a build script, which is located next to the Dockerfile in
`docker/build.sh`. It can be executed from repository root like this:
Use the standard `docker compose build` command from within the `docker` directory.
```bash
./docker/build.sh
```
The build Script not only builds the container, but also creates the docker
volume if not existing yet.
If using an AMD GPU:
a: set the `GPU_DRIVER=rocm` environment variable in `docker-compose.yml` and continue using `docker compose build` as usual, or
b: set `GPU_DRIVER=rocm` in the `.env` file and use the `build.sh` script, provided for convenience
#### Run the Container
After the build process is done, you can run the container via the provided
`docker/run.sh` script
Use the standard `docker compose up` command, and generally the `docker compose` [CLI](https://docs.docker.com/compose/reference/) as usual.
```bash
./docker/run.sh
```
Once the container starts up (and configures the InvokeAI root directory if this is a new installation), you can access InvokeAI at [http://localhost:9090](http://localhost:9090)
When used without arguments, the container will start the webserver and provide
you the link to open it. But if you want to use some other parameters you can
also do so.
## Troubleshooting / FAQ
!!! example "run script example"
```bash
./docker/run.sh "banana sushi" -Ak_lms -S42 -s10
```
This would generate the legendary "banana sushi" with Seed 42, k_lms Sampler and 10 steps.
Find out more about available CLI-Parameters at [features/CLI.md](../../features/CLI/#arguments)
---
## Running the container on your GPU
If you have an Nvidia GPU, you can enable InvokeAI to run on the GPU by running
the container with an extra environment variable to enable GPU usage and have
the process run much faster:
```bash
GPU_FLAGS=all ./docker/run.sh
```
This passes the `--gpus all` to docker and uses the GPU.
If you don't have a GPU (or your host is not yet setup to use it) you will see a
message like this:
`docker: Error response from daemon: could not select device driver "" with capabilities: [[gpu]].`
You can use the full set of GPU combinations documented here:
You can also do text-guided image-to-image translation. For example, turning a
sketch into a detailed drawing.
`strength` is a value between 0.0 and 1.0 that controls the amount of noise that
is added to the input image. Values that approach 1.0 allow for lots of
variations but will also produce images that are not semantically consistent
with the input. 0.0 preserves image exactly, 1.0 replaces it completely.
Make sure your input image size dimensions are multiples of 64 e.g. 512x512.
Otherwise you'll get `Error: product of dimension sizes > 2**31'`. If you still
get the error
[try a different size](https://support.apple.com/guide/preview/resize-rotate-or-flip-an-image-prvw2015/mac#:~:text=image's%20file%20size-,In%20the%20Preview%20app%20on%20your%20Mac%2C%20open%20the%20file,is%20shown%20at%20the%20bottom.)
like 512x256.
If you're on a Docker container, copy your input image into the Docker volume
- Q: I am running on Windows under WSL2, and am seeing a "no such file or directory" error.
- A: Your `docker-entrypoint.sh` file likely has Windows (CRLF) as opposed to Unix (LF) line endings,
and you may have cloned this repository before the issue was fixed. To solve this, please change
the line endings in the `docker-entrypoint.sh` file to `LF`. You can do this in VSCode
(`Ctrl+P` and search for "line endings"), or by using the `dos2unix` utility in WSL.
Finally, you may delete `docker-entrypoint.sh` followed by `git pull; git checkout docker/docker-entrypoint.sh`
to reset the file to its most recent version.
For more information on this issue, please see the [Docker Desktop documentation](https://docs.docker.com/desktop/troubleshoot/topics/#avoid-unexpected-syntax-errors-use-unix-style-line-endings-for-files-in-containers)
✅ This is the recommended installation method for first-time users.
This is a script that will install all of InvokeAI's essential
third party libraries and InvokeAI itself.
🖥️ **Download the latest installer .zip file here** : https://github.com/invoke-ai/InvokeAI/releases/latest
- *Look for the file labelled "InvokeAI-installer-v3.X.X.zip" at the bottom of the page*
- If you experience issues, read through the full [installation instructions](010_INSTALL_AUTOMATED.md) to make sure you have met all of the installation requirements. If you need more help, join the [Discord](discord.gg/invoke-ai) or create an issue on [Github](https://github.com/invoke-ai/InvokeAI).
This method is recommended for those familiar with running Docker containers.
We offer a method for creating Docker containers containing InvokeAI and its dependencies. This method is recommended for individuals with experience with Docker containers and understand the pluses and minuses of a container-based install.
## Other Installation Guides
- [PyPatchMatch](060_INSTALL_PATCHMATCH.md)
- [XFormers](070_INSTALL_XFORMERS.md)
- [CUDA and ROCm Drivers](030_INSTALL_CUDA_AND_ROCM.md)
The nodes editor is a blank canvas allowing for the use of individual functions and image transformations to control the image generation workflow. Nodes take in inputs on the left side of the node, and return an output on the right side of the node. A node graph is composed of multiple nodes that are connected together to create a workflow. Nodes' inputs and outputs are connected by dragging connectors from node to node. Inputs and outputs are color coded for ease of use.
The workflow editor is a blank canvas allowing for the use of individual functions and image transformations to control the image generation workflow. Nodes take in inputs on the left side of the node, and return an output on the right side of the node. A node graph is composed of multiple nodes that are connected together to create a workflow. Nodes' inputs and outputs are connected by dragging connectors from node to node. Inputs and outputs are color coded for ease of use.
To better understand how nodes are used, think of how an electric power bar works. It takes in one input (electricity from a wall outlet) and passes it to multiple devices through multiple outputs. Similarly, a node could have multiple inputs and outputs functioning at the same (or different) time, but all node outputs pass information onward like a power bar passes electricity. Not all outputs are compatible with all inputs, however - Each node has different constraints on how it is expecting to input/output information. In general, node outputs are colour-coded to match compatible inputs of other nodes.
If you're not familiar with Diffusion, take a look at our [Diffusion Overview.](../help/diffusion.md) Understanding how diffusion works will enable you to more easily use the Workflow Editor and build workflows to suit your needs.
## Features
### Workflow Library
The Workflow Library enables you to save workflows to the Invoke database, allowing you to easily creating, modify and share workflows as needed.
A curated set of workflows are provided by default - these are designed to help explain important nodes' usage in the Workflow Editor.
The Workflow Editor allows you to create a UI for your workflow, to make it easier to iterate on your generations.
To add an input to the Linear UI, right click on the **input label** and select "Add to Linear View".
The Linear UI View will also be part of the saved workflow, allowing you share workflows and enable other to use them, regardless of complexity.

### Renaming Fields and Nodes
Any node or input field can be renamed in the workflow editor. If the input field you have renamed has been added to the Linear View, the changed name will be reflected in the Linear View and the node.
### Managing Nodes
* Ctrl+C to copy a node
* Ctrl+V to paste a node
* Backspace/Delete to delete a node
* Shift+Click to drag and select multiple nodes
### Node Caching
Nodes have a "Use Cache" option in their footer. This allows for performance improvements by using the previously cached values during the workflow processing.
If you're not familiar with Diffusion, take a look at our [Diffusion Overview.](../help/diffusion.md) Understanding how diffusion works will enable you to more easily use the Nodes Editor and build workflows to suit your needs.
## Important Concepts
## Important Nodes & Concepts
There are several node grouping concepts that can be examined with a narrow focus. These (and other) groupings can be pieced together to make up functional graph setups, and are important to understanding how groups of nodes work together as part of a whole. Note that the screenshots below aren't examples of complete functioning node graphs (see Examples).
@ -33,11 +63,11 @@ The ImageToLatents node takes in a pixel image and a VAE and outputs a latents.
It is common to want to use both the same seed (for continuity) and random seeds (for variety). To define a seed, simply enter it into the 'Seed' field on a noise node. Conversely, the RandomInt node generates a random integer between 'Low' and 'High', and can be used as input to the 'Seed' edge point on a noise node to randomize your seed.
The ControlNet node outputs a Control, which can be provided as input to non-image *ToLatents nodes. Depending on the type of ControlNet desired, ControlNet nodes usually require an image processor node, such as a Canny Processor or Depth Processor, which prepares an input image for use with ControlNet.
The ControlNet node outputs a Control, which can be provided as input to a Denoise Latents node. Depending on the type of ControlNet desired, ControlNet nodes usually require an image processor node, such as a Canny Processor or Depth Processor, which prepares an input image for use with ControlNet.
### Batch / Multiple Image Generation + Random Seeds
Multiple image generation in the node editor is done using the RandomRange node. In this case, the 'Size' field represents the number of images to generate. As RandomRange produces a collection of integers, we need to add the Iterate node to iterate through the collection.
To control seeds across generations takes some care. The first row in the screenshot will generate multiple images with different seeds, but using the same RandomRange parameters across invocations will result in the same group of random seeds being used across the images, producing repeatable results. In the second row, adding the RandomInt node as input to RandomRange's 'Seed' edge point will ensure that seeds are varied across all images across invocations, producing varied results.
Batch or multiple image generation in the workflow editor is done using the RandomRange node. In this case, the 'Size' field represents the number of images to generate, meaning this example will generate 4 images. As RandomRange produces a collection of integers, we need to add the Iterate node to iterate through the collection. This noise can then be fed to the Denoise Latents node for it to iterate through the denoising process with the different seeds provided.
@ -4,30 +4,141 @@ These are nodes that have been developed by the community, for the community. If
If you'd like to submit a node for the community, please refer to the [node creation overview](contributingNodes.md).
To download a node, simply download the `.py` node file from the link and add it to the `invokeai/app/invocations` folder in your InvokeAI install location. Along with the node, an example node graph should be provided to help you get started with the node.
To use a node, add the node to the `nodes` folder found in your InvokeAI install location.
To use a community node graph, download the the `.json`node graph file and load it into Invoke AI via the **Load Nodes** button on the Node Editor.
The suggested method is to use `git clone`to clone the repository the node is found in. This allows for easy updates of the node in the future.
## Community Nodes
If you'd prefer, you can also just download the whole node folder from the linked repository and add it to the `nodes` folder.
### FaceTools
To use a community workflow, download the the `.json` node graph file and load it into Invoke AI via the **Load Workflow** button in the Workflow Editor.
**Description:** FaceTools is a collection of nodes created to manipulate faces as you would in Unified Canvas. It includes FaceMask, FaceOff, and FacePlace. FaceMask autodetects a face in the image using MediaPipe and creates a mask from it. FaceOff similarly detects a face, then takes the face off of the image by adding a square bounding box around it and cropping/scaling it. FacePlace puts the bounded face image from FaceOff back onto the original image. Using these nodes with other inpainting node(s), you can put new faces on existing things, put new things around existing faces, and work closer with a face as a bounded image. Additionally, you can supply X and Y offset values to scale/change the shape of the mask for finer control on FaceMask and FaceOff. See GitHub repository below for usage examples.
- Community Nodes
+ [Adapters-Linked](#adapters-linked-nodes)
+ [Autostereogram](#autostereogram-nodes)
+ [Average Images](#average-images)
+ [Clean Image Artifacts After Cut](#clean-image-artifacts-after-cut)
**Description:**This node calculates an ideal image size for a first pass of a multi-pass upscaling. The aim is to avoid duplication that results from choosing a size larger than the model is capable of.
**Description:**A set of nodes for linked adapters (ControlNet, IP-Adaptor & T2I-Adapter). This allows multiple adapters to be chained together without using a `collect` node which means it can be used inside an `iterate` node without any collecting on every iteration issues.
**Description:** Generate autostereogram images from a depth map. This is not a very practically useful node but more a 90s nostalgic indulgence as I used to love these images as a kid.
**Description:** Render depth maps from Wavefront .obj files (triangulated) using this simple 3D renderer utilizing numpy and matplotlib to compute and color the scene. There are simple parameters to change the FOV, camera position, and model orientation.
To be imported, an .obj must use triangulated meshes, so make sure to enable that option if exporting from a 3D modeling program. This renderer makes each triangle a solid color based on its average depth, so it will cause anomalies if your .obj has large triangles. In Blender, the Remesh modifier can be helpful to subdivide a mesh into small pieces that work well given these limitations.
**Description:** This InvokeAI node takes in a collection of images and randomly chooses one. This can be useful when you have a number of poses to choose from for a ControlNet node, or a number of input images for another purpose.
**Description:** This set of 3 nodes generates prompts from simple user-defined grammar rules (loaded from custom files - examples provided below). The prompts are made by recursively expanding a special template string, replacing nonterminal "parts-of-speech" until no nonterminal terms remain in the string.
**Description:** Retroize is a collection of nodes for InvokeAI to "Retroize" images. Any image can be given a fresh coat of retro paint with these nodes, either from your gallery or from within the graph itself. It includes nodes to pixelize, quantize, palettize, and ditherize images; as well as to retrieve palettes from existing images.
**Description**: Halftone converts the source image to grayscale and then performs halftoning. CMYK Halftone converts the image to CMYK and applies a per-channel halftoning to make the source image look like a magazine or newspaper. For both nodes, you can specify angles and halftone dot spacing.
**Description**: Hand Refiner takes in your image and automatically generates a fixed depth map for the hands along with a mask of the hands region that will conveniently allow you to use them along with ControlNet to fix the wonky hands generated by Stable Diffusion
**Description:** This is a pack of nodes for composing masks and images, including a simple text mask creator and both image and latent offset nodes. The offsets wrap around, so these can be used in conjunction with the Seamless node to progressively generate centered on different parts of the seamless tiling.
This includes 15 Nodes:
- *Adjust Image Hue Plus* - Rotate the hue of an image in one of several different color spaces.
- *Blend Latents/Noise (Masked)* - Use a mask to blend part of one latents tensor [including Noise outputs] into another. Can be used to "renoise" sections during a multi-stage [masked] denoising process.
- *Enhance Image* - Boost or reduce color saturation, contrast, brightness, sharpness, or invert colors of any image at any stage with this simple wrapper for pillow [PIL]'s ImageEnhance module.
- *Equivalent Achromatic Lightness* - Calculates image lightness accounting for Helmholtz-Kohlrausch effect based on a method described by High, Green, and Nussbaum (2023).
- *Text to Mask (Clipseg)* - Input a prompt and an image to generate a mask representing areas of the image matched by the prompt.
- *Text to Mask Advanced (Clipseg)* - Output up to four prompt masks combined with logical "and", logical "or", or as separate channels of an RGBA image.
- *Image Layer Blend* - Perform a layered blend of two images using alpha compositing. Opacity of top layer is selectable, with optional mask and several different blend modes/color spaces.
- *Image Compositor* - Take a subject from an image with a flat backdrop and layer it on another image using a chroma key or flood select background removal.
- *Image Dilate or Erode* - Dilate or expand a mask (or any image!). This is equivalent to an expand/contract operation.
- *Image Value Thresholds* - Clip an image to pure black/white beyond specified thresholds.
- *Offset Latents* - Offset a latents tensor in the vertical and/or horizontal dimensions, wrapping it around.
- *Offset Image* - Offset an image in the vertical and/or horizontal dimensions, wrapping it around.
- *Rotate/Flip Image* - Rotate an image in degrees clockwise/counterclockwise about its center, optionally resizing the image boundaries to fit, or flipping it about the vertical and/or horizontal axes.
- *Shadows/Highlights/Midtones* - Extract three masks (with adjustable hard or soft thresholds) representing shadows, midtones, and highlights regions of an image.
- *Text Mask (simple 2D)* - create and position a white on black (or black on white) line of text using any font locally available to Invoke.
**Description:** This InvokeAI node takes in a collection of images and randomly chooses one. This can be useful when you have a number of poses to choose from for a ControlNet node, or a number of input images for another purpose.
**Description:** This node uses a small (~2.4mb) model to upscale the latents used in a Stable Diffusion 1.5 or Stable Diffusion XL image generation, rather than the typical interpolation method, avoiding the traditional downsides of the latent upscale technique.
**Description:** This is a video frame image provider + indexer/video creation nodes for hooking up to iterators and ranges and ControlNets and such forinvokeAInode experimentation. Think animation + ControlNet outputs.
**Description:** This is a video frame image provider + indexer/video creation nodes for hooking up to iterators and ranges and ControlNets and such forinvokeAInode experimentation. Think animation + ControlNet outputs.
**Description:** An InvokeAI node to match a histogram from one image to another. This is a bit like the `color correct` node in the main InvokeAI but this works in the YCbCr colourspace and can handle images of different sizes. Also does not require a mask input.
- Option to only transfer luminance channel.
- Option to save output as grayscale
A good use case for this node is to normalize the colors of an image that has been through the tiled scaling workflow of my XYGrid Nodes.
See full docs here: https://github.com/skunkworxdark/Prompt-tools-nodes/edit/main/README.md
**Description:** Nightmare Prompt Generator - Uses a local text generation model to create unique imaginative (but usually nightmarish) prompts for InvokeAI. By default, it allows you to choose from some gpt-neo models I finetuned on over 2500 of my own InvokeAI prompts in Compel format, but you're able to add your own, as well. Offers support for replacing any troublesome words with a random choice from list you can also define.
"describe a new mystical creature in its natural environment"
@ -99,7 +405,7 @@ Generated Prompt: An enchanted weapon will be usable by any character regardless
"The mystical creature I am describing to you is called the "Glimmerwing". It is a majestic, iridescent being that inhabits the depths of the most enchanted forests and glimmering lakes. Its body is covered in shimmering scales that reflect every color of the rainbow, and it has delicate, translucent wings that sparkle like diamonds in the sunlight. The Glimmerwing's home is a crystal-clear lake, surrounded by towering trees with leaves that shimmer like jewels. In this serene environment, the Glimmerwing spends its days swimming gracefully through the water, chasing schools of glittering fish and playing with the gentle ripples of the lake's surface.
As the sun sets, the Glimmerwing perches on a branch of one of the trees, spreading its wings to catch the last rays of light. The creature's scales glow softly, casting a rainbow of colors across the forest floor. The Glimmerwing sings a haunting melody, its voice echoing through the stillness of the night air. Its song is said to have the power to heal the sick and bring peace to troubled souls. Those who are lucky enough to hear the Glimmerwing's song are forever changed by its beauty and grace."
@ -107,62 +413,87 @@ a Text-Generation-Webui instance (might work remotely too, but I never tried it)
**Note**
This node works best with SDXL models, especially as the style can be described independantly of the LLM's output.
This node works best with SDXL models, especially as the style can be described independently of the LLM's output.
--------------------------------
### Depth Map from Wavefront OBJ
### Prompt Tools
**Description:**Render depth maps from Wavefront .obj files (triangulated) using this simple 3D renderer utilizing numpy and matplotlib to compute and color the scene. There are simple parameters to change the FOV, camera position, and model orientation.
**Description:**A set of InvokeAI nodes that add general prompt (string) manipulation tools. Designed to accompany the `Prompts From File` node and other prompt generation nodes.
To be imported, an .obj must use triangulated meshes, so make sure to enable that option if exporting from a 3D modeling program. This renderer makes each triangle a solid color based on its average depth, so it will cause anomalies if your .obj has large triangles. In Blender, the Remesh modifier can be helpful to subdivide a mesh into small pieces that work well given these limitations.
1.`Prompt To File` - saves a prompt or collection of prompts to a file. one per line. There is an append/overwrite option.
2.`PTFields Collect` - Converts image generation fields into a Json format string that can be passed to Prompt to file.
3.`PTFields Expand` - Takes Json string and converts it to individual generation parameters. This can be fed from the Prompts to file node.
4.`Prompt Strength` - Formats prompt with strength like the weighted format of compel
5.`Prompt Strength Combine` - Combines weighted prompts for .and()/.blend()
6.`CSV To Index String` - Gets a string from a CSV by index. Includes a Random index option
**Description:**Boost or reduce color saturation, contrast, brightness, sharpness, or invert colors of any image at any stage with this simple wrapper for pillow [PIL]'s ImageEnhance module.
**Description:**This is a pack of nodes to interoperate with other services, be they public websites or bespoke local servers. The pack consists of these nodes:
Color inversion is toggled with a simple switch, while each of the four enhancer modes are activated by entering a value other than 1 in each corresponding input field. Values less than 1 will reduce the corresponding property, while values greater than 1 will enhance it.
- *Load Remote Image* - Lets you load remote images such as a realtime webcam image, an image of the day, or dynamically created images.
- *Post Image to Remote Server* - Lets you upload an image to a remote server using an HTTP POST request, eg for storage, display or further processing.
**Description:** This set of 3 nodes generates prompts from simple user-defined grammar rules (loaded from custom files - examples provided below). The prompts are made by recursively expanding a special template string, replacing nonterminal "parts-of-speech" until no more nonterminal terms remain in the string.
### BriaAI Remove Background
This includes 3 Nodes:
- *Lookup Table from File* - loads a YAML file "prompt" section (or of a whole folder of YAML's) into a JSON-ified dictionary (Lookups output)
- *Lookups Entry from Prompt* - places a single entry in a new Lookups output under the specified heading
- *Prompt from Lookup Table* - uses a Collection of Lookups as grammar rules from which to randomly generate prompts.
**Description**: Implements one click background removal with BriaAI's new version 1.4 model which seems to be be producing better results than any other previous background removal tool.
**Description:** This is a pack of nodes for composing masks and images, including a simple text mask creator and both image and latent offset nodes. The offsets wrap around, so these can be used in conjunction with the Seamless node to progressively generate centered on different parts of the seamless tiling.
Description: An integration of the rembg package to remove backgrounds from images using multiple U2NET models.
This includes 4 Nodes:
- *Text Mask (simple 2D)* - create and position a white on black (or black on white) line of text using any font locally available to Invoke.
- *Image Compositor* - Take a subject from an image with a flat backdrop and layer it on another image using a chroma key or flood select background removal.
- *Offset Latents* - Offset a latents tensor in the vertical and/or horizontal dimensions, wrapping it around.
- *Offset Image* - Offset an image in the vertical and/or horizontal dimensions, wrapping it around.
**Description:** Retroize is a collection of nodes for InvokeAI to "Retroize" images. Any image can be given a fresh coat of retro paint with these nodes, either from your gallery or from within the graph itself. It includes nodes to pixelize, quantize, palettize, and ditherize images; as well as to retrieve palettes from existing images.
**Description:** text font to text image node for InvokeAI, download a font to use (or if in font cache uses it from there), the text is always resized to the image size, but can control that with padding, optional 2nd line
@ -186,27 +516,83 @@ A third node is included, *Random Switch (Integers)*, which is just a generic ve
**Description:** This node generates masks for highlights, midtones, and shadows given an input image. You can optionally specify a blur for the lookup table used in making those masks from the source image.
@ -4,10 +4,10 @@ To learn about the specifics of creating a new node, please visit our [Node crea
Once you’ve created a node and confirmed that it behaves as expected locally, follow these steps:
- Make sure the node is contained in a new Python (.py) file
- Submit a pull request with a link to your node in GitHub against the `nodes` branch to add the node to the [Community Nodes](CommunityNodes) list
- Make sure you are following the template below and have provided all relevant details about the node and what it does.
- A maintainer will review the pull request and node. If the node is aligned with the direction of the project, you might be asked for permission to include it in the core project.
- Make sure the node is contained in a new Python (.py) file. Preferably, the node is in a repo with a README detailing the nodes usage & examples to help others more easily use your node. Including the tag "invokeai-node" in your repository's README can also help other users find it more easily.
- Submit a pull request with a link to your node(s) repo in GitHub against the `main` branch to add the node to the [Community Nodes](communityNodes.md) list
- Make sure you are following the template below and have provided all relevant details about the node and what it does. Example output images and workflows are very helpful for other users looking to use your node.
- A maintainer will review the pull request and node. If the node is aligned with the direction of the project, you may be asked for permission to include it in the core project.
### Community Node Template
Some files were not shown because too many files have changed in this diff
Show More
Reference in New Issue
Block a user
Blocking a user prevents them from interacting with repositories, such as opening or commenting on pull requests or issues. Learn more about blocking a user.